Configuring Okta
Follow the steps described here to configure Fides and Okta for login. This will need to be completed in collaboration with the team that manages Okta at your organization.
Step by step instructions for configuring Okta
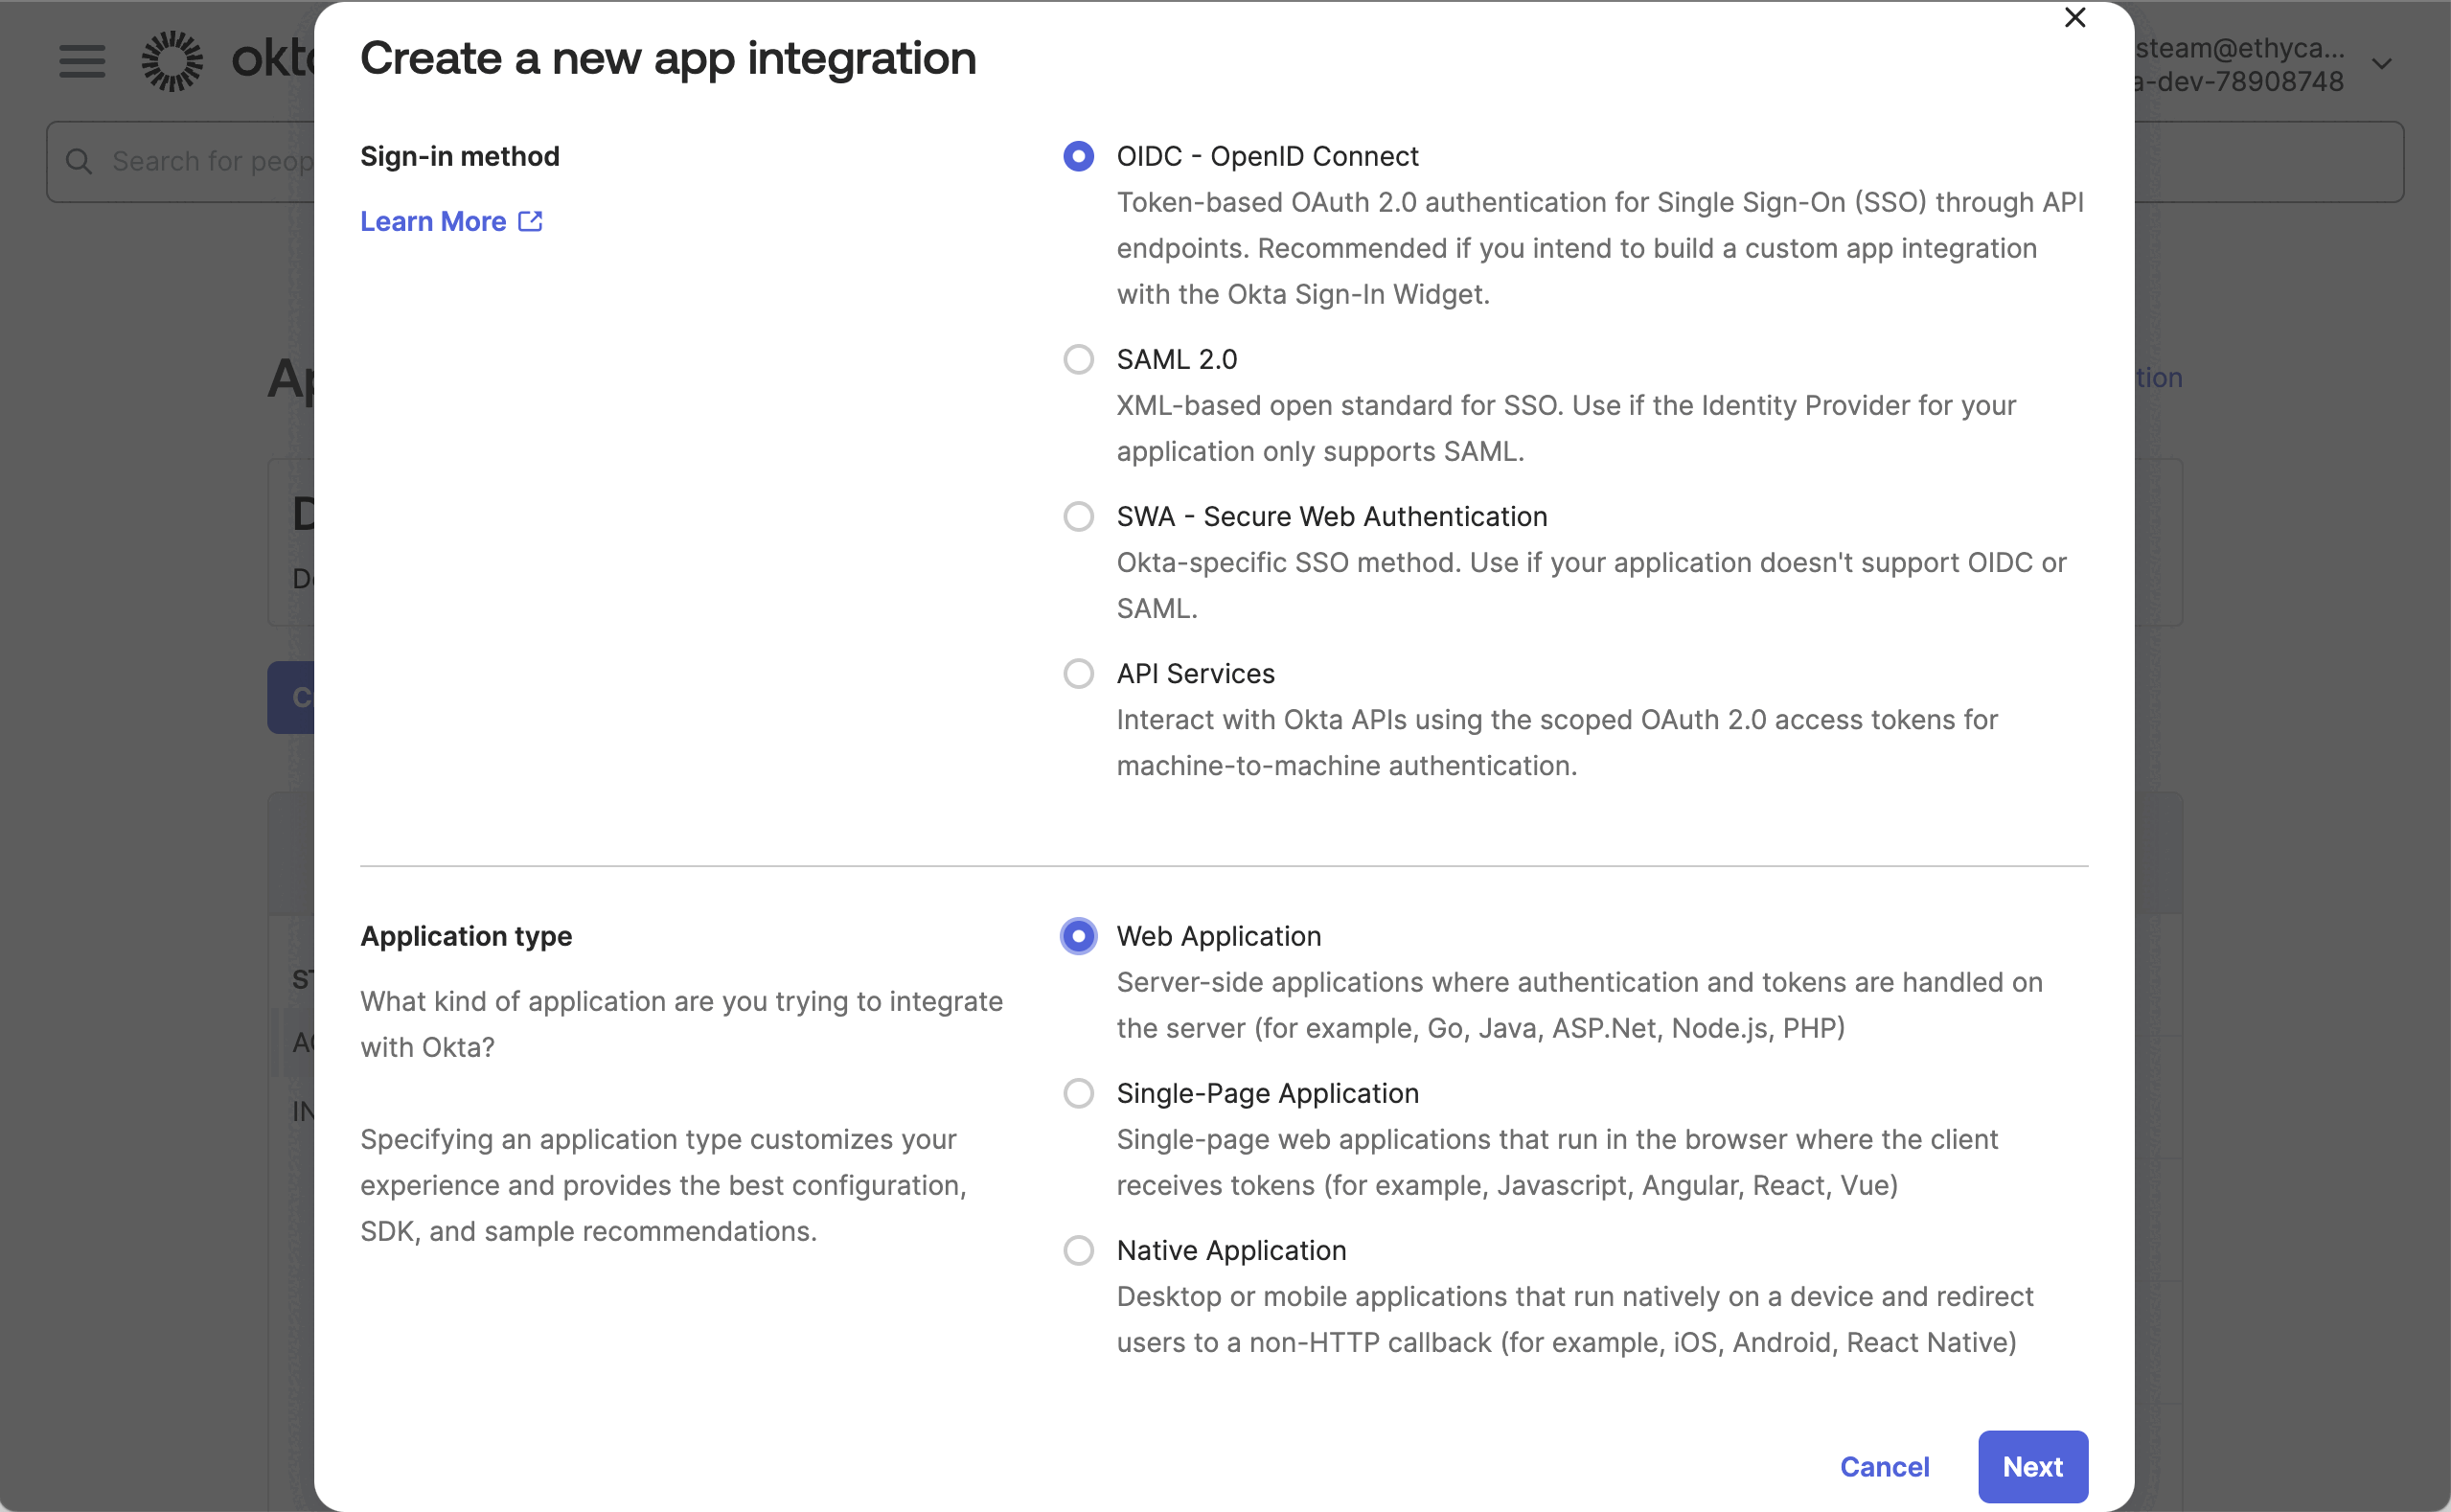
- Add a new App Integration to Okta for your Fides environments. Depending on how many environments of Fides you have, you may need to create multiple integrations. Choose "OIDC" as the Sign-in method and "Web Application" as the Application type.

- Give the new integration a name so that you'll know what to refer back to to make future changes.
- Complete any additional Okta settings that are typical when adding new integrations to your organization.
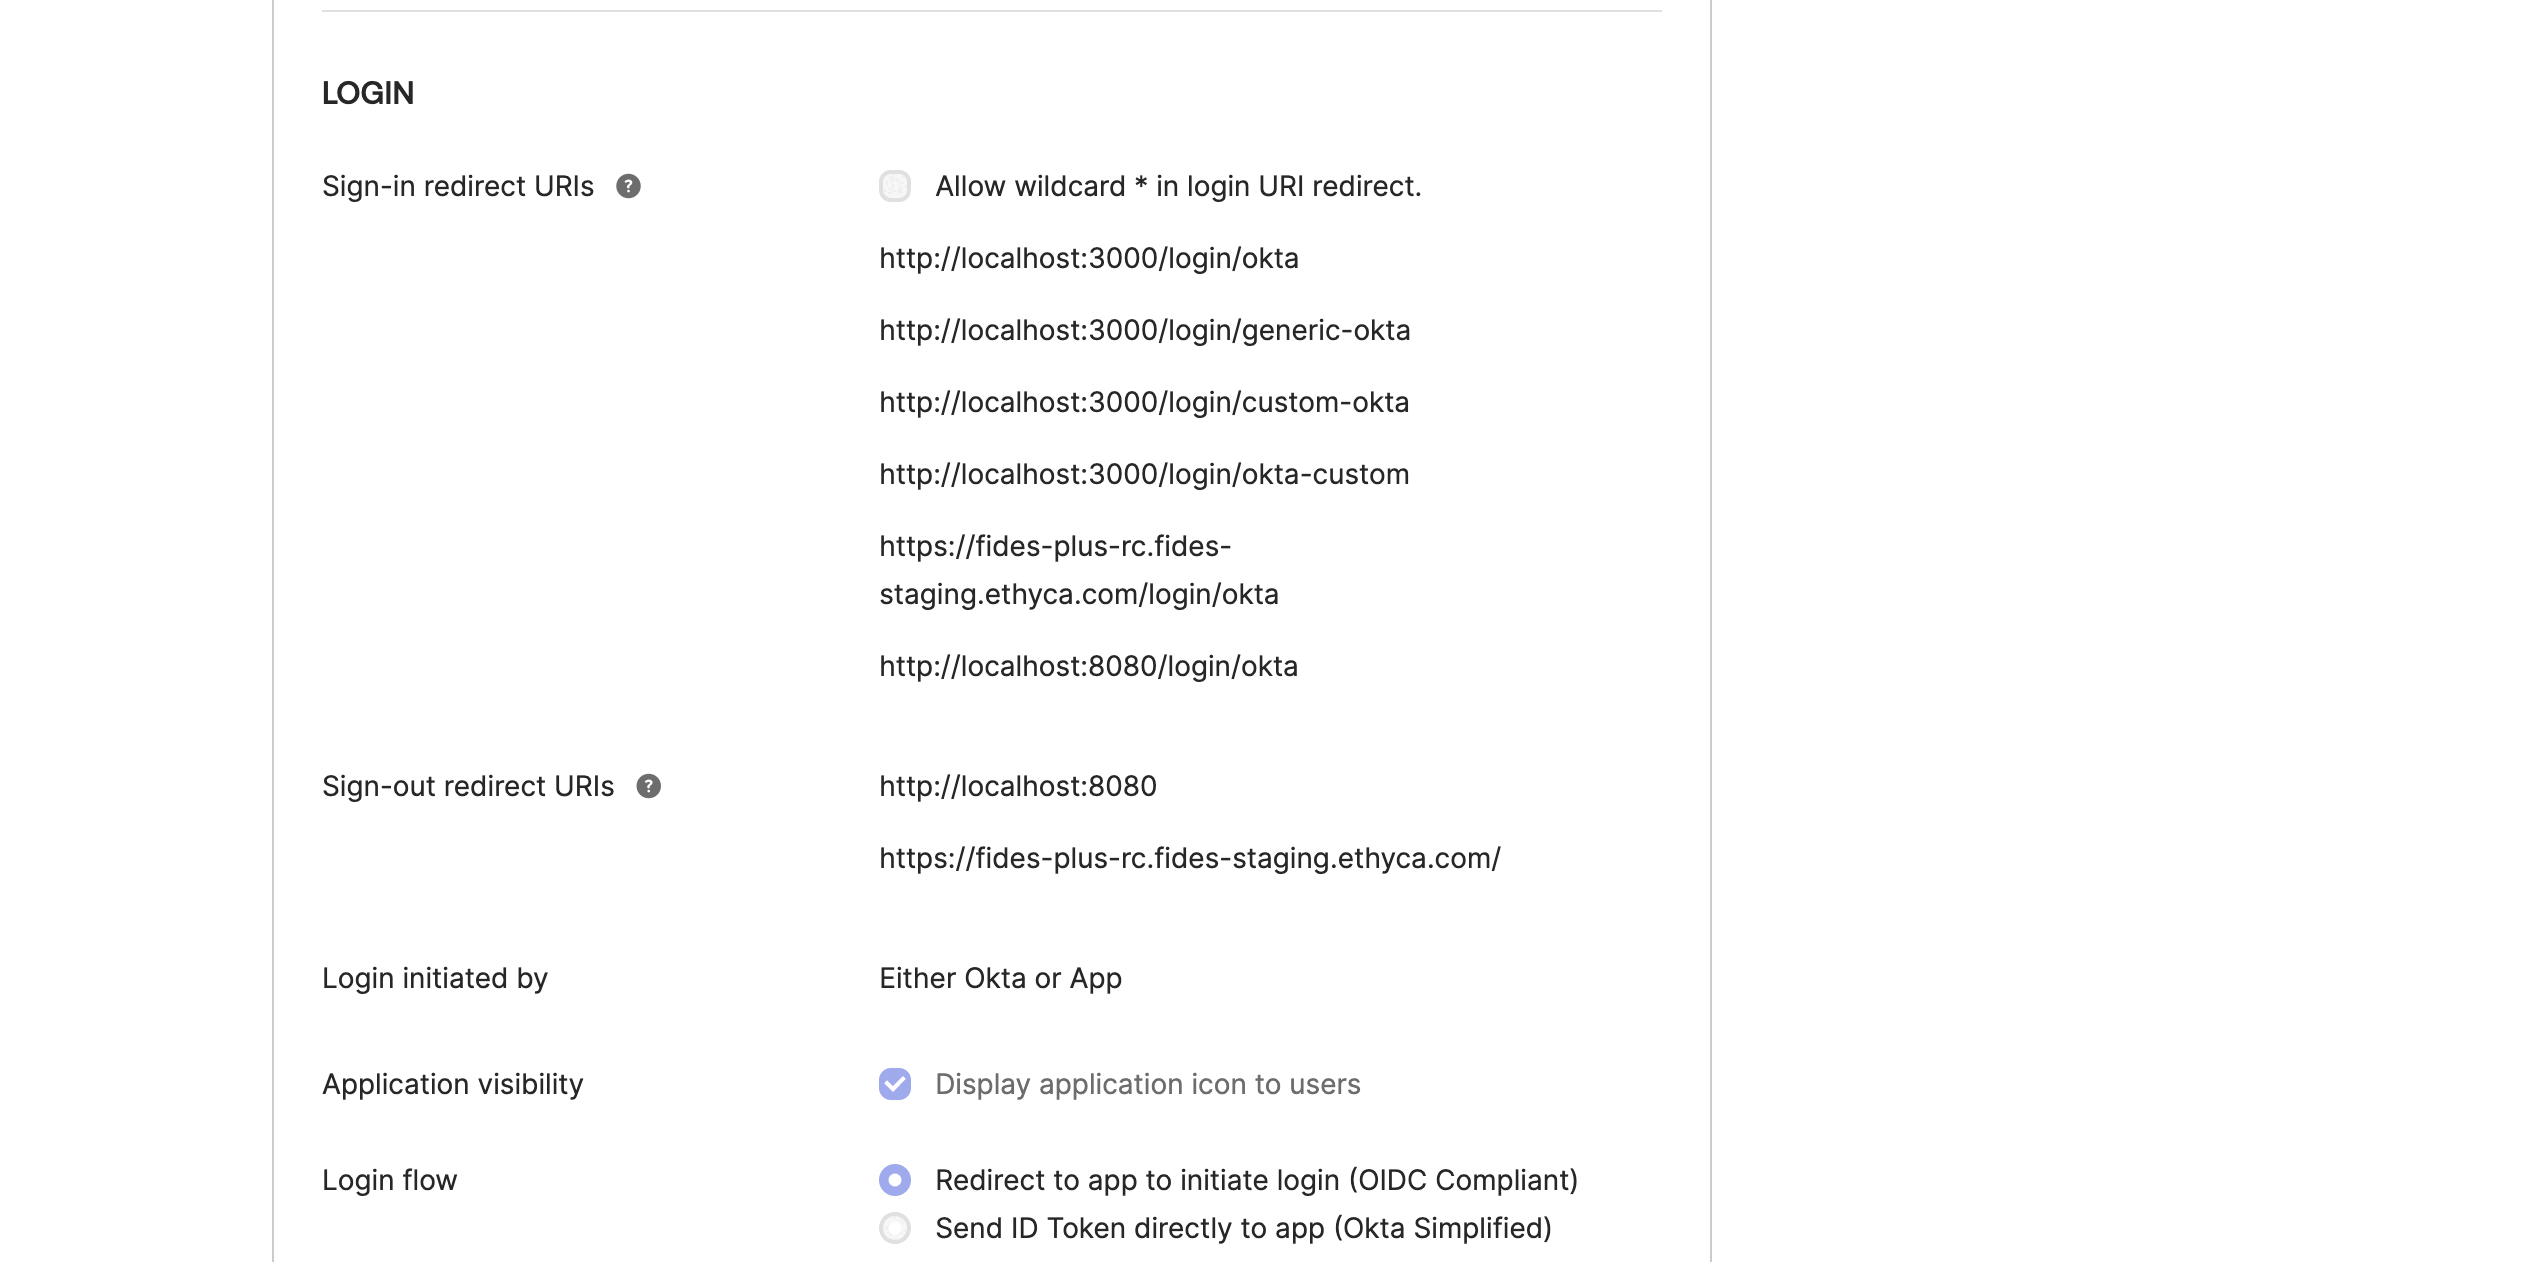
- Add your redirect URLs to the App Integration General Settings section as follows:
- The Sign-in redirect URI should be:
https://<yourfidesdomain.com>/login/okta. - The Sign-out redirect URI should be:
https://<yourfidesdomain.com>of another standard logout URL for your organization. - Set the login flow to "Redirect to app to initiate login (OIDC Compliant)"

- Return to Fides to configure the integration and go to the "Settings > Organization" screen.
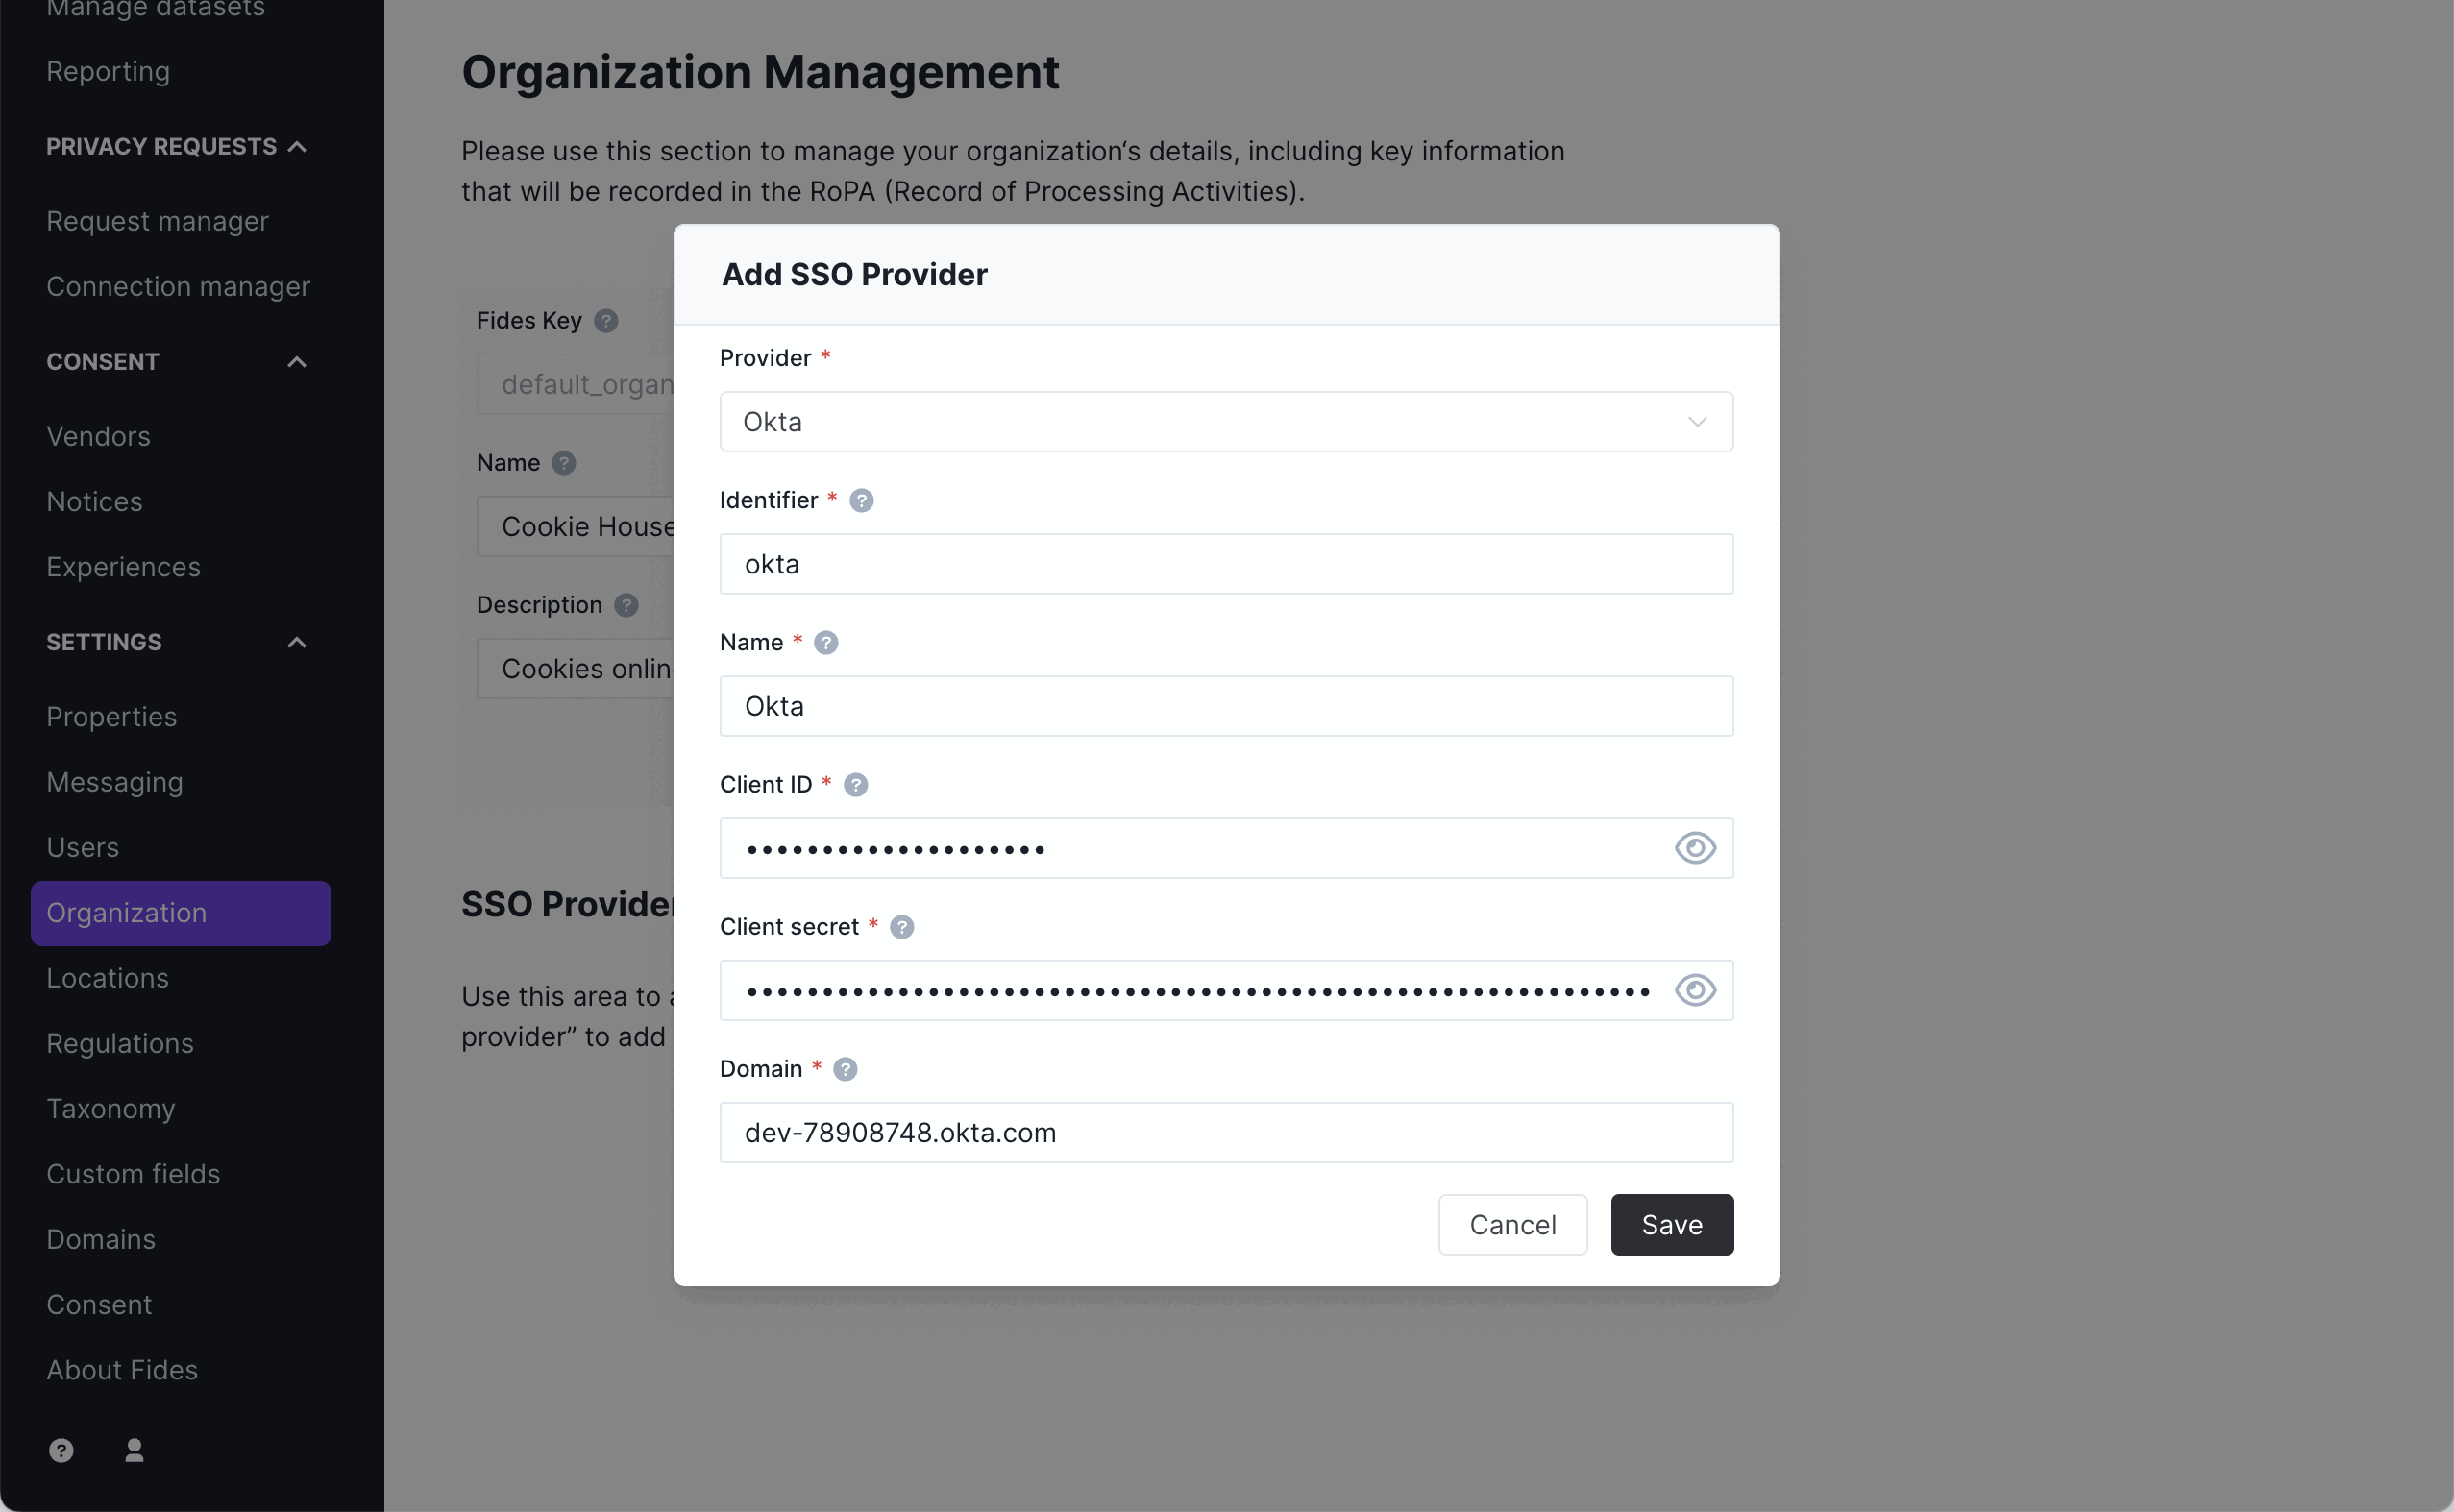
- Click on "Add SSO Provider"
- Fill in the fields using the information from the Okta App Intgration.
- Select Okta from the Provider list.
- Fill in the identifier with the value from Step 4. This is the end of the URL path you put in the "Sign-in redirect URI" field. In this case "okta". This field is case sensitive so double check everything before saving.
- Name the integration. This will show on the Fides login screen to your users when this method is fully configured.
- Copy the Client ID and Client secret from Okta and paste them in the fields.
- Copy the domain from the Okta Admin UI.
- Click "Save".

You now have Okta configured! Add some users so that you can test the integration.
Adding users
In this version of OIDC support, you must still add users from the Fides admin UI. When adding a user who will sign in via Okta, set both their username and email as the email address that is provided by Okta. Once you have created users, assign them the appropriate role and they will be able to login via Okta, provided they have the appropriate permissions/groups in Okta.