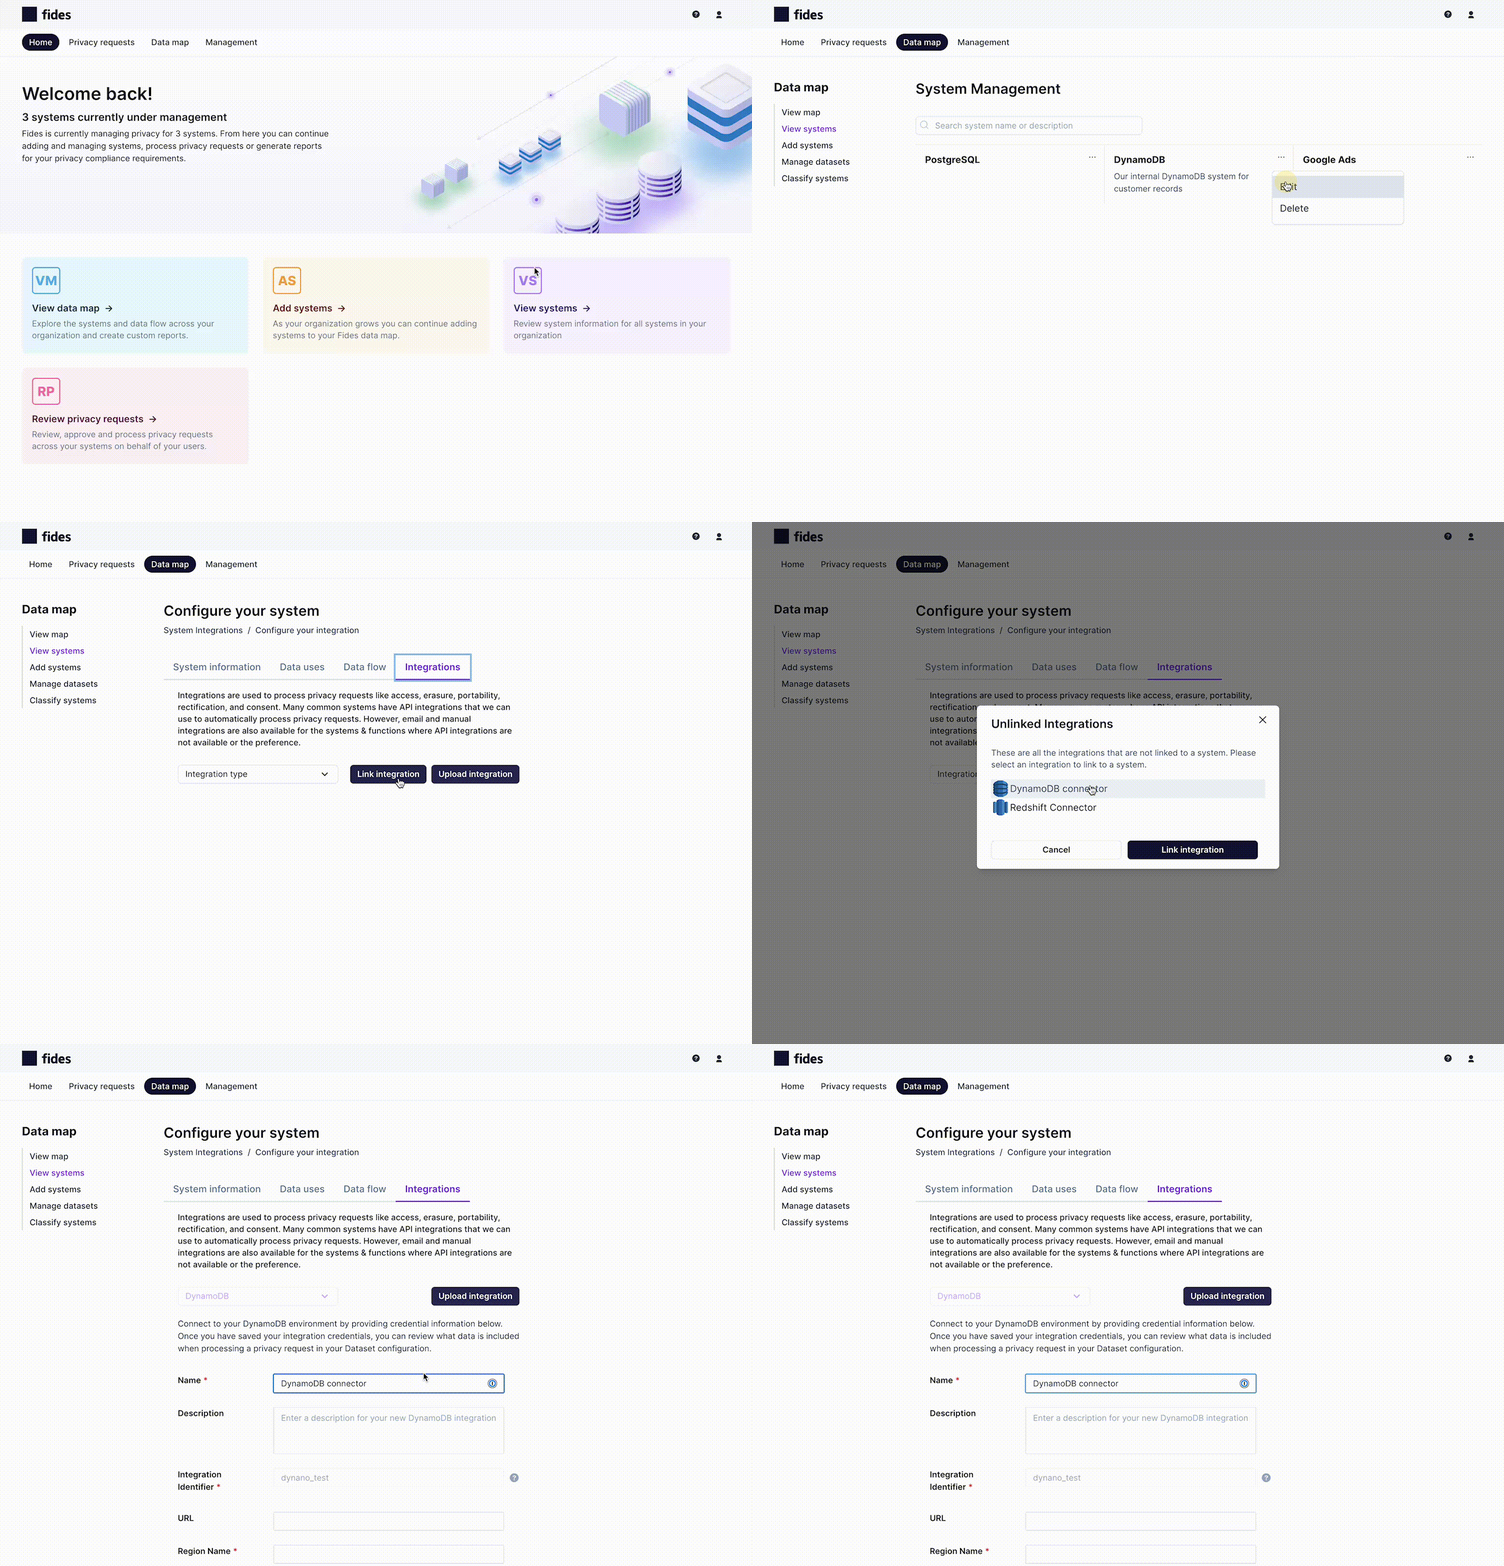
Managing integrations
Introduction
In this guide, you'll learn how to:
- Integrate with existing systems
- Enable or disable an integration
- Delete an integration
- Upload a custom connector template
To learn more about Integrations and to see which vendors we currently support, please see the Overview.
Integrate with existing systems
To integrate with a system that's already in your data map:
1. Collect the information that you will need to connect to the system
For each vendor, you'll need to provide unique connection credentials. Our vendor guides, outline the information you need to collect, making it easier to gather the required credentials and set up the connections:
2. Configure the connection information and test the integration
- Navigate to Data inventory → System inventory and choose the system that you want to integrate with.
- Click on the Integrations tab.
- Select the appropriate vendor from the Integration type drop-down menu.
- Enter the information collected in Step 3 and click Save.
- Pick which privacy request types should be supported for this integration (ex. Access)
- Test the integration using the Test connection button, if desired.

3. Configure the dataset
If you are connecting to a database, you will need to create a dataset in order to process Data Subject Requests (DSRs). For detailed steps, please see our guide for Linking datasets.
Enable or disable an integration
- Navigate to the system: Data inventory → System inventory and choose the system that you want to delete the integration from.
- Click on the Integrations tab.
- Click on the Enable Integration toggle.

Delete an integration
To delete an integration:
- Navigate to the system: Data inventory → System inventory and choose the system that you want to delete the integration from.
- Click on the Integrations tab.
- Scroll to the bottom of the form and click Delete.

Upload a custom template
To add a new custom integration:
- Navigate to the system: Data inventory → System inventory and choose the system that you want to integrate with.
- Click on the Integrations tab.
- Click on the Upload connector button.
- Upload the custom template, in the form of a Zip file, using the resulting modal.

To create a custom template follow this guide.
Migrate from the Connection manager
Fides recently moved from supporting standalone connectors to System-based Integrations. To ease the migration to the new system, the Connection manager UI will remain accessible as long as there are unlinked connectors available.
To link a connector to a system:
- Navigate to Data inventory → System inventory and choose the system that you want to link a connector to.
- Click on the Integrations tab.
- Click Link connector.
- Select the connection from the list of unlinked connections.
- Click Link connector
- Click Save

This connector will no longer appear in the Connection manager UI.