Configuring Datasets
Introduction
This guide walks you through the process of editing and testing datasets in Fides. Datasets are the foundation of your privacy request system, defining the structure and relationships of your data. You'll learn how to edit, validate, and connect datasets to ensure they accurately represent your data model and support your privacy operations.
Prerequisites
Before you begin, ensure you have:
- A Fides Cloud or Fides Enterprise account
- The role of Owner or Contributor for your Fides organization.
- Basic understanding of your data model and relationships
- Familiarity with the Fides Admin UI or CLI
- Completed the initial dataset creation process. This could be through the Detection & Discovery process or by manually creating datasets.
Birds-eye View
In the process of editing and validating datasets, you will typically follow these steps:
-
Edit your Dataset:
- Use the CLI or Admin UI to make changes to your dataset
-
Link to Integration:
- Connect your modified dataset to your integration
- Important: Keep the integration inactive during this phase
-
Test Datasets:
- Test your dataset configuration by submitting test privacy requests
- Ensure all data categories are properly mapped
- Verify the dataset structure matches your requirements
-
Enable Integration:
- Once validation is complete and you're confident in your setup, activate the integration to begin processing data
Editing Datasets
There are two main approaches to editing your datasets:
- Use the Fides CLI (Command Line Interface)
- Use the Fides Admin UI (User Interface)
Using the CLI
The Fides CLI provides a convenient way to manage your datasets through the command line. Here are the key commands for managing your datasets:
Pulling Datasets
To download your existing datasets:
# Pull all datasets into separate files
fides pull dataset --all-resources --separate-files

# Pull a specific dataset by Fides key
fides pull dataset --fides-key your_dataset_key

# Pull all datasets into a single file (legacy method)
fides pull dataset --all-resources
Pushing Datasets
After making your changes in a code editor, you can push the updated datasets back:
# Push all datasets from a directory
fides push dataset --directory ./path/to/datasets
Using the UI
The Fides Admin UI offers a user-friendly interface for managing your datasets, including validation and testing.
You have 2 options for editing your datasets:
- Table View: Access the dataset editor through the table view interface for straightforward modifications to data categories.
- YAML View: Use the YAML view in the dataset tester to make more complex changes.
Let's dive in.
Table View
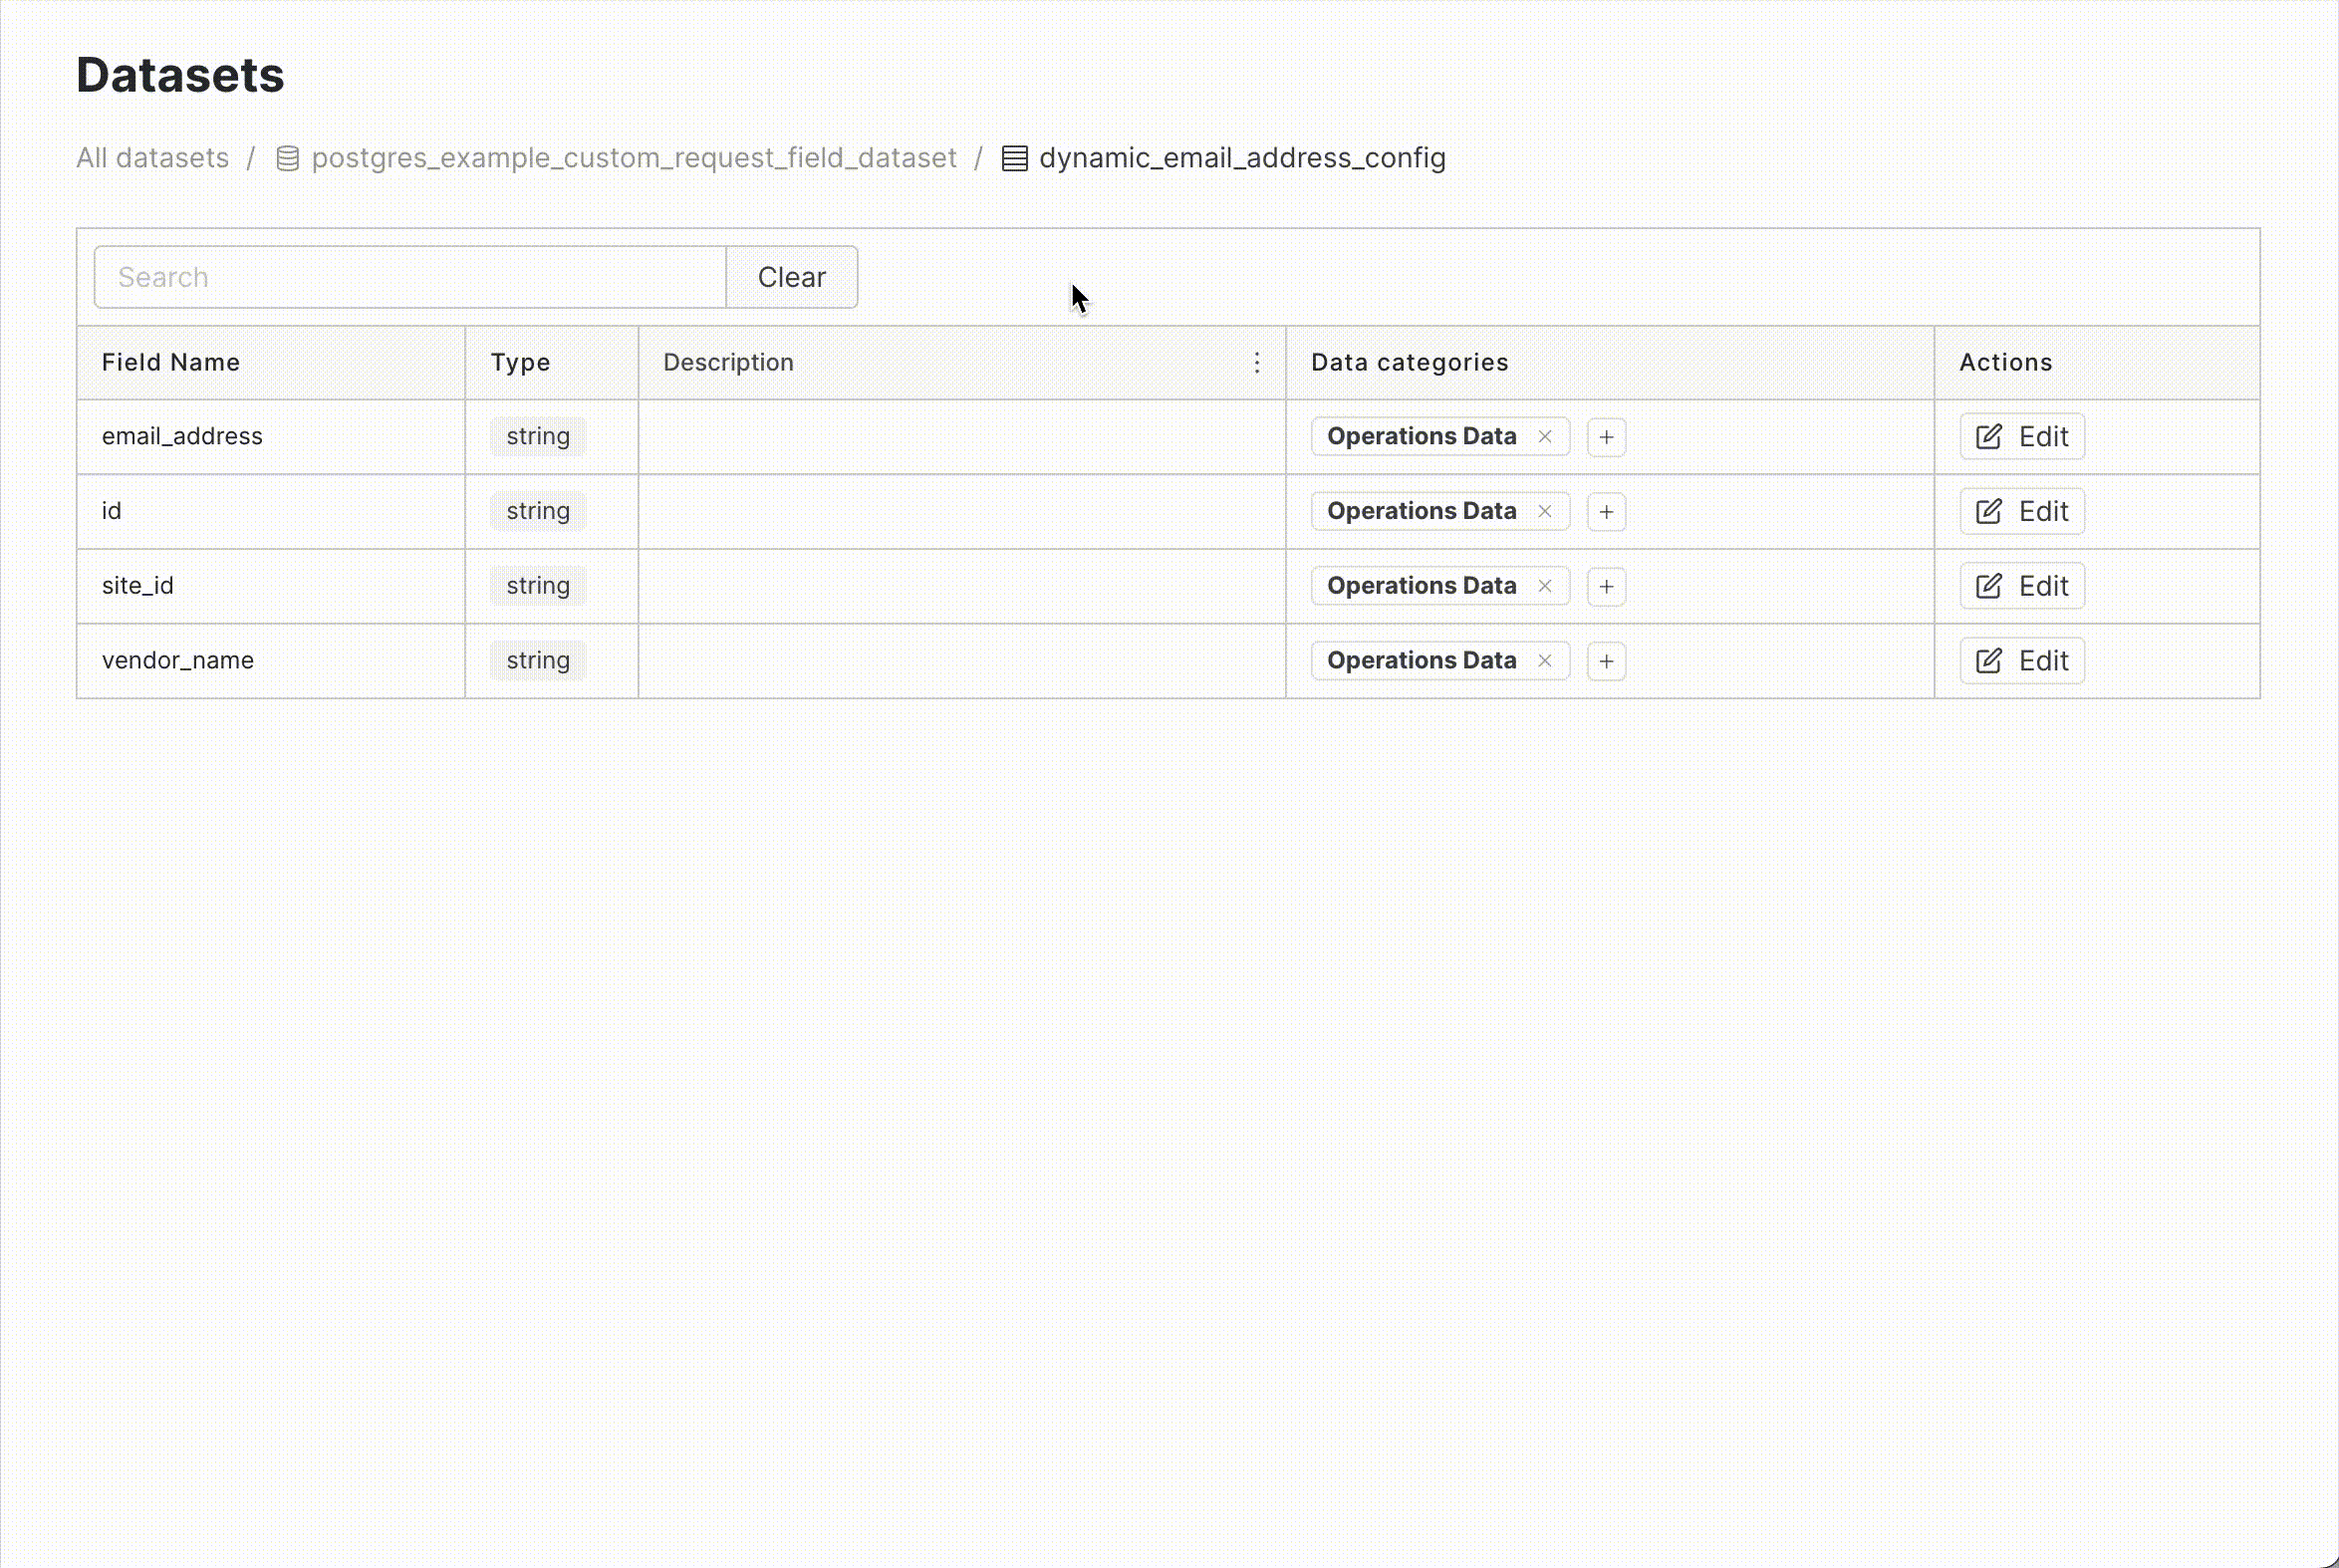
If you only need to update the data categories assigned to various fields on a dataset, you can do so directly in the Manage Datasets section of Admin-UI.
YAML View
If you need to edit more than the data categories, we recommend you use the YAML view through the System Inventory section in the Admin-UI.
Skip ahead to the Link to Integrations and Dataset Testing section.
Modifying Data Categories
Regardless of which method you choose (CLI or UI), when you need to modify the data categories themselves, you should do the following:
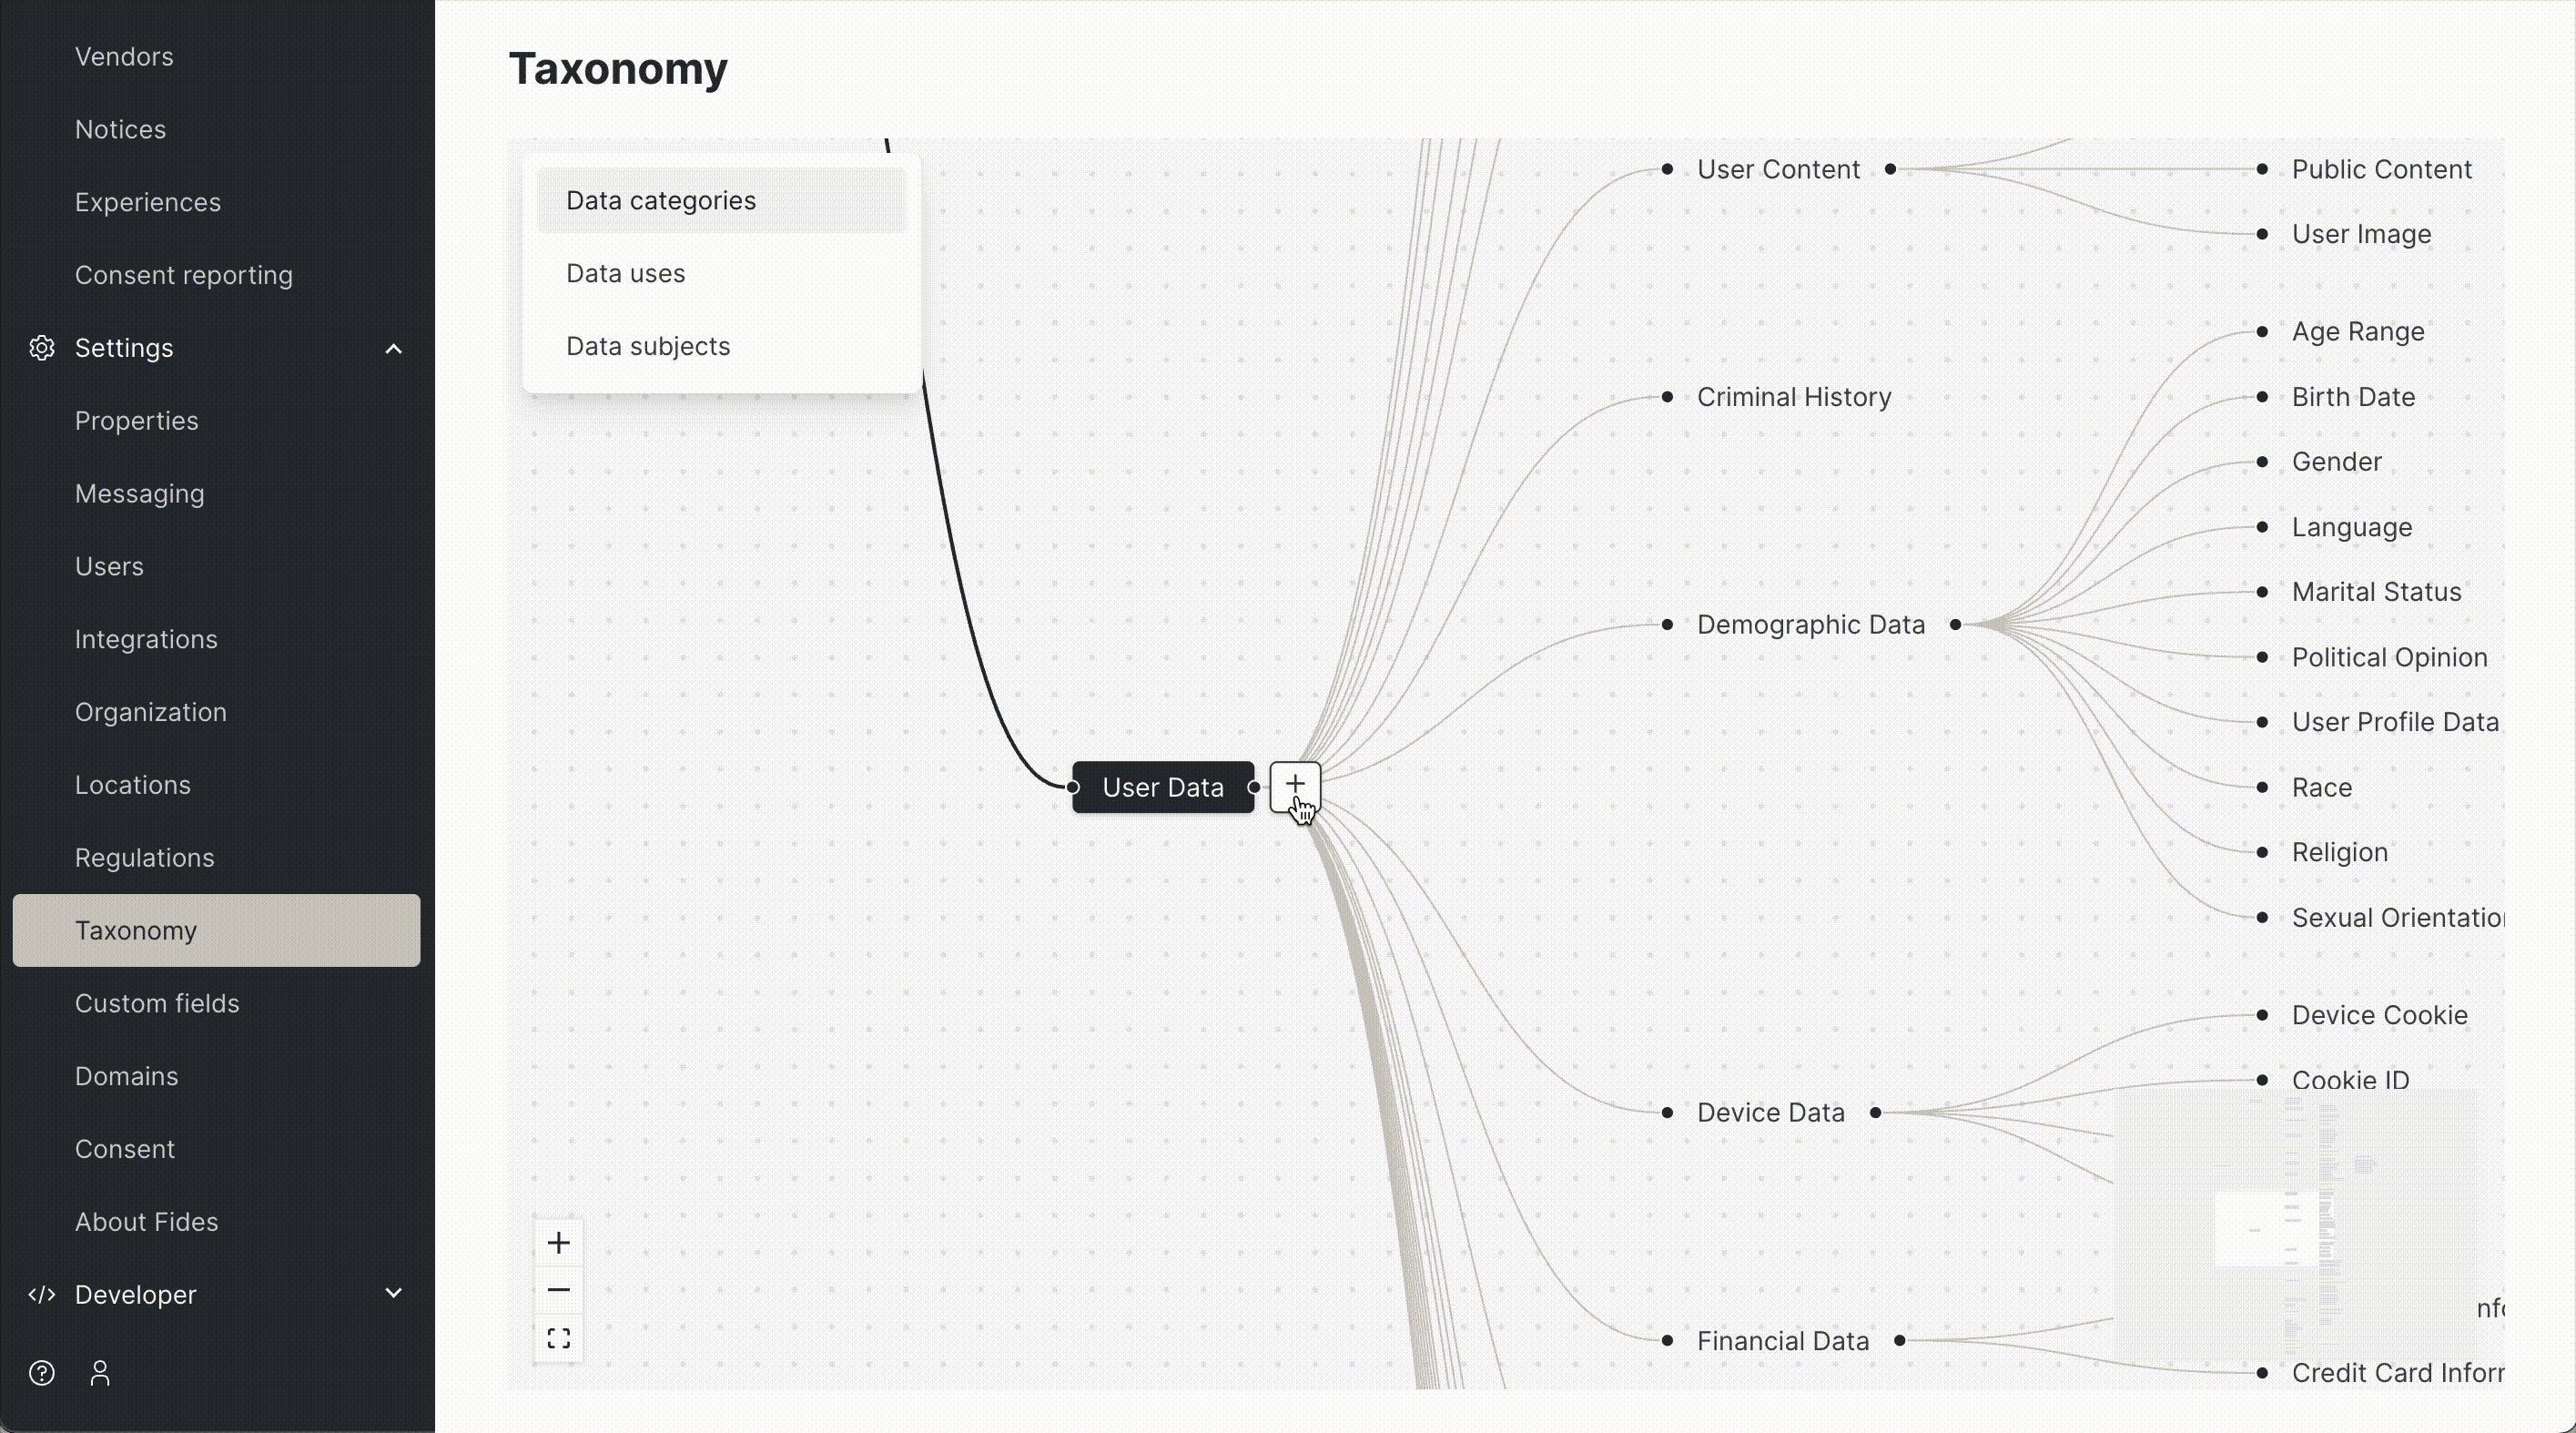
- Navigate to the Taxonomy section in the Admin interface.
- Make your desired category modifications.
- Save your changes.
- Those updates will now be available for your datasets to use.
Link to Integrations and Dataset Testing
We recommend validating your datasets to ensure they are correctly configured. The Fides Admin UI provides a dataset tester within the System Inventory section that allows you to update, test, and validate your datasets.
Watch the following video to see how to validate your dataset. The steps are as follows:
- Navigate to the System Inventory section in Admin-UI.
- Click on the system associated with your dataset.
- Navigate to the Integrations tab.
- If your integration is not already linked to an system, click the Link Integration button and select your integration. Hit Save.
- The Enable integration toggle should be set to off (
Inactive) during this phase. - At the bottom of the Integration form, click the Test Datasets button.
- Here you can see the current dataset YAML configuration alongside the testing UI. If you need to make some changes to your dataset, you can do so in this YAML view.
- Click the Test button to validate your dataset against a given policy and test input data.
- Review the test results and make any necessary adjustments to your dataset configuration.
- Click Save to both validate and save your dataset.
Activate Integration
Once you have validated your dataset and are confident in its configuration, you can activate the integration. This will allow the integration to start processing data according to the rules defined in your dataset.
- Navigate to the System Inventory section in Admin-UI.
- Click on the system associated with your dataset.
- Navigate to the Integrations tab.
- Toggle the Enable integration switch to on (
Active).
Important: Keep the integration inactive until you've completed validation and are confident in your dataset configuration.
For more detailed information on working with datasets, review the dataset pages in our developer documentation.