Consent Management: Configuring the Privacy Center Experience
In this tutorial, we'll configure the privacy center experience.
After reading this, you'll be familiar with the configurable options of the privacy center and how they're presented to your visitors.
Prerequisites
For this tutorial you'll need:
- A Fides Cloud or Fides Enterprise account
- The role of
OwnerorContributorfor your Fides organization. - At least one system with a data use on your Data Map. Read how to add systems to the Data Map now.
- At least one privacy notice configured. Read how to configure privacy notices now.
Configuring the Privacy Center Experience
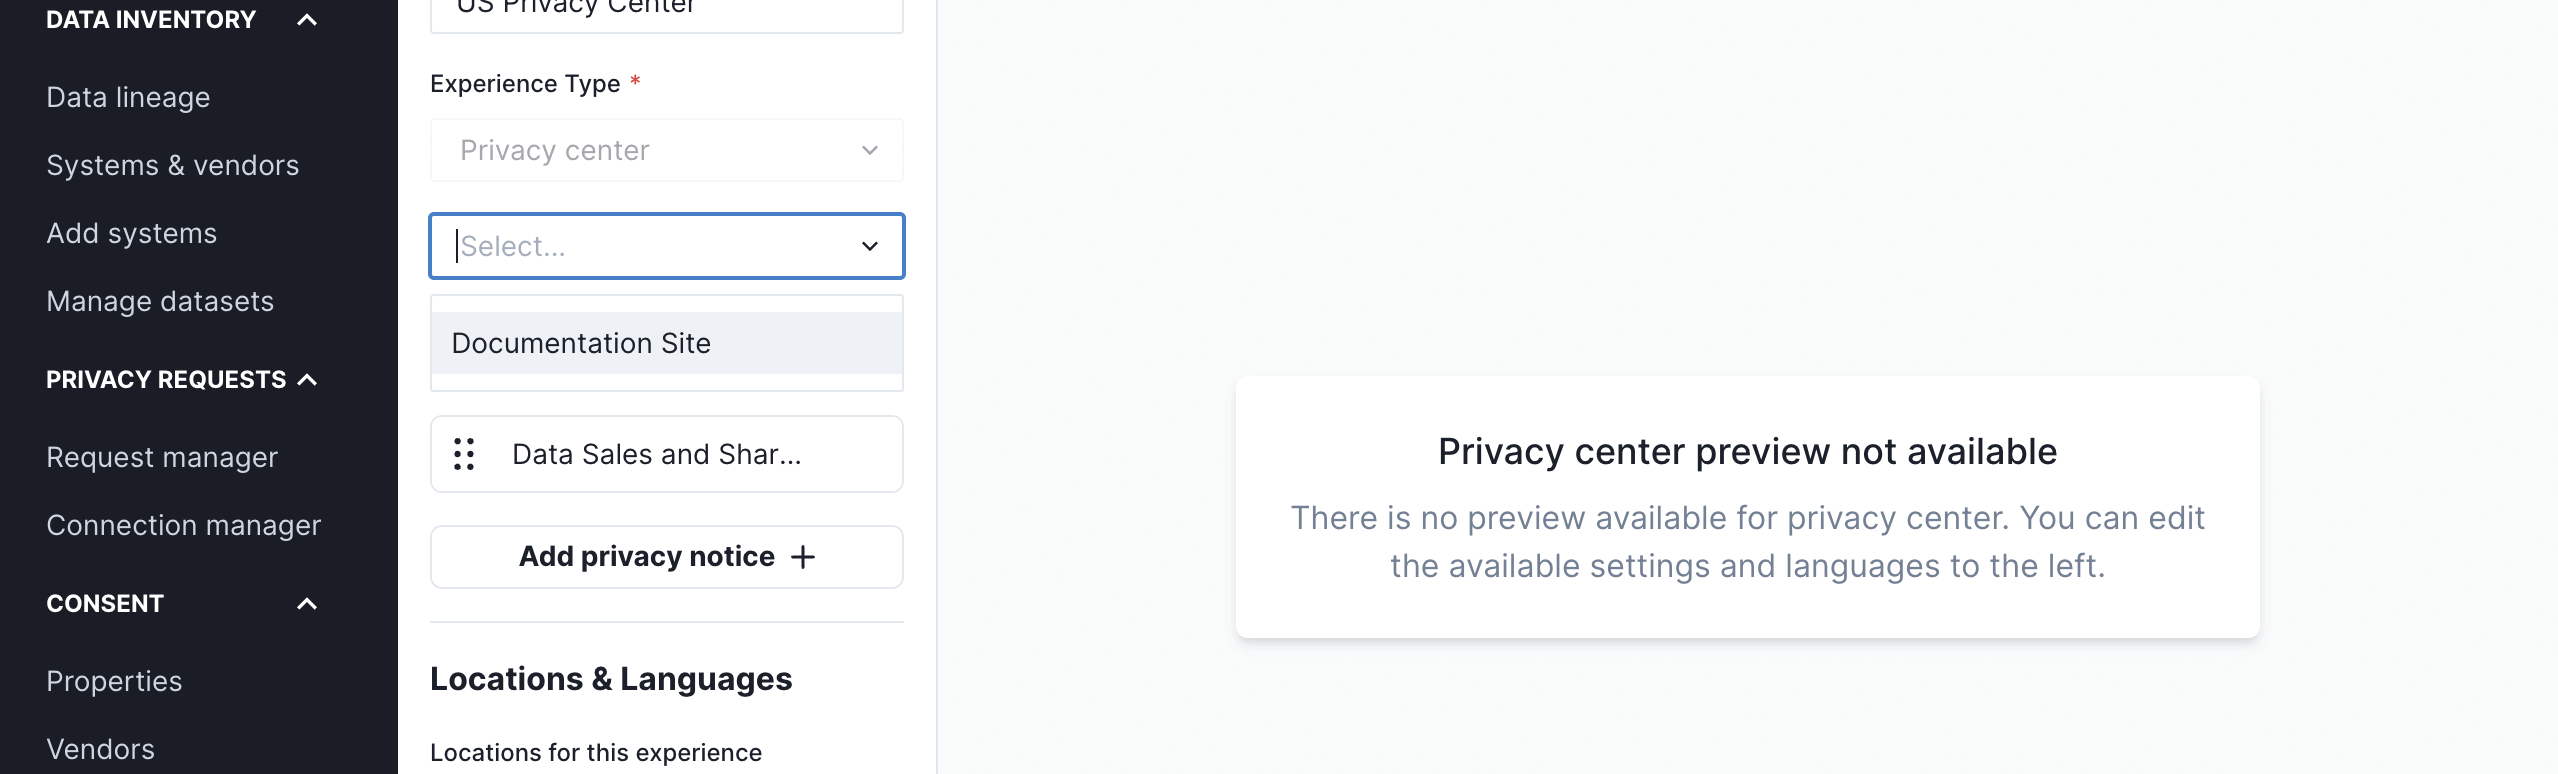
To start, navigate to Consent → Experiences where you'll see a list of currently configured privacy experiences for your Fides account.
Click on any Privacy center component to view the detailed configuration page.
From here, you can set the components of the privacy center experience:
- Experience name, type, dismissable settings:
- Name: name given to the experience so that you can easily identify it.
- Type: experience type assigned when the experience was created. Once created, this cannot be edited.
- Properties: assign the experience to a property you've created.
- Privacy notices: choose one or more privacy notices to display in the privacy experience.
- Locations & Languages: choose the languages the privacy experience will support. Support for languages other than English requires a special Fides license.
Let's review each privacy center experience configuration component:
Experience name, and type
In this first section, you set some basic properties of the experience.
- The name is used to identify the experience after it's created.
- The type is a selection of one of the three configurable experience types: Banner+Modal, Modal, and Privacy Center. Once you select an experience type you cannot change it.
Properties
You can assign experiences to properties in this section. If you've created any properties they will be listed as options. You can assign an experience to a property, provided that there isn't another experience of the same type assigned to an overlapping location in that property.
Privacy Notices
In Fides, you assign privacy notices to privacy experiences, which is how a notice is shown to users in a specific location. Fides provides privacy experiences with privacy notices pre-configured, and you can edit these assignments at any time. When you add or remove a notice, the preview will update so that you can preview what will be shown to users.
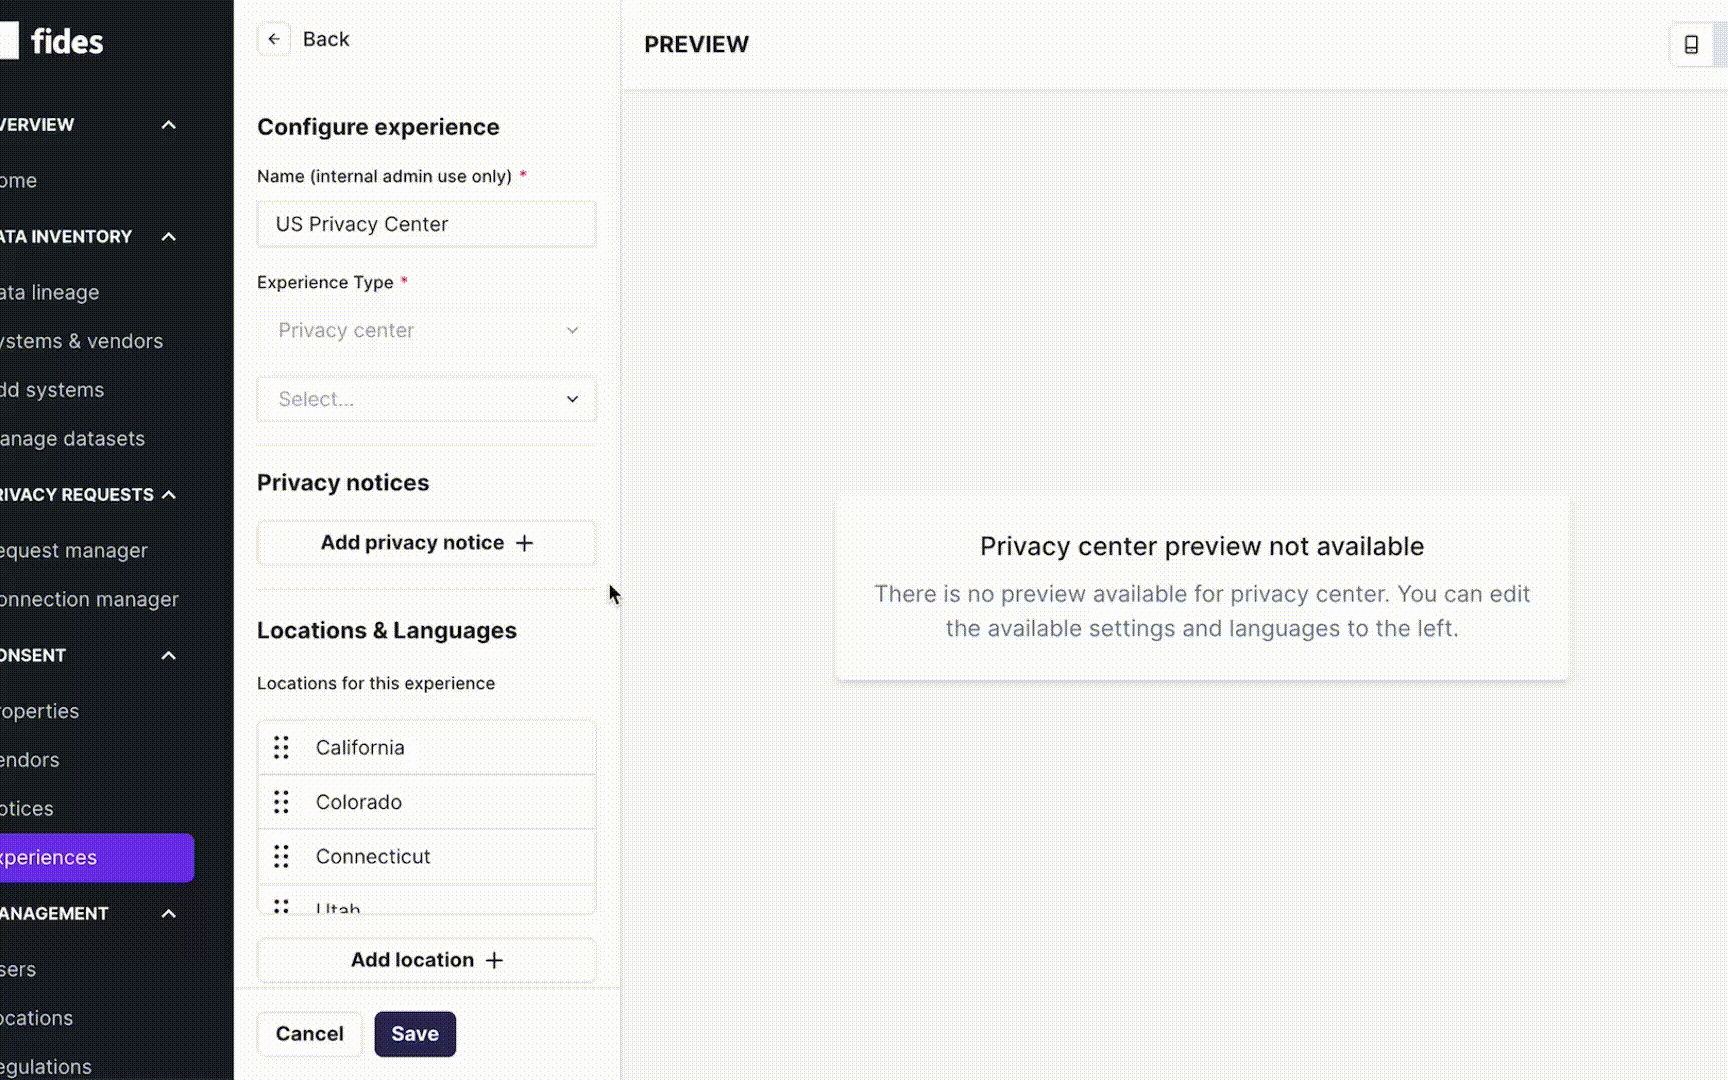
Locations and languages
Each privacy experience allows you to provide custom copy for all titles, descriptions, links, and buttons that are part of the experience. While you are editing the Banner+Modal and Modal experiences, Fides provides a live preview of the text changes so that you can see what will appear on your experience before you publish the changes to your site.
As shown in the GIF below, you can configure:
- Title: the title of the privacy center consent page displayed to the visitor.
- Description: the detailed text of the privacy center displayed to the visitor.
- "Accept" button label: the label to accept the privacy notice.
- "Reject" button label: the label to reject the privacy notice.
- "Save" button label: the label to save preferences in the pop-up.
- Privacy policy link label: optional label for a link that opens a new page. Often used for a privacy policy.
- Privacy policy link URL: optional URL for a link that opens a new page.
When your Fides license includes multiple languages, you can provide translated text for each of the above options for each supported language.
As of Fides 2.32.0, previews for the privacy center experience are not yet available.