Consent Management: Configuring Google Tag Manager Consent Mode
In this tutorial, we'll configure Google Tag Manager (GTM) to respect the end-user consent choices provided by Fides.js.
Overview
GTM provides a feature called Consent Mode which is a framework that allows Consent Mode aware tags to adjust their behavior based on standardized user consent choices. The consent is gathered via Fides.js and provided to GTM using the Ethyca's Consent Mode Template (opens in a new tab).
For the integration to function correctly, the GTM container and the template need to be configured with:
- A new user-defined data layer variable named
Fidesto allow the template to access the user consent choices. - A new Custom Event trigger that will fire on page events such a
FidesInitialized - A Consent Mode template and its corresponding tag
Prerequisites
For this tutorial you'll need:
- A Fides Cloud or Fides Enterprise account
- The role of
OwnerorContributorfor your Fides organization. - Update and publisher permissions on your GTM account.
- At least one system with a data use on your Data Map. Read how to add systems to the Data Map now.
- At least one privacy notice configured. Read how to configure privacy notices now.
- At least one privacy experience configured. Read how to configure privacy experiences now.
- Installed
Fides.json your web site. Read how to install fides.js now.
Regulation information
When implementing Fides and Google Tag Manager for use in Europe and Germany specifically, seek the advice of your legal counsel on the proper implementation. In response to their advice, you may wish to load the GTM javascript only after consent is obtained from Fides. To accomplish this, ensure that Fides is loaded and initialized before Google Tag Manager. You can read more about this in the Fides.js documentation here.
Once Fides is initialized, you should defer any loading of GTM javascript until after consent is obtained. The specific consent you wish to use to load GTM is a choice you and your legal counsel will need to make. Once you have obtained the agreed upon consent, you can check for it using the Fides interface and load GTM based on the user's consent.
Create the Data Layer Variable
- Navigate to Variables → New to create a new GTM Variable.
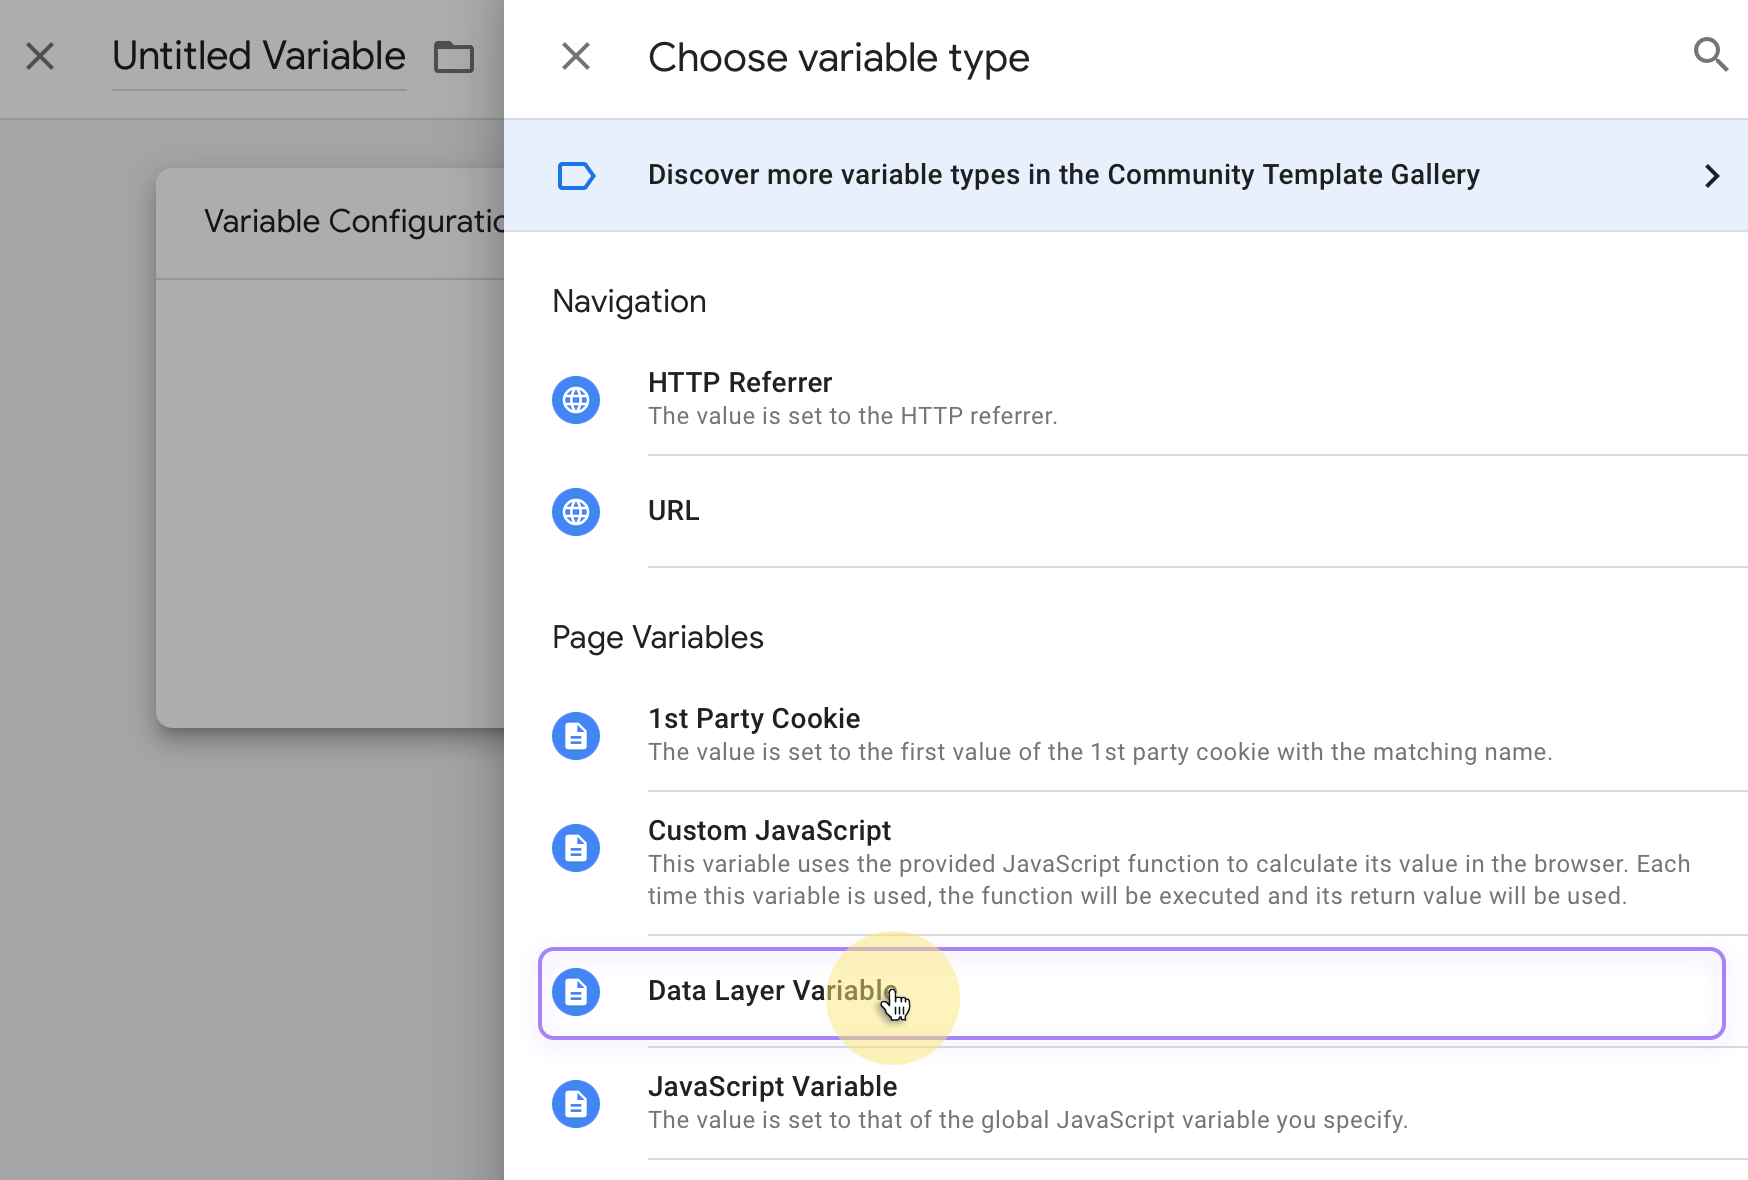
- From the Choose variable type menu, select Data Layer Variable as the type:
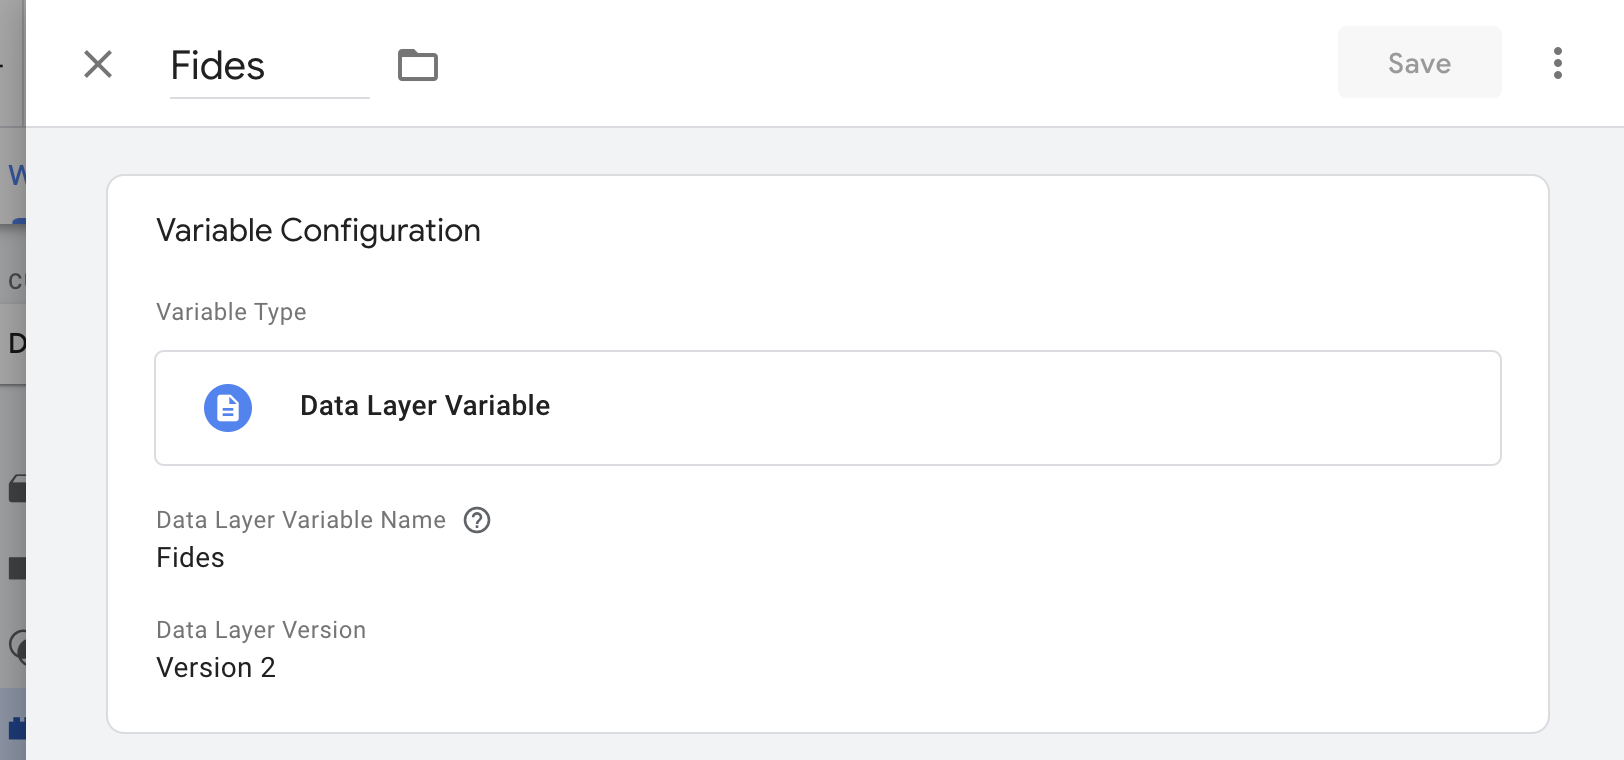
- Set the Data Layer Variable Name to
Fidesas we will be passing the consent details to the template wholesale. - Name the variable
Fidesand hit Save.
Configure a Trigger
The next step is to create a Custom Event trigger that will allow the template to respond to Fides.js events and keep the user consent up to date on the GTM side.
- Navigate to Triggers → New to create a new Trigger.
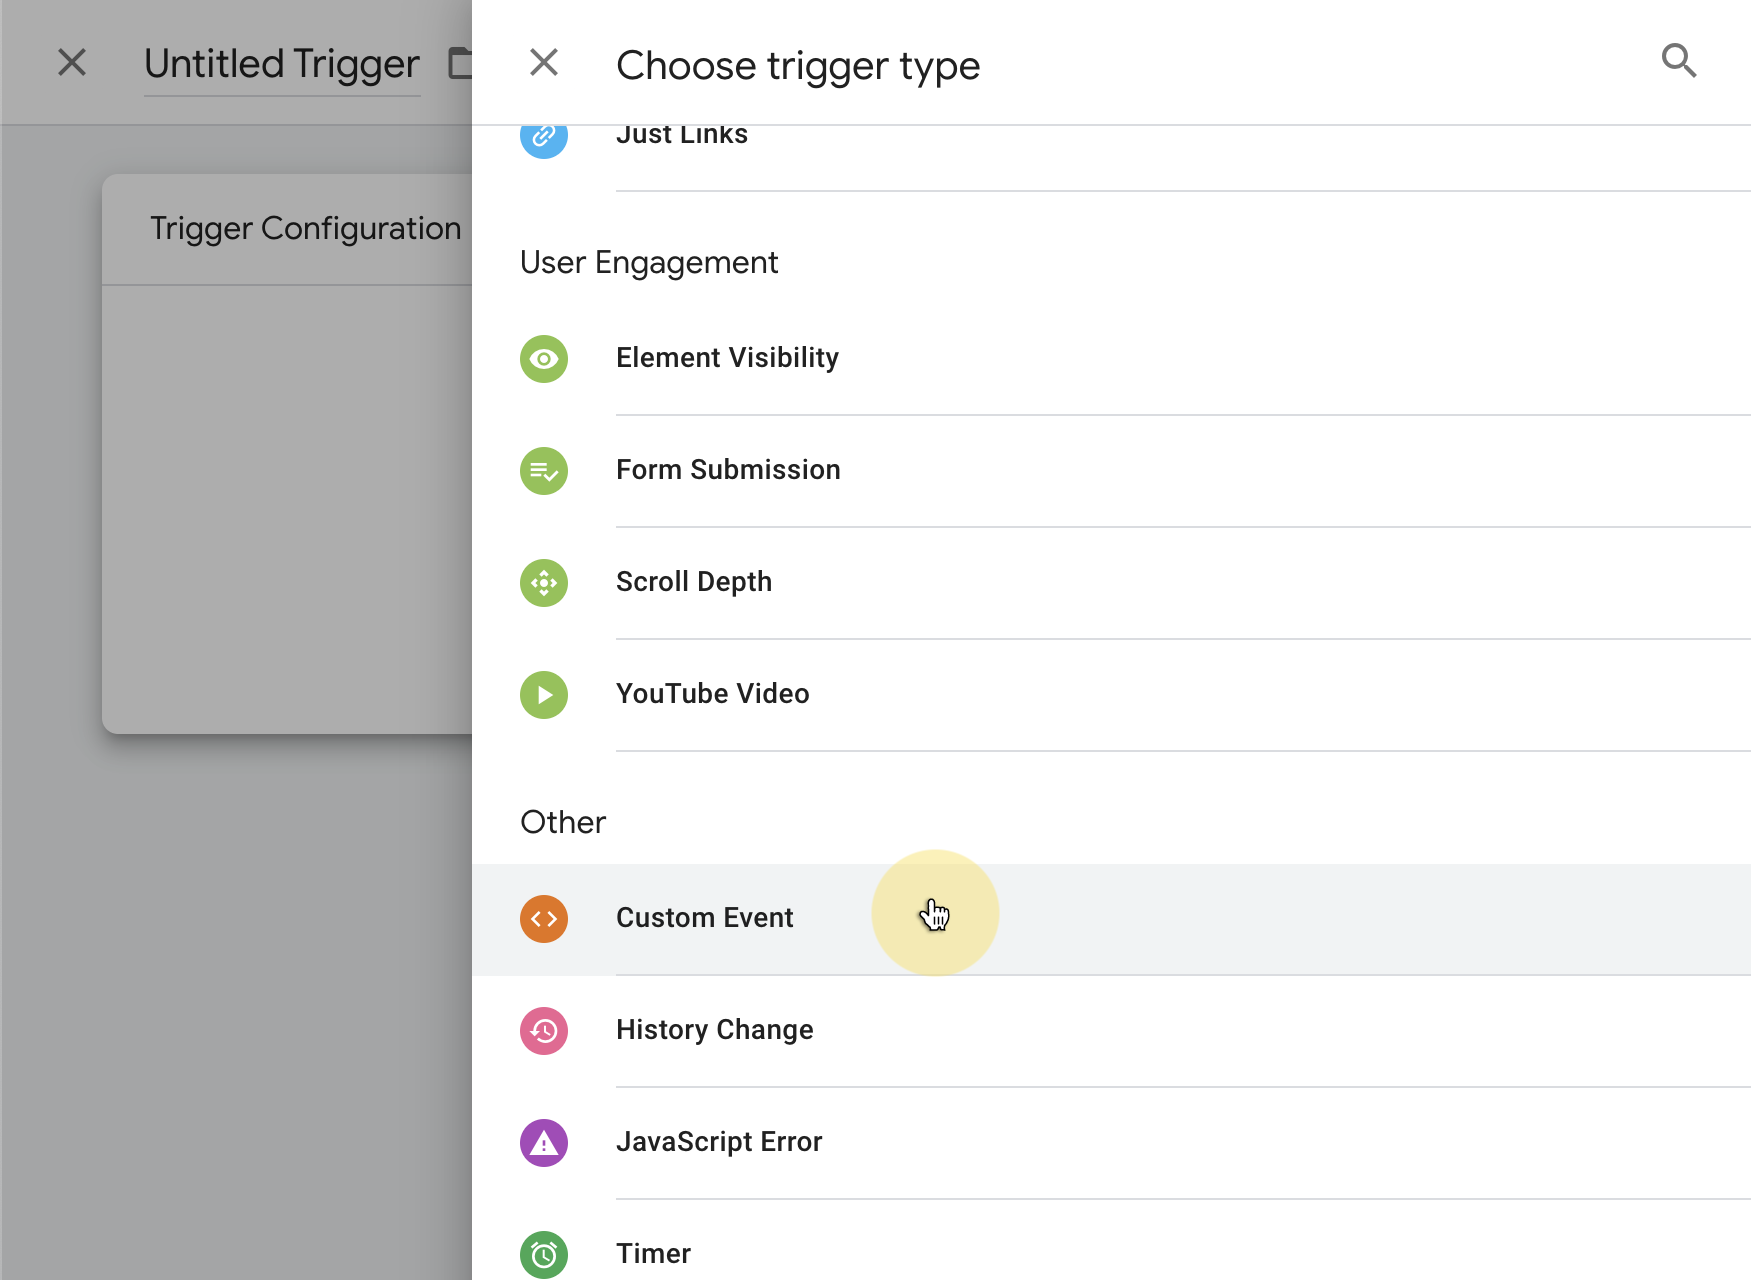
- From the Choose a trigger type menu, select Custom Event:
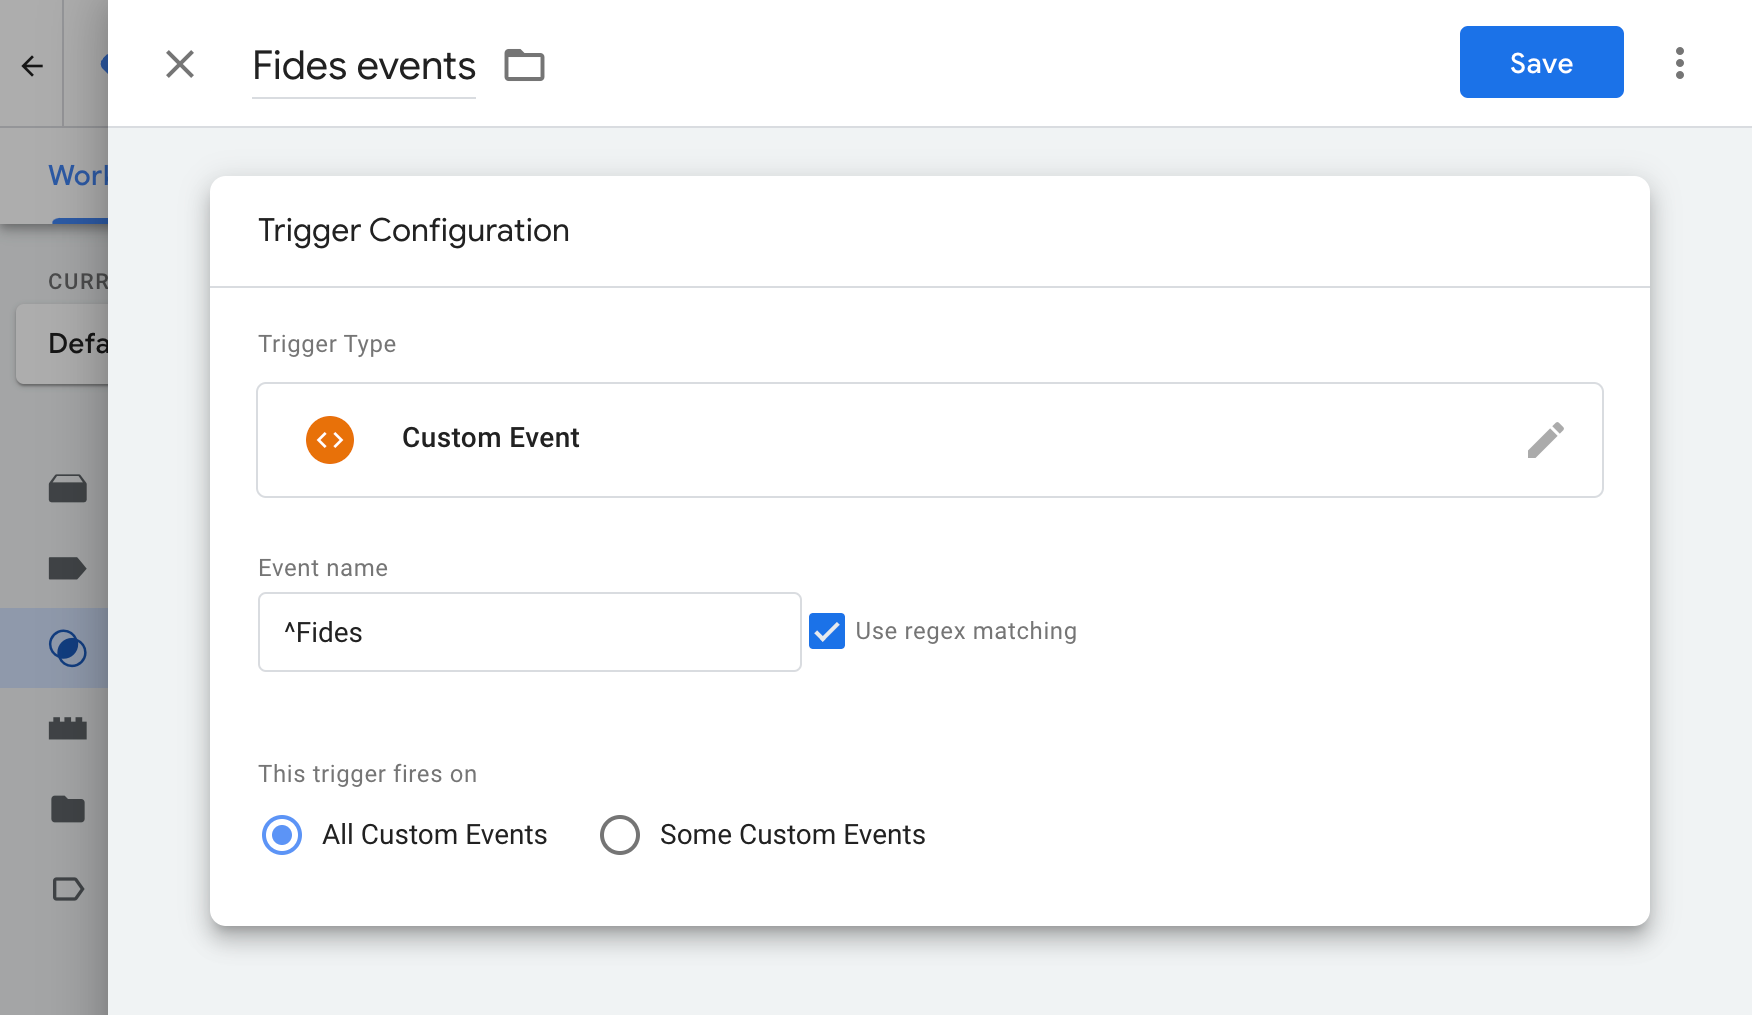
- Give the trigger a suitable, identifiable name, such as
Fides Events - Check Use regex matching and enter
^Fidesin the event name field. This allows us to use a single trigger for all of the Fides events.
Add and configure the consent mode template
- Visit the template repository (opens in a new tab) and download the
template.tplfile to your computer. - In GTM, navigate to Templates → New
- In the meatball dropdown menu select Import and upload the template file.
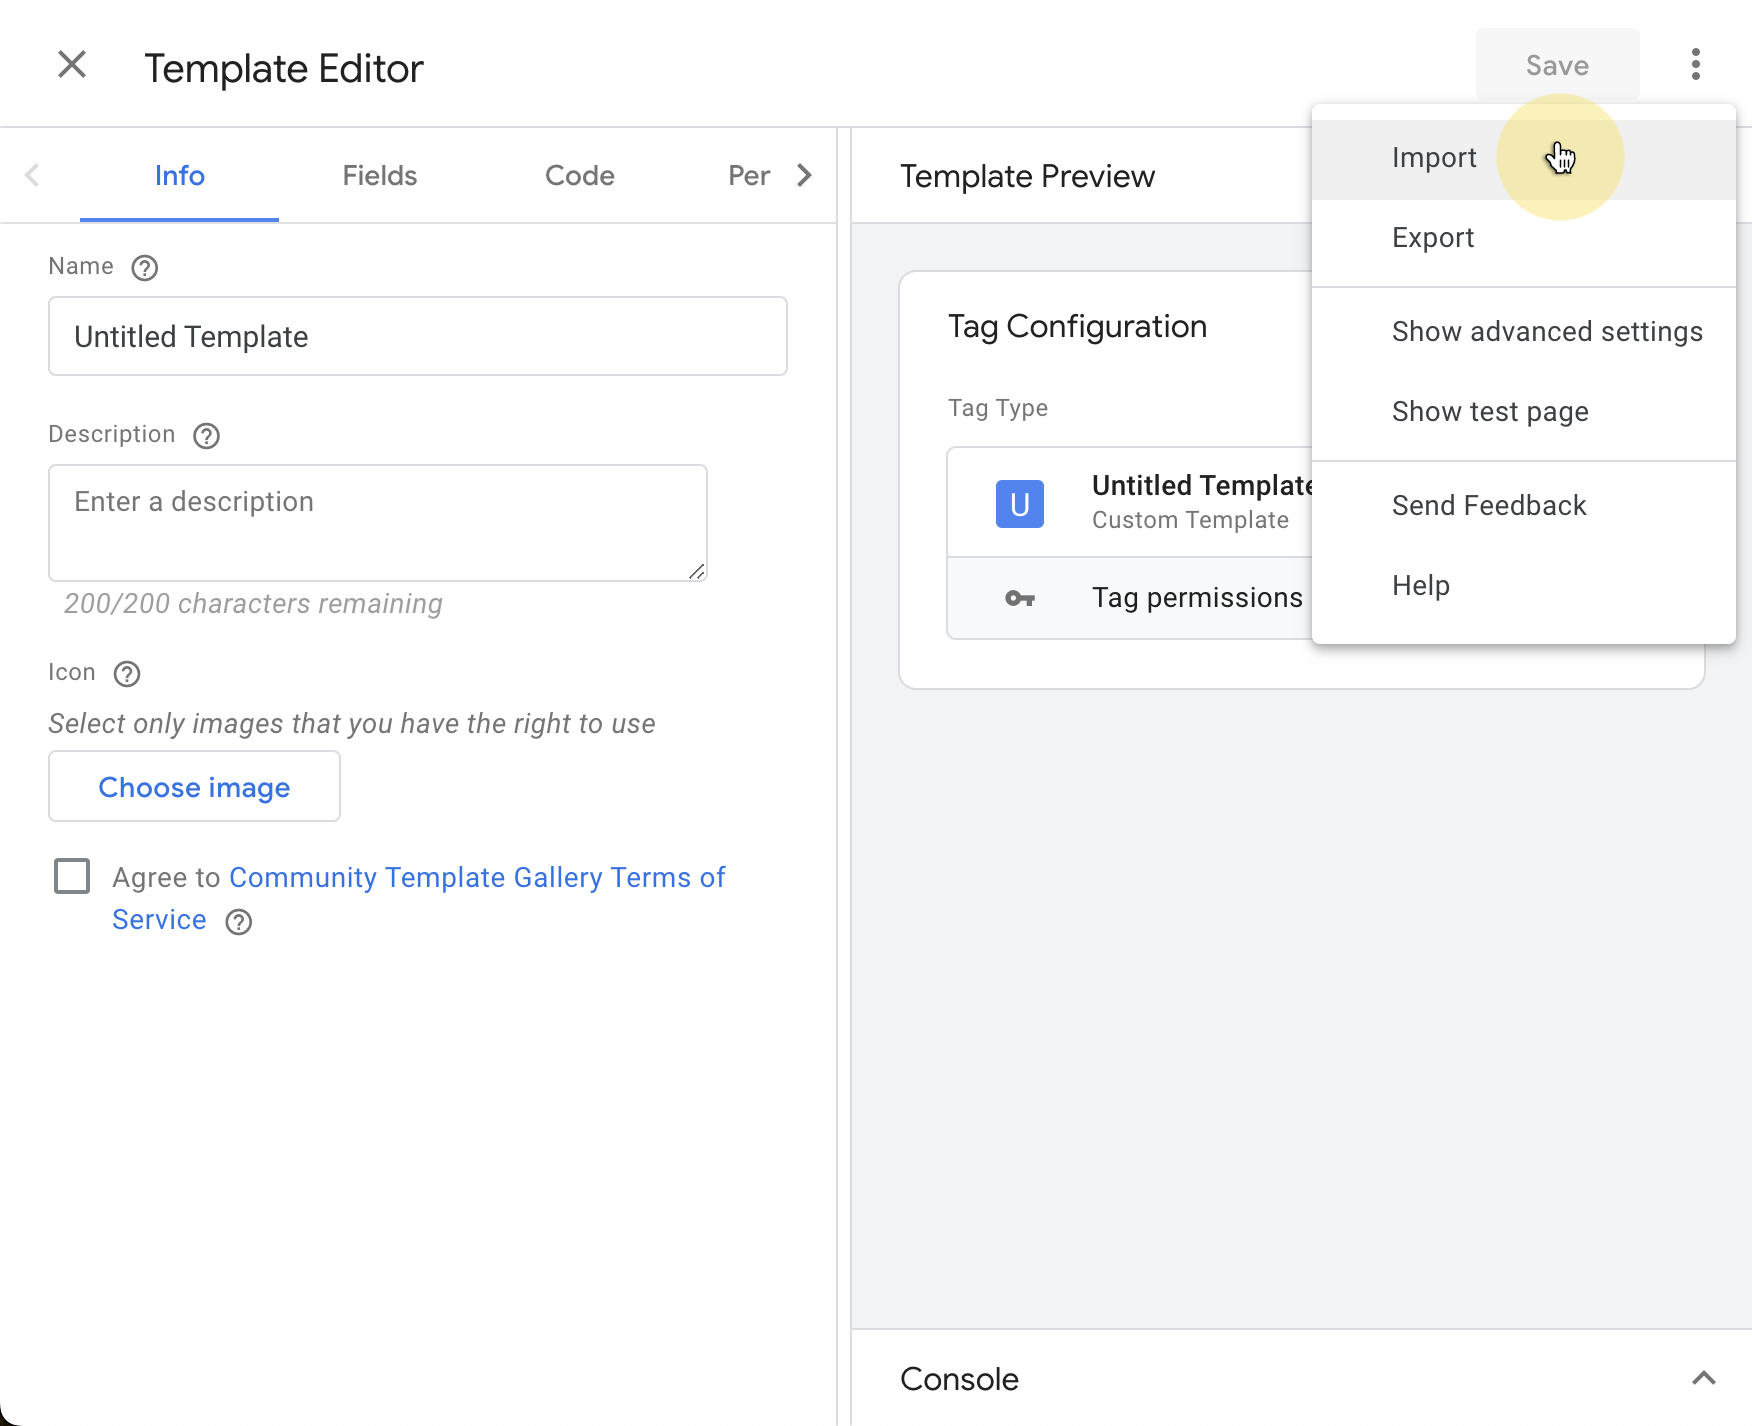
- Click Save and close the template editor.
- Navigate to Tags → New
- Click on the Tag Configuration block and select the template (Ethyca CMP) you just added from the Custom section
- Click on the Triggering block and select both Consent Initialization - All Pages and the custom Fides Events trigger you added earlier.
- Give the tag a name, such as
Ethyca CMP, click Save and you're done!
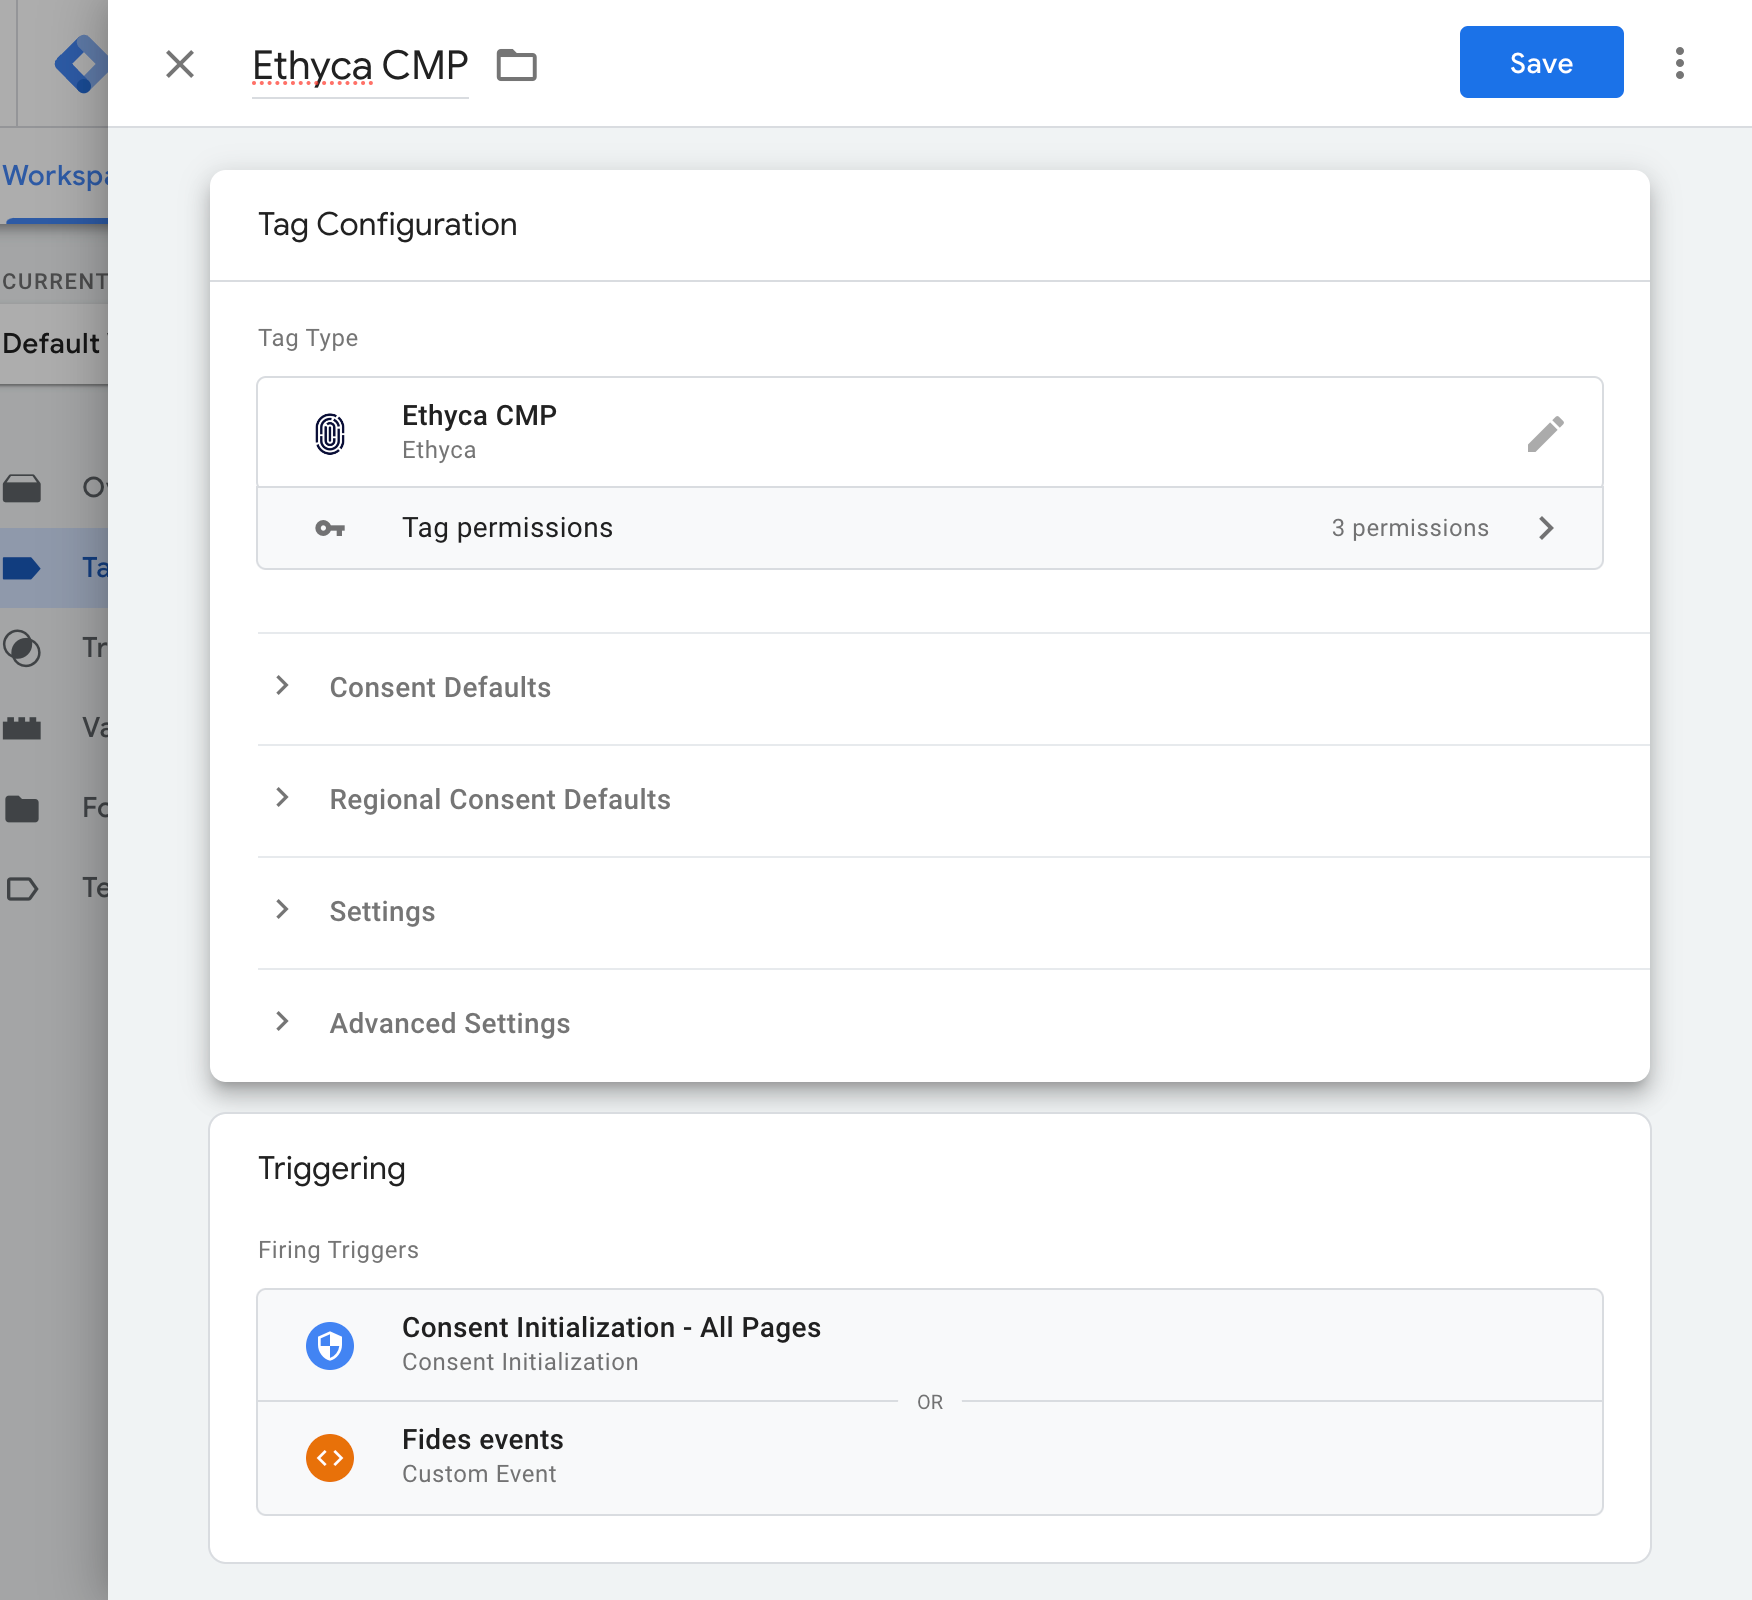
- Optionally, look through Consent Defaults and Regional Consent Defaults sections to review the default consent values. These will be used in case there's a problem with
Fides.jsand the user's consent cannot be determined. The regional defaults take precedence over Consent Defaults.
Ensure your tags respect the user's consent
Visit Tags and select the Tag you would like to review. In Tag Configuration under Advanced Settings there is a section called Consent Settings. For a Tag that uses the built-in consent checks it will look similar to the screenshot below.
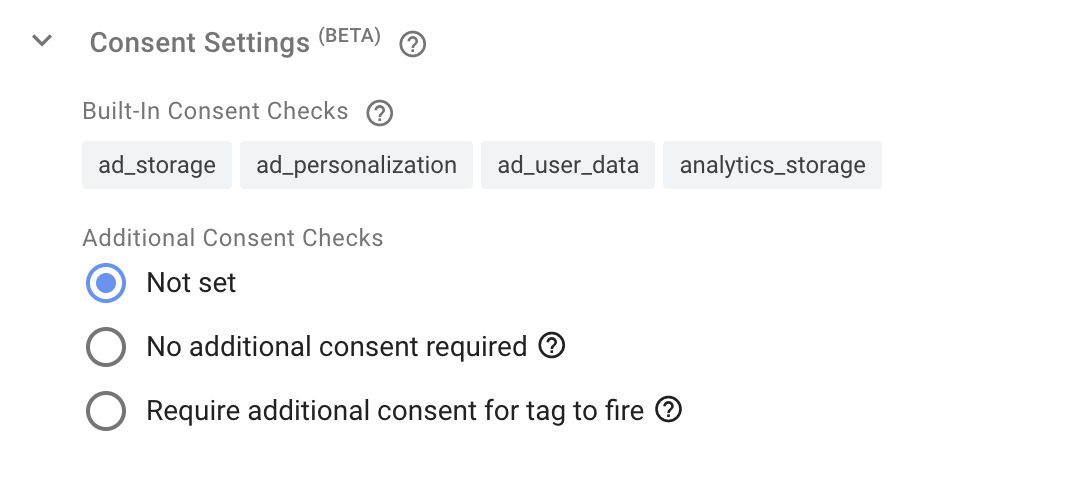
If no built-in consent checks are listed, you can configure these yourself in the Require additional consent for tag to fire section. In case you want to use a non-standard consent key, the previous approach described in Configuring Google Tag Manager can be used together with the Consent Mode template.