Consent Management: Configuring the Transparency and Consent Framework
Fides includes support for the Interactive Advertising Bureau Europe's (IAB Europe) Transparency and Consent Framework (TCF) version 2.2. This feature is enabled when Fides is provisioned for your by Ethyca's Privacy Deployment team. Please contact your Ethyca solutions team if you require support for TCF v2.2 with Fides. To learn more about TCF v2.2, read our TCF user guide.
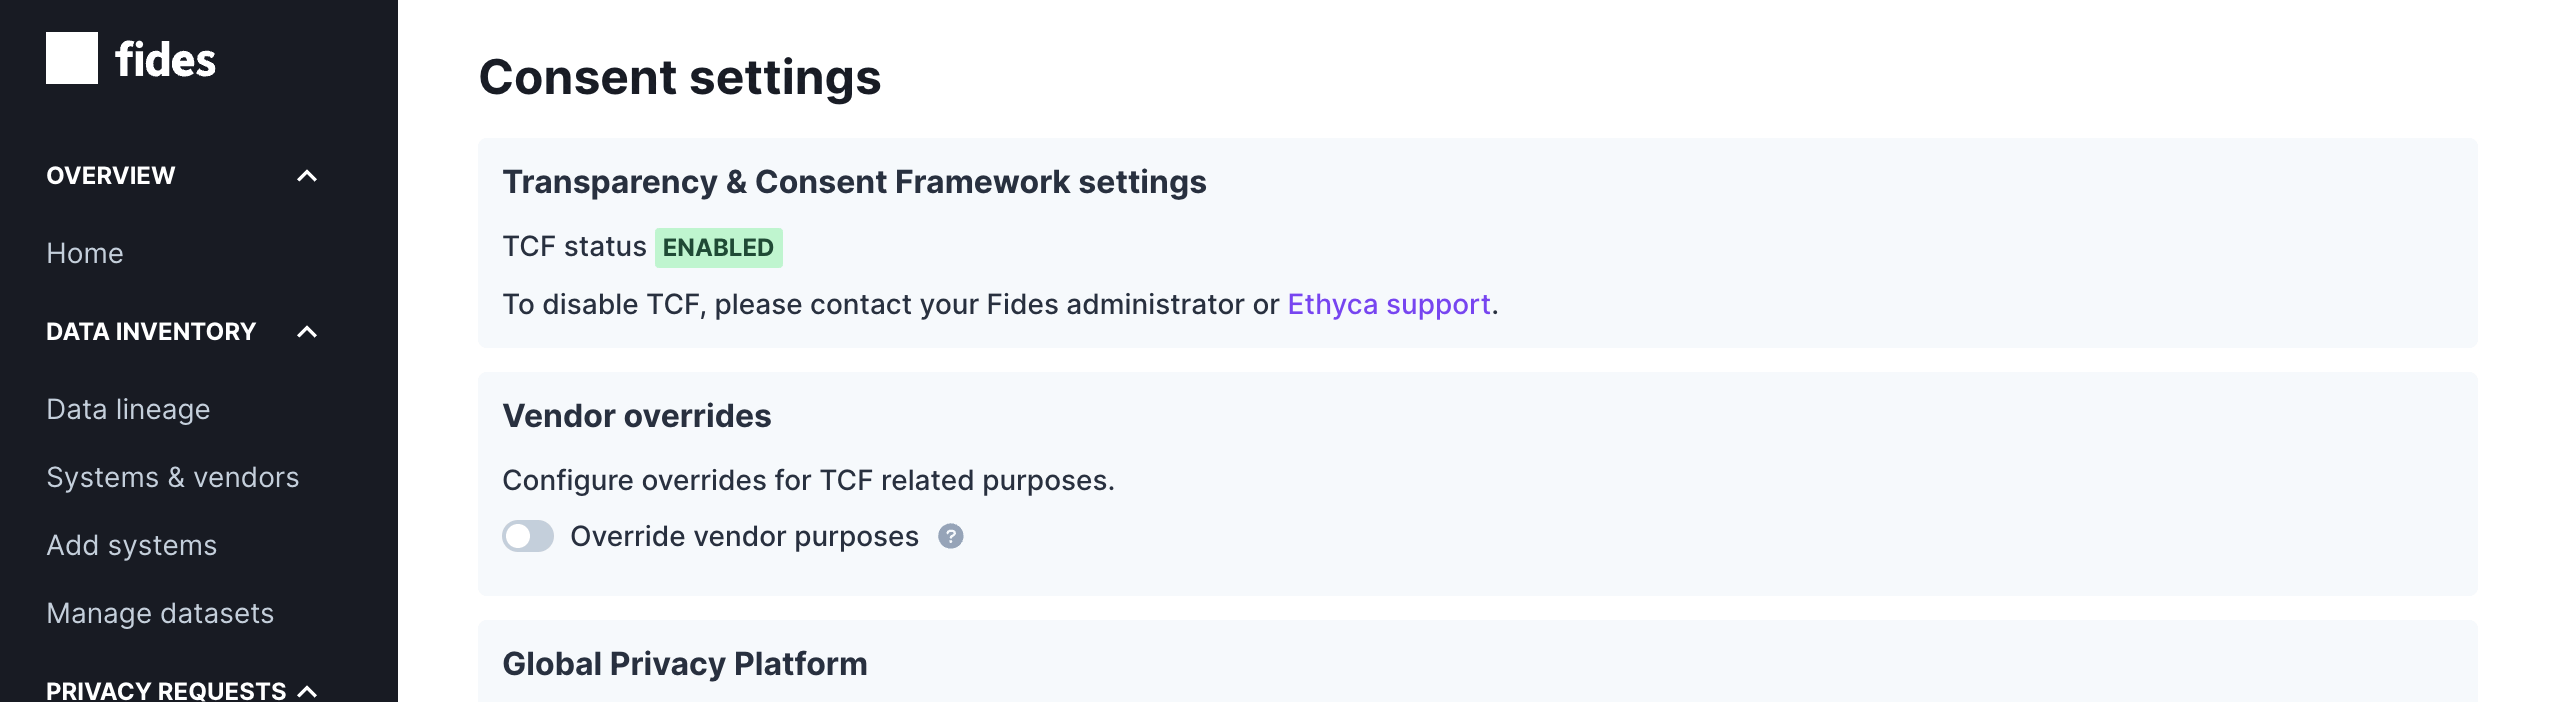
You can verify that TCF is enabled in your Fides instance by navigating to Management → Consent. At the top of the screen there will be a section for "Transparency & Consent Framework settings" under which you'll see a status of ENABLED. If TCF is included in your plan but not enabled, or you wish to add TCF to your Fides plan, please contact your Ethyca Support Team.
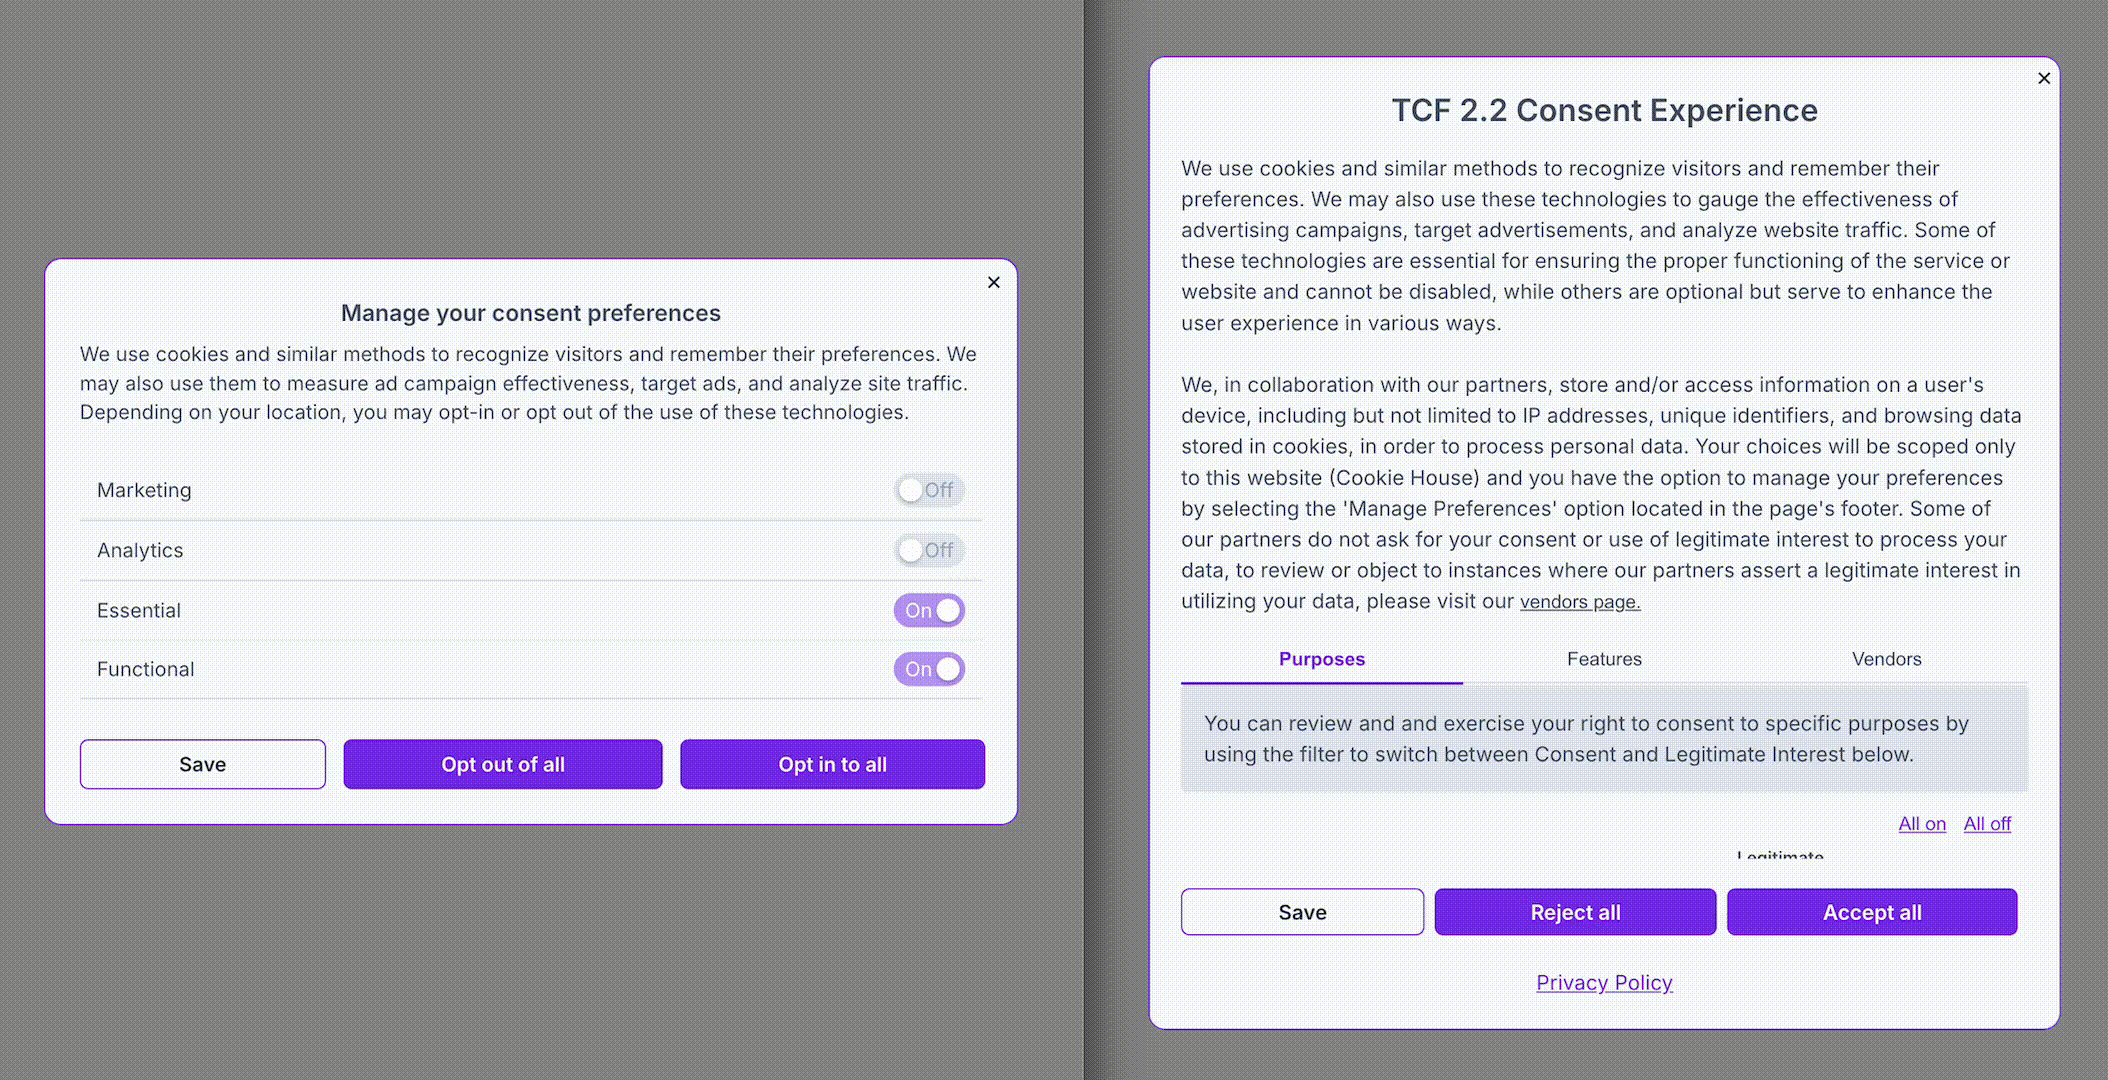
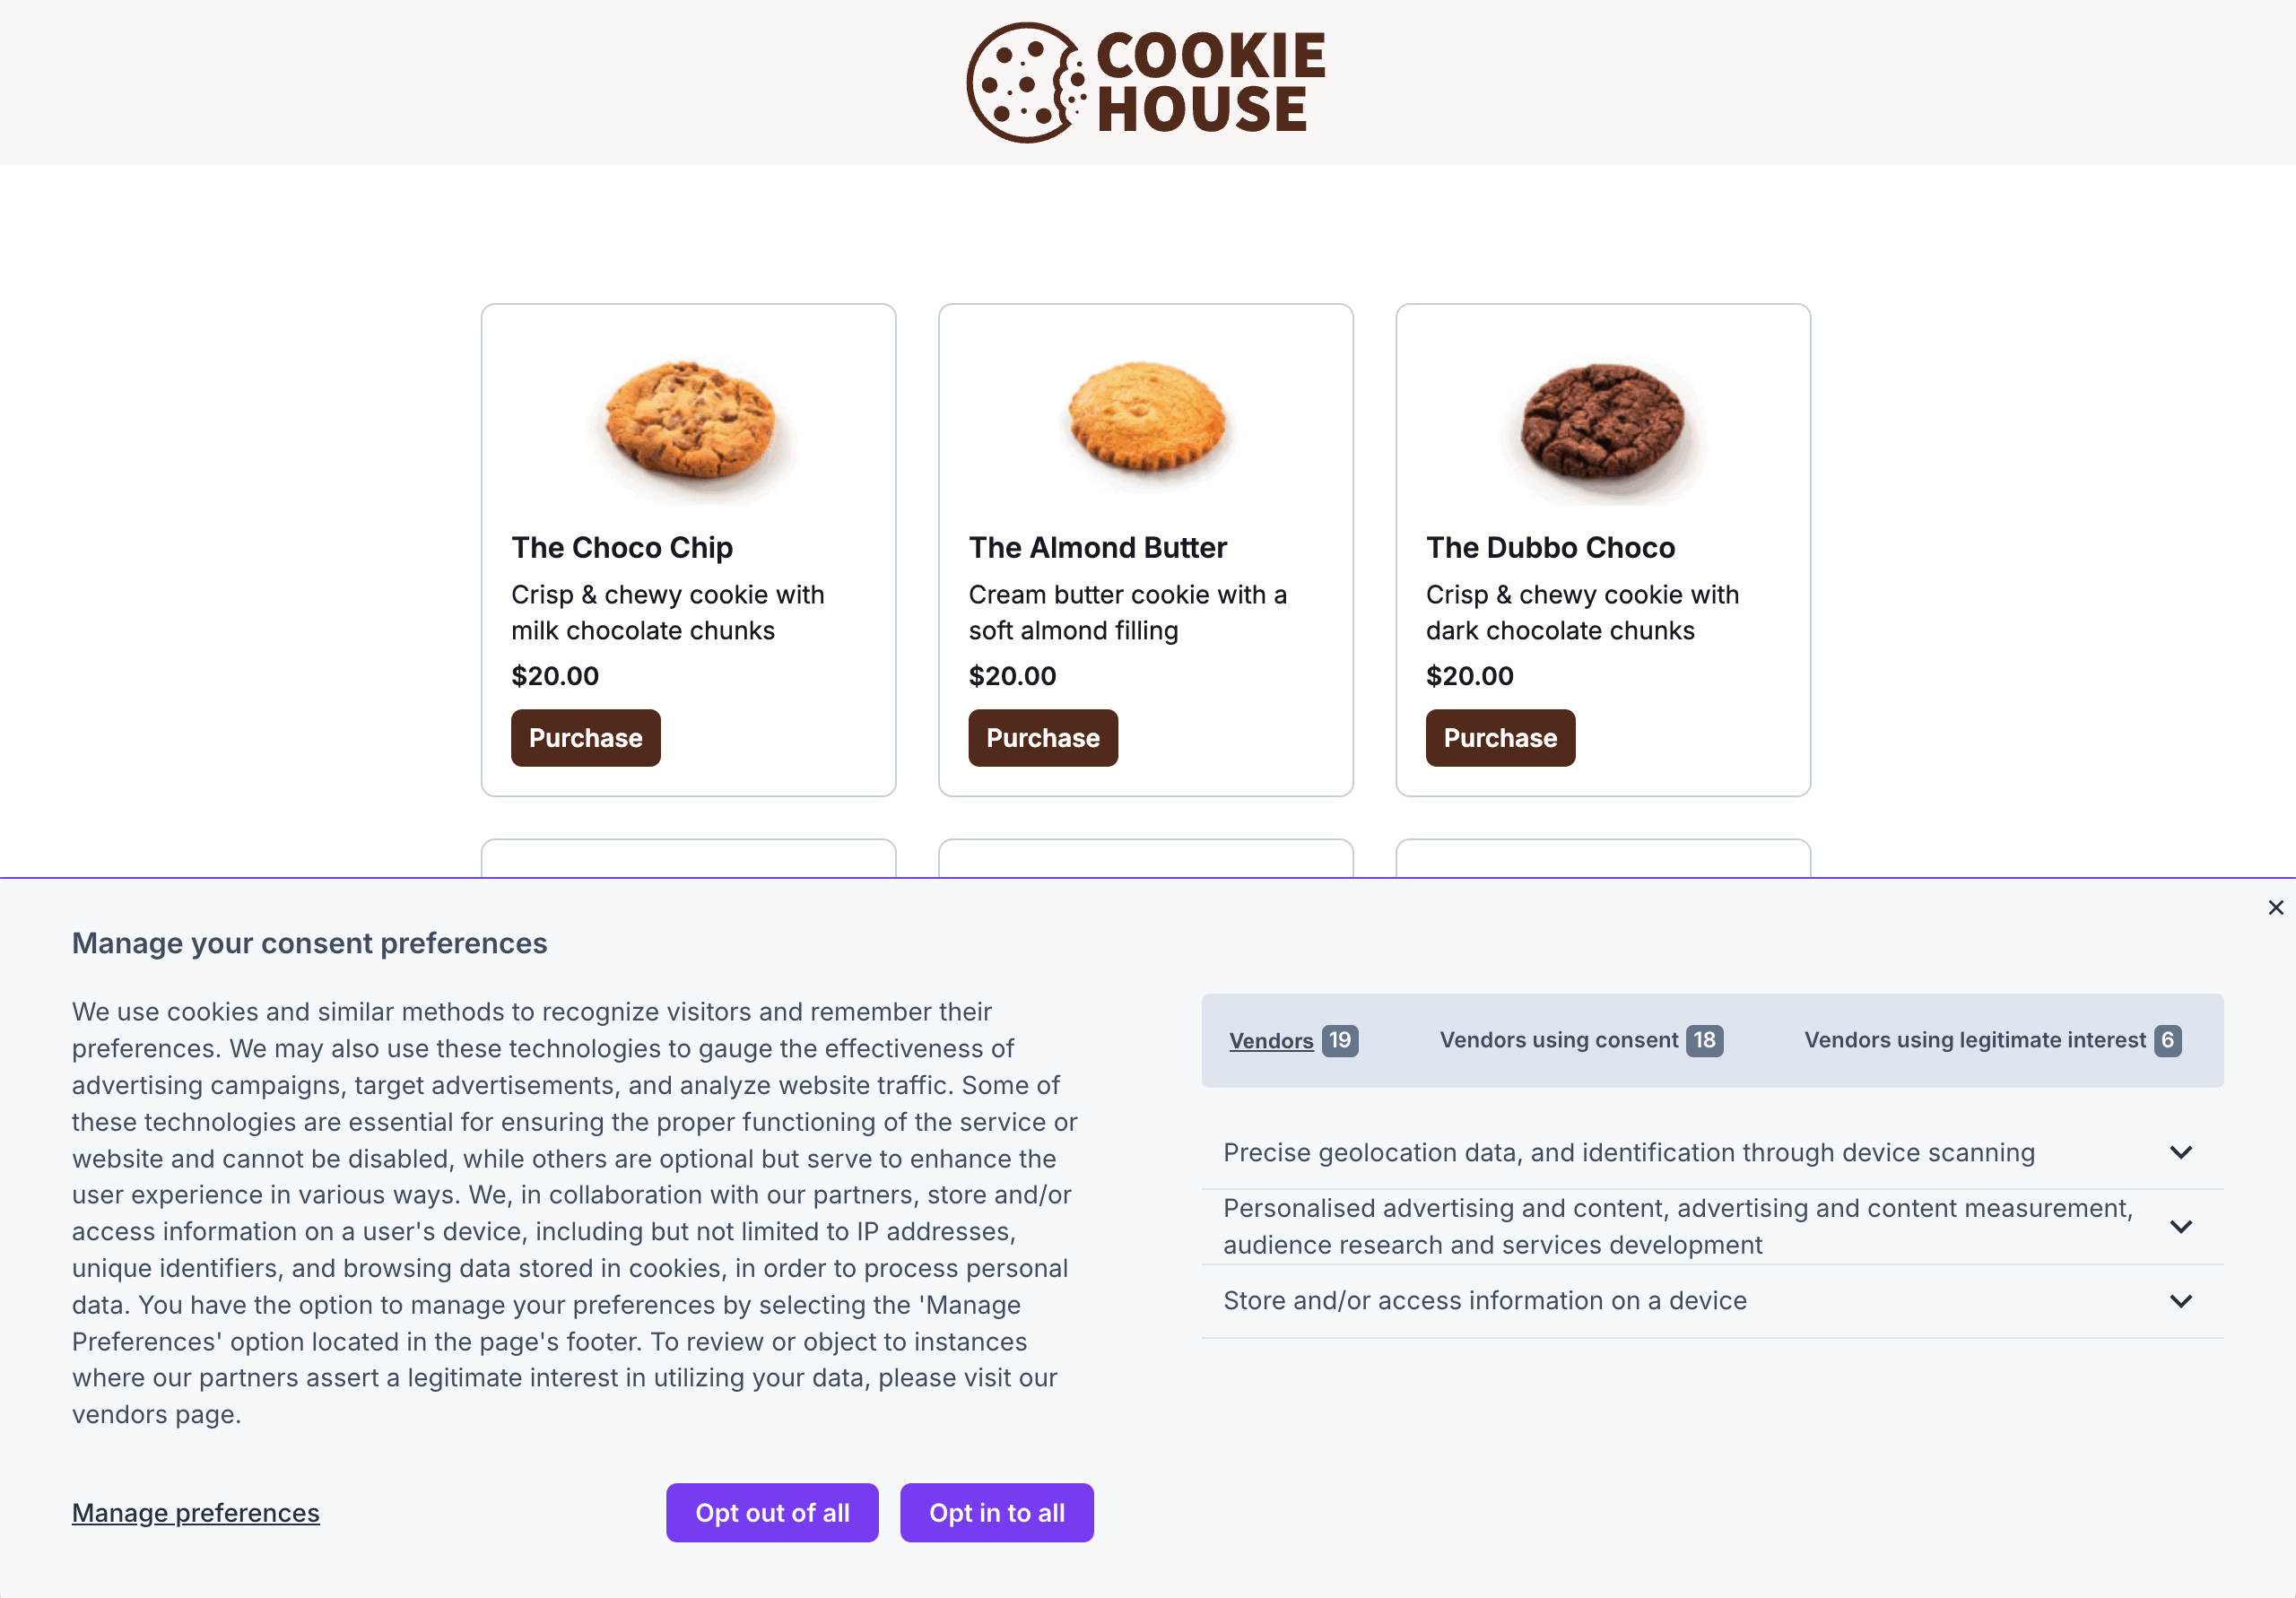
When TCF is enabled in your Fides instance, your Fides Consent Management Platform (CMP) configuration updates to serve an IAB TCF 2.2 compliant consent experience. This means that for locations where TCF 2.2 is applicable, such as the EEA (European Economic Area), users will see a comprehensive TCF user experience instead of a more typical cookie consent management banner as shown in the comparison below:
In order to see and test changes to your TCF configuration, Fides.js must be installed on your website. Read the tutorial "Install Fides on your Website" for steps to install the Fides CMP on your website.
Adding Vendors
After TCF is enabled and the Fides CMP is installed on your website, you can configure your TCF CMP by adding vendors to Fides that are part of your advertising and data processing business practices.
In TCF, the vendors you select to display in your CMP dictate the consent choices made available to consumers based on the purposes they declare when joining the framework. For more information on vendors and purposes, read the TCF user guide.
Once you have identified the vendors you wish to add, you can add them in bulk or one-by-one.
Add vendors in bulk
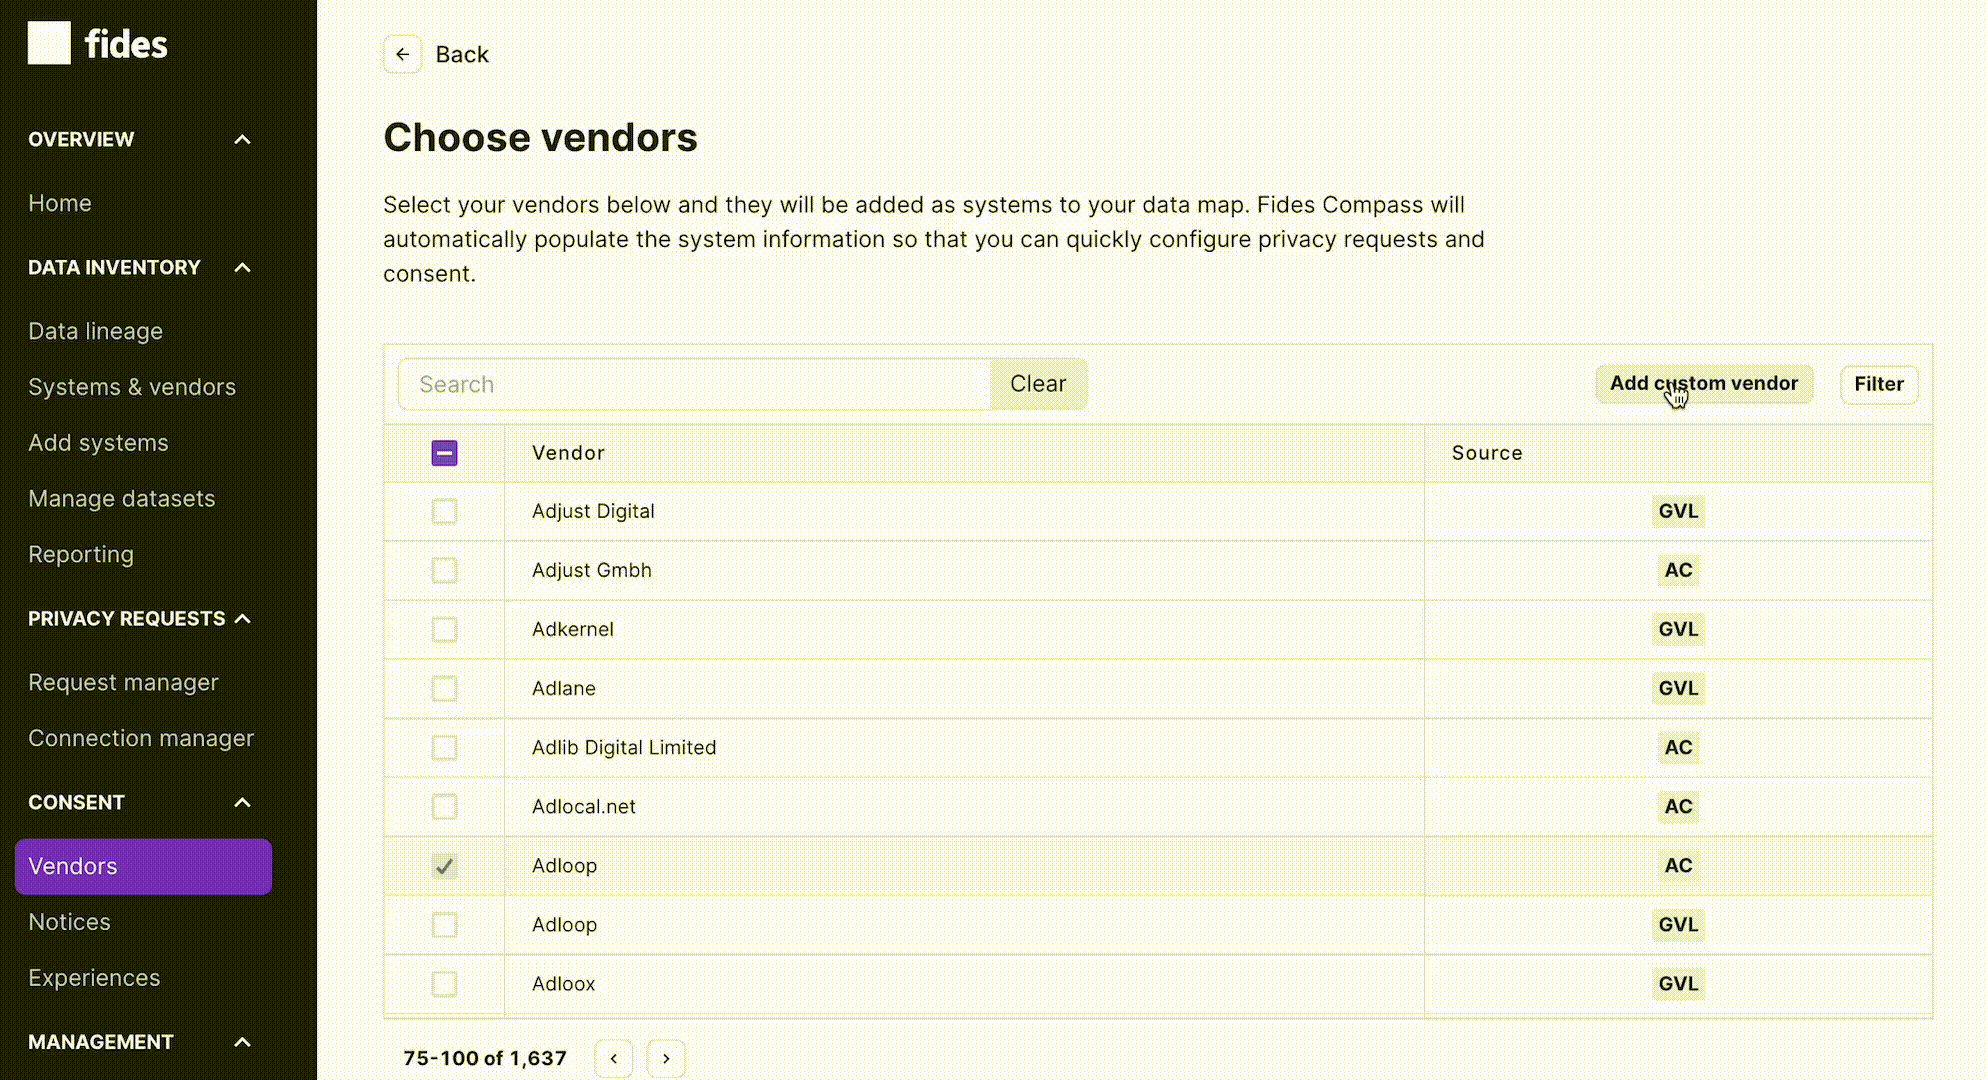
When you need to add a large number of vendors, go to Consent → Vendors and click on "Add vendors" in the top right of the table.
Here you can search for vendors from Fides Compass, make one or multiple selections, then save your selection. Vendors are labeled to indicate whether they participate in the IAB Global Vendor List (GVL) or the Google Additional Consent (AC) list which can be seen from the GVL and AC tags in each row.
Add single vendors
If you need to add a single vendor, you can also do this by navigating to Data Inventory → Add systems. Click on "Add a system" and pick a vendor from the dropdown of choices shown when you start typing a name. This will ensure you select a vendor from Fides Compass and the GVL or AC lists.
Fides Compass and vendor lists
The vendors you select in Fides are provided by Fides Compass, the privacy intelligence dictionary included with Fides when you purchase support for TCF. When selecting vendors for TCF, you are selecting vendors that have been added to Compass from the IAB's Global Vendor List (GVL) or Google's Additional Consent (AC) list. These lists include all vendors that will honor user consent choices made from the Fides CMP when TCF is enabled.
Editing the CMP text
The IAB TCF Consent framework agreement only allows you to edit a limited set of text that is displayed to users in the TCF CMP experience. To make these changes to the permitted sections of text, navigate to Consent → Experiences and click on "TCF overlay".
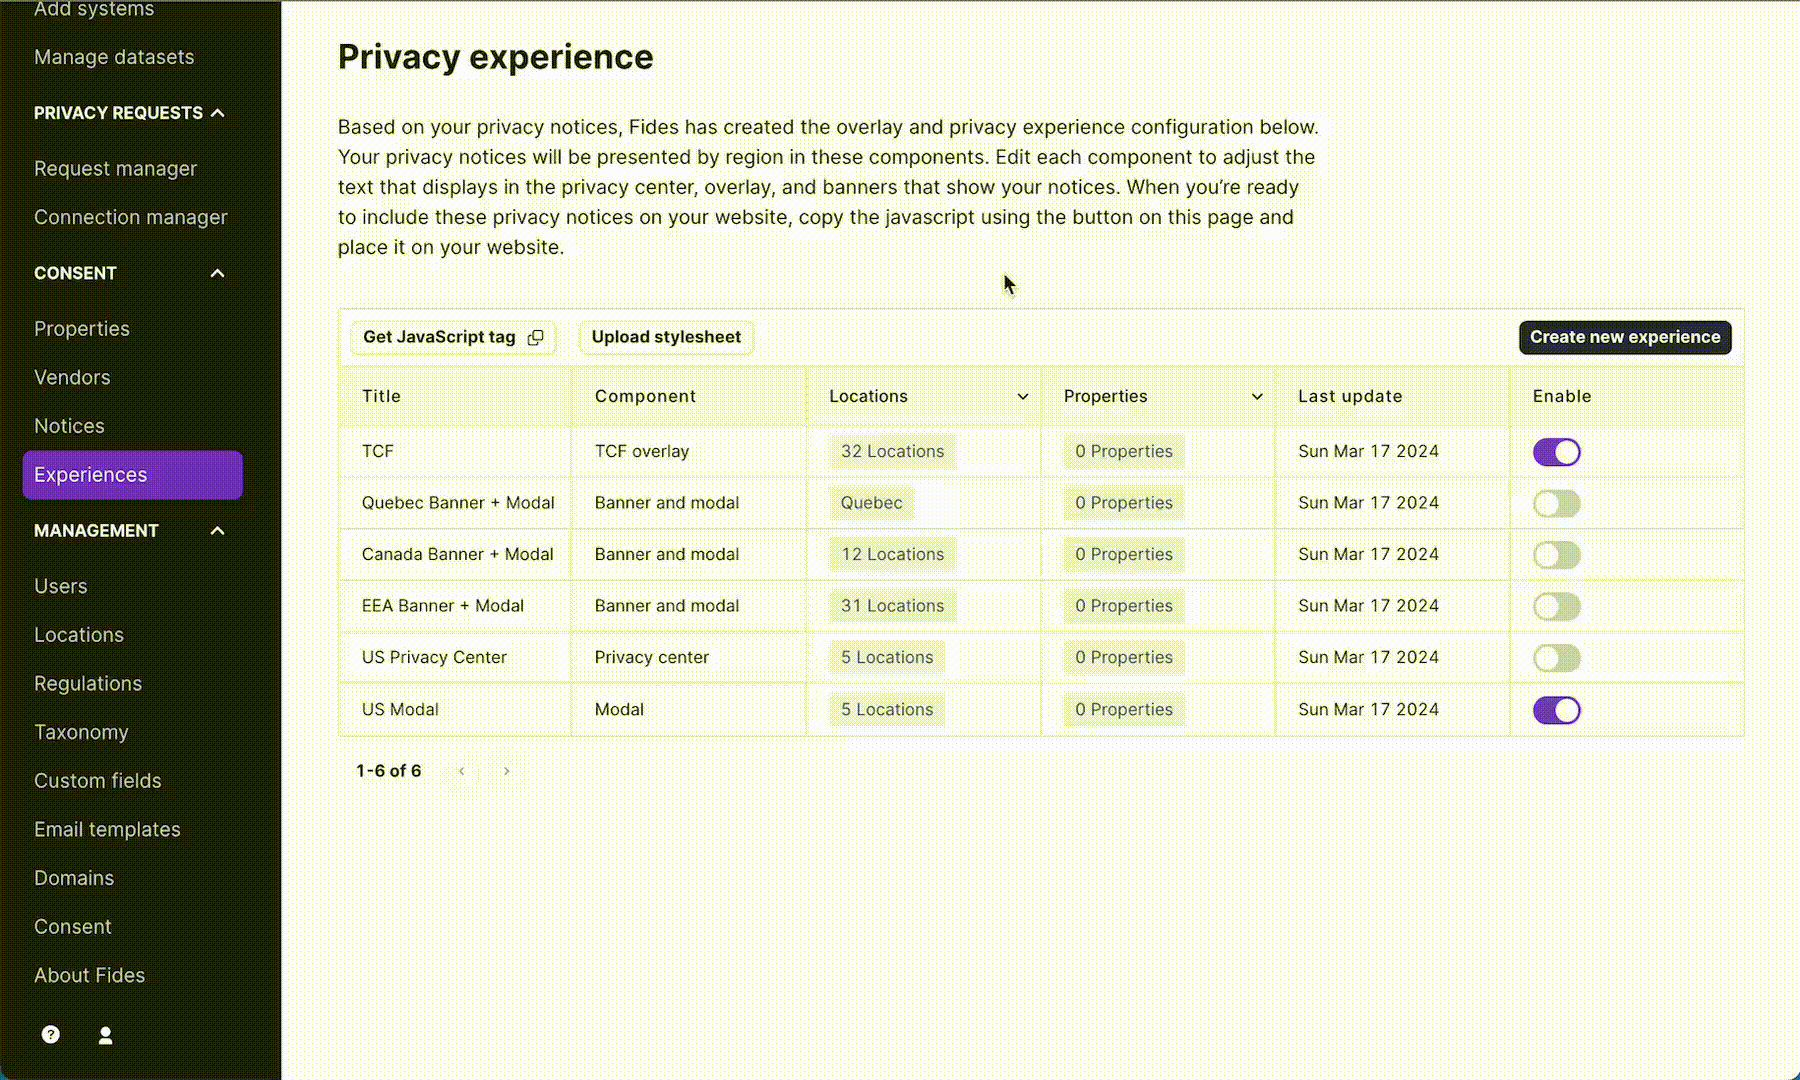
From this screen, you can click on a language to edit the default title, description, and button text that is provided by Fides to meet your business and legal needs. This text is displayed on Layer 1 and 2 of the CMP, before the rest of the experience pertaining to user choices. This is the only text that can be edited on the TCF compliant CMP UI. All other UI text is provided by the framework and cannot be changed.
TCF Consumer Experience
Now that you've added vendors, familiarize yourself with the TCF UI so that you understand how your selections will be presented to consumers. TCF includes relatively strict guidance for what information must be presented in the CMP and how it is to be presented. You can read more about the specific UI policies on the IAB Europe's website (opens in a new tab).
The Fides CMP presents TCF to users in two layers:
Layer 1 of TCF Experience
Layer 1 provides an overview of the framework and vendors included, as well as the ability to grant consent for all purposes and vendors or revoke consent for all purposes and vendors. Layer 1 also includes a link which, when clicked, opens Layer 2.
Layer 2 of TCF Experience
Layer 2 provides significantly more information about purposes, features, and vendors to users.
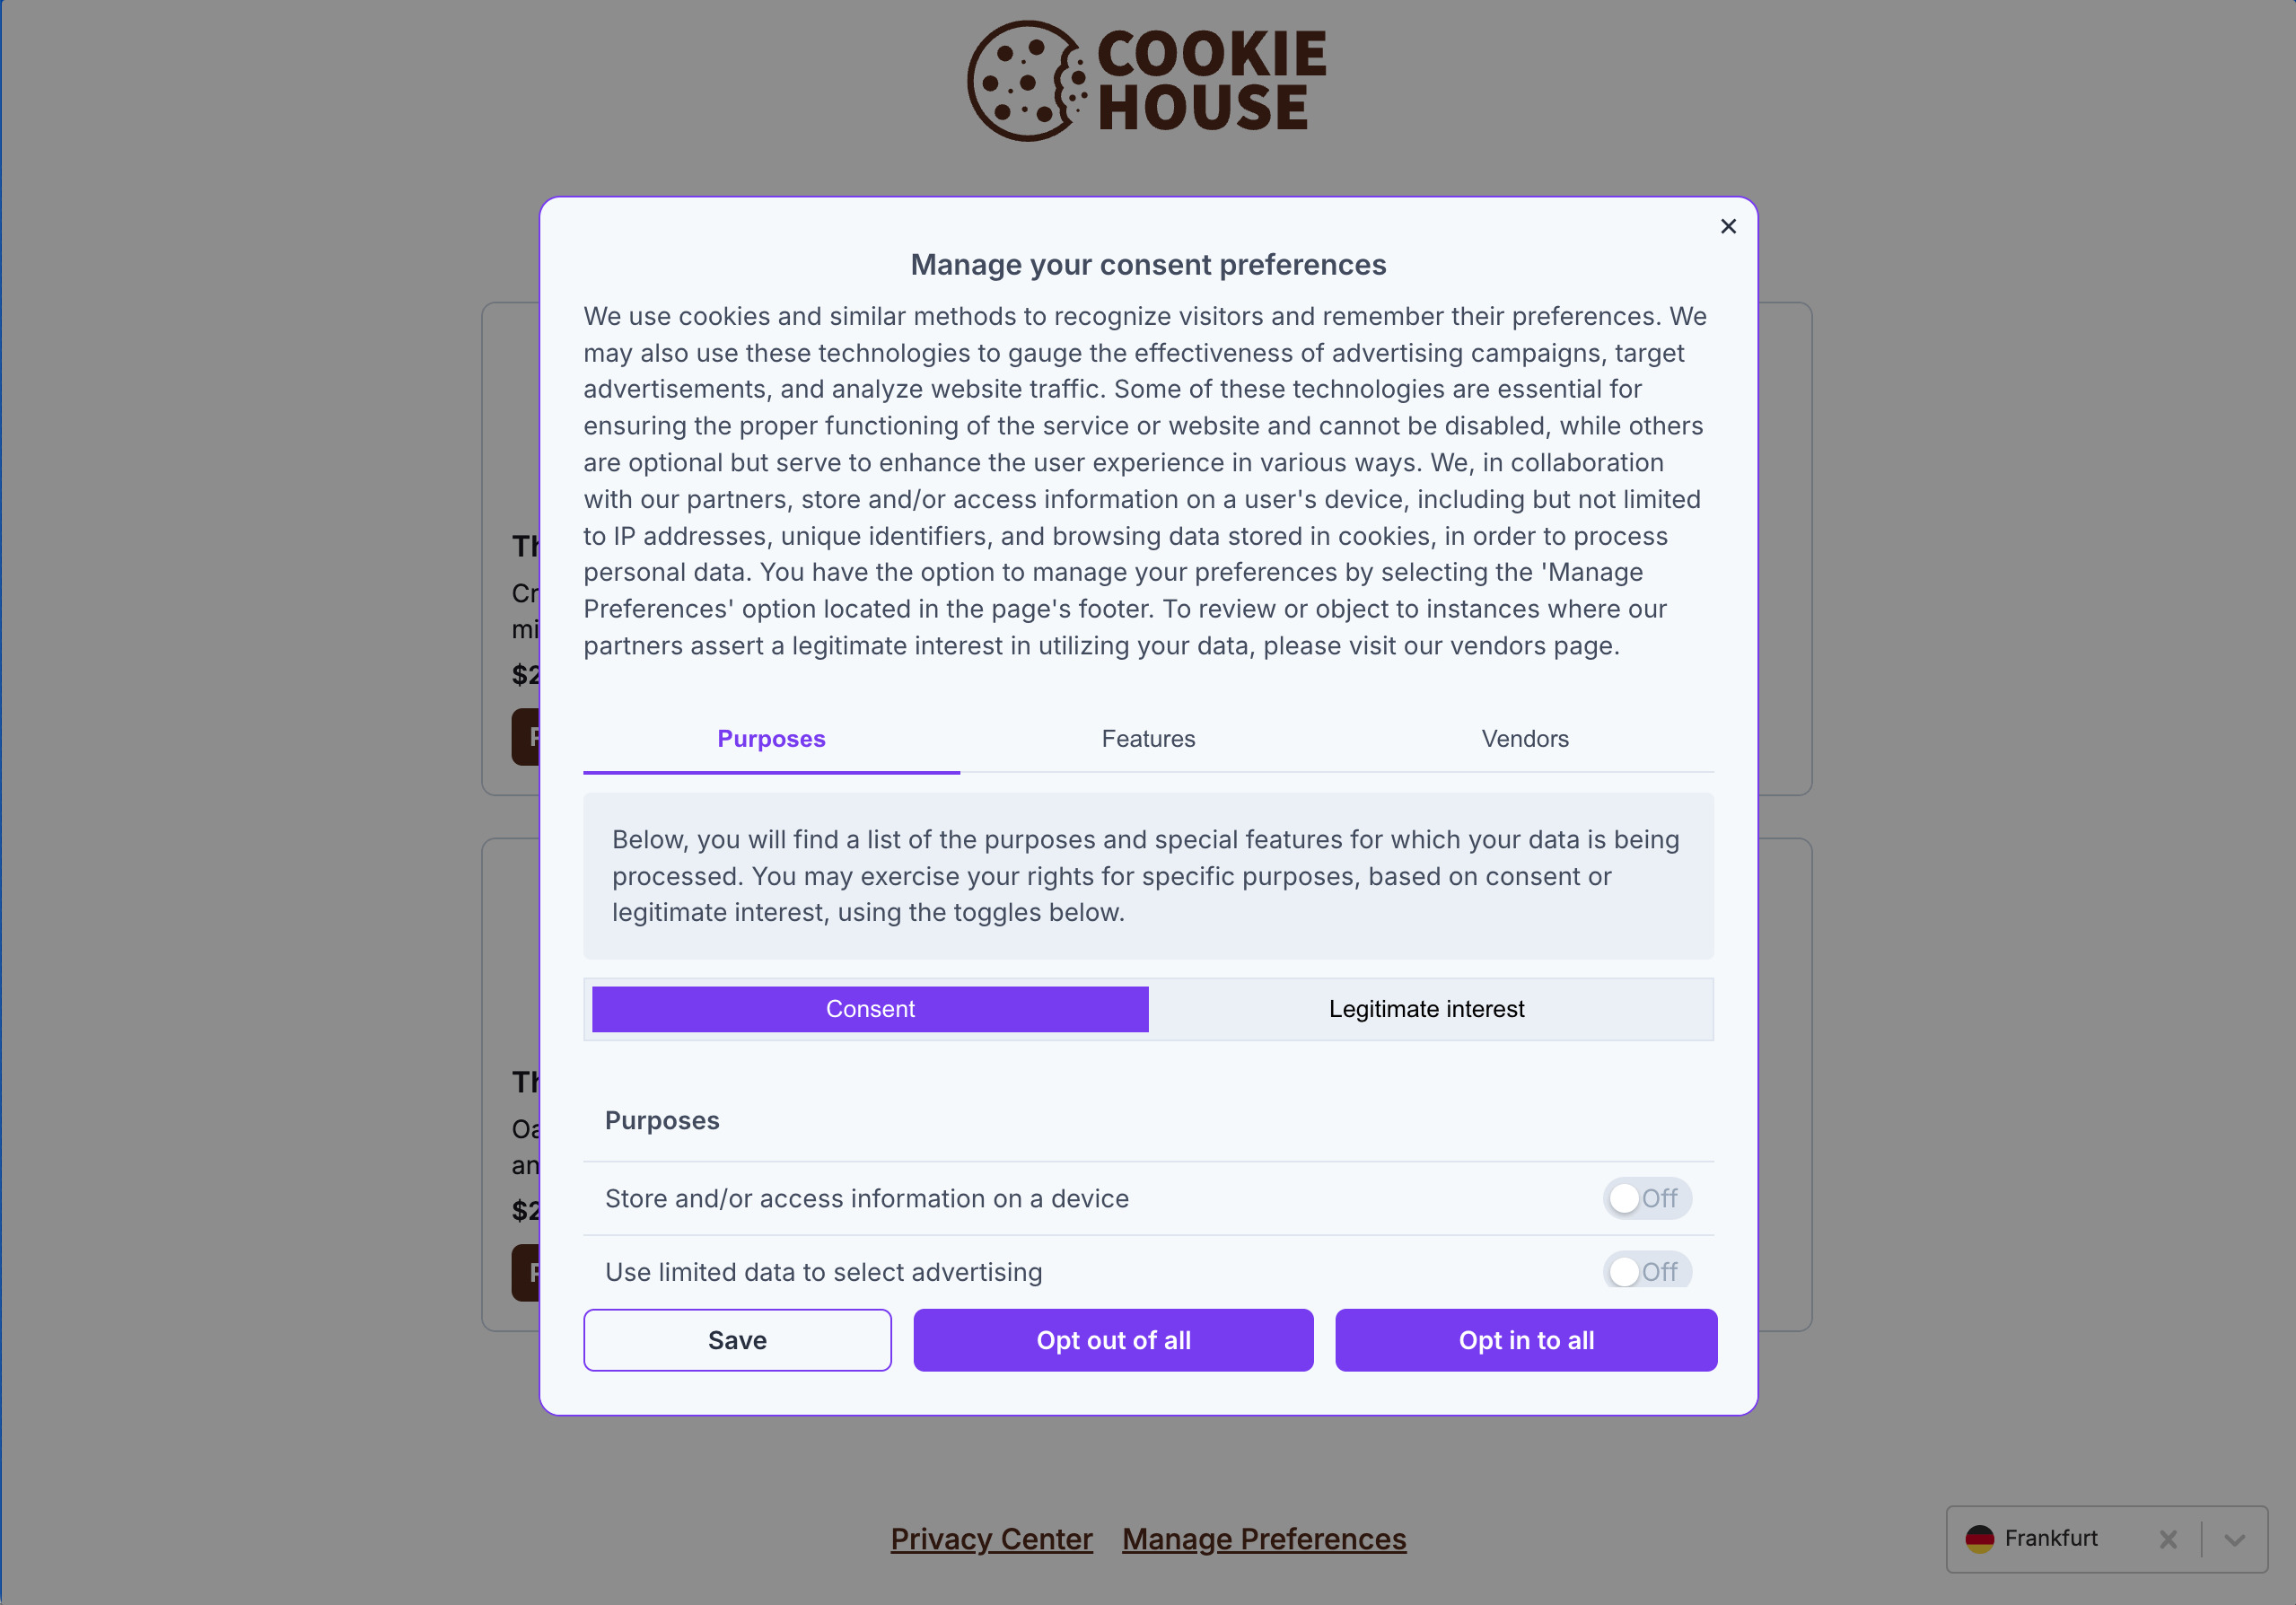
On each layer, the purposes, features, and vendors that are shown are determined by the vendor selections you made in the Fides UI during the previous steps of this tutorial.
You can apply your own CSS to the CMP UI, but the elements that are shown in the default layers must remain present even after you apply your styles.
Customizing the Style and Appearance
The consumer facing TCF CMP appearance can be styled using comprehensive CSS. Read the guide on Customizing Appearance with CSS to learn more now or contact please contact your Ethyca Support Team to get Privacy Engineering support.
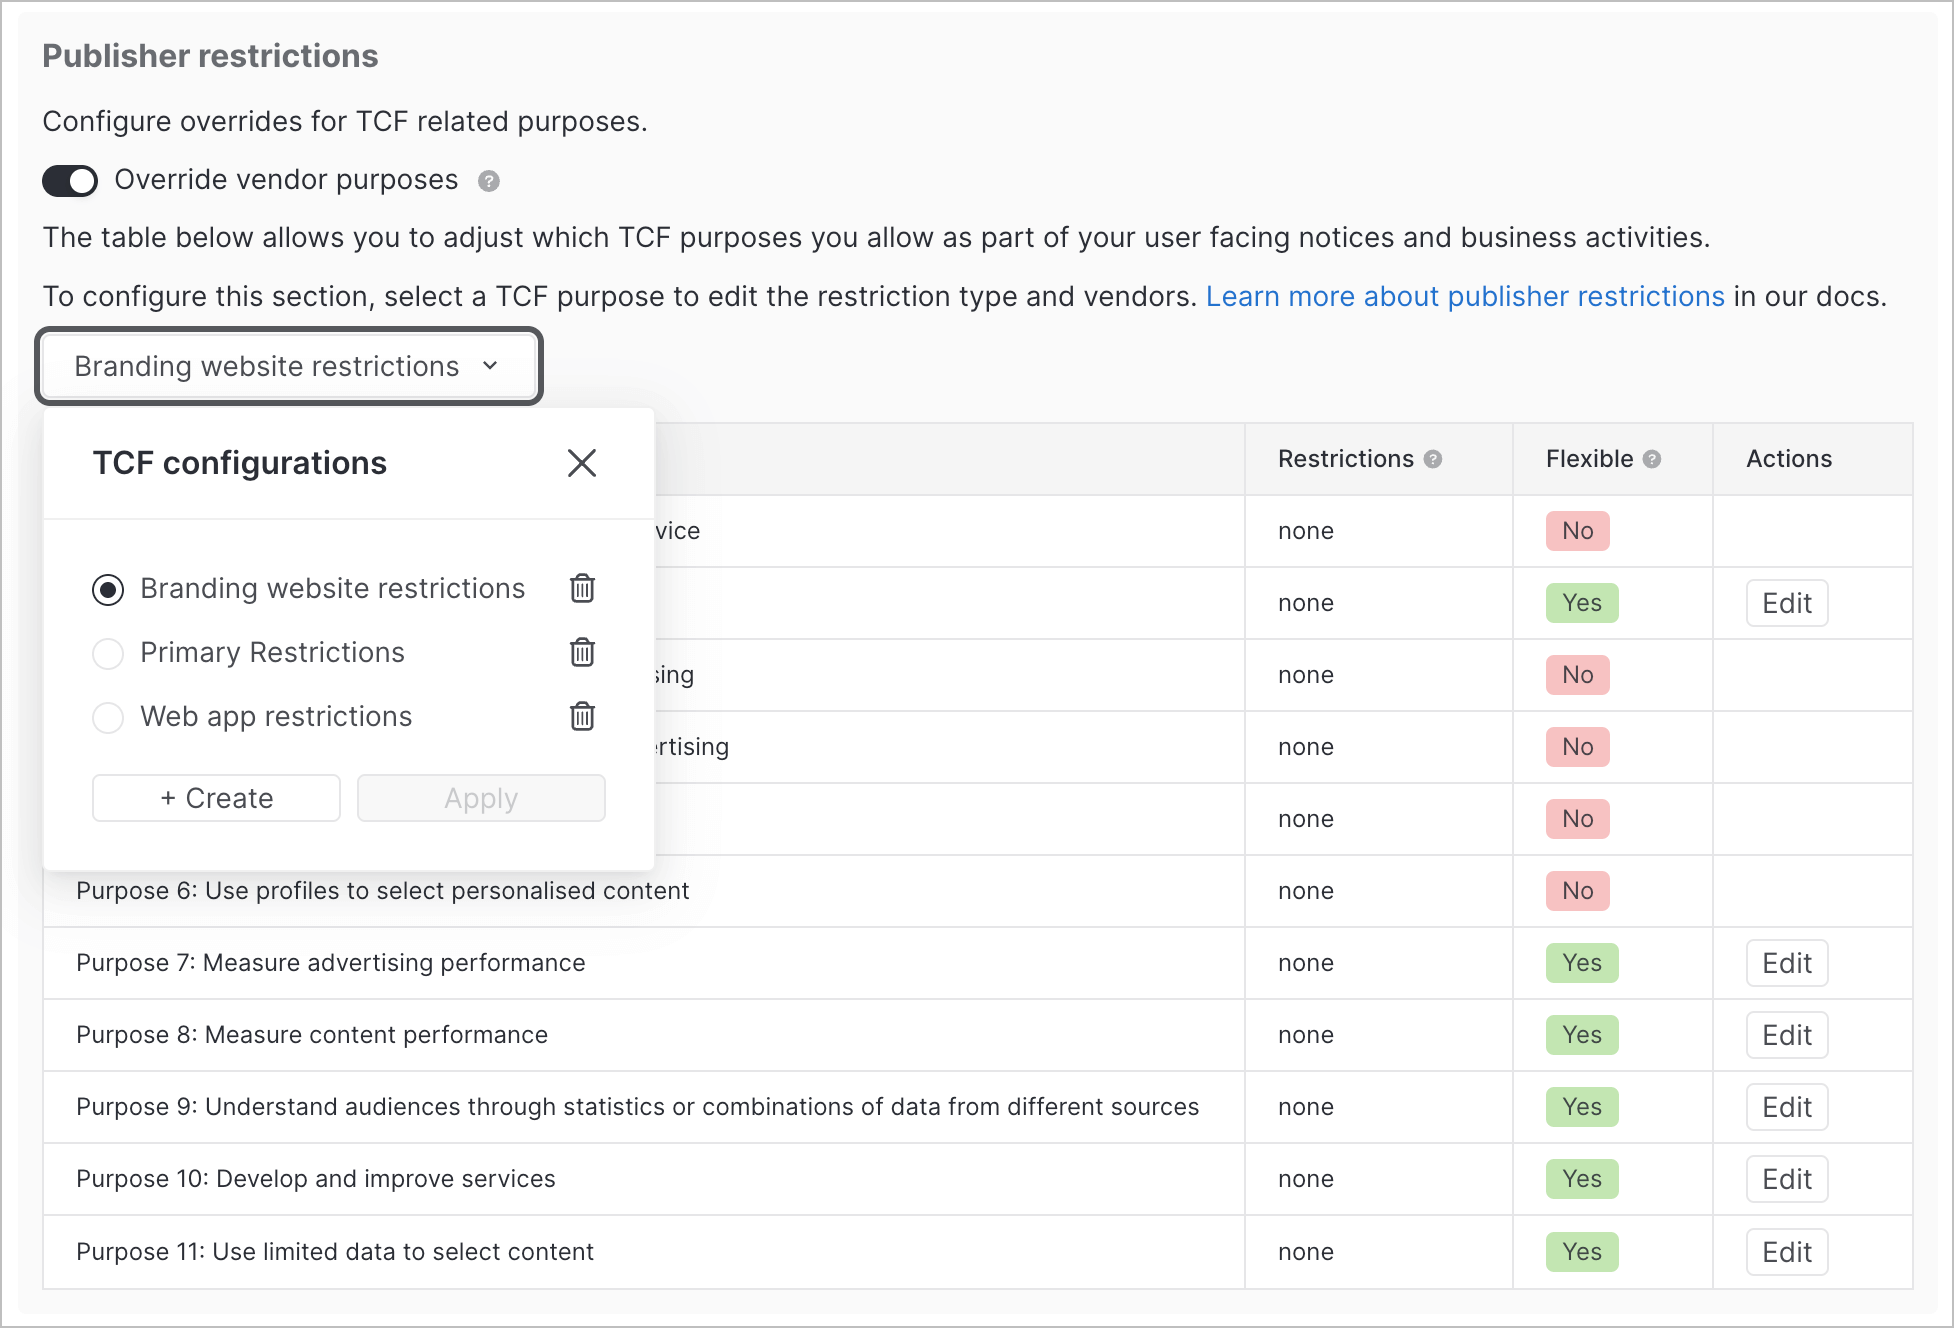
Publisher Restrictions
Fides supports configuring publisher restrictions for vendor purposes through TCF configurations. From the Management → Consent page, you can create and manage multiple TCF configurations that control:
- Preventing data processing for flexible TCF purposes
- Requiring vendors to use consent as a legal basis for flexible purposes
- Requiring vendors to use legitimate interest as a legal basis for flexible purposes
These configurations can then be applied to specific privacy experiences through the Privacy Experience editor. When creating or editing a TCF privacy experience, you can select which TCF configuration to apply from the dropdown menu.
This approach allows you to maintain different vendor override configurations and apply them selectively across different privacy experiences on your site.
Managing TCF
Once TCF is live on your site, visitors who make a selection will have a cookie saved to their browser that contains their TCF preferences. Users will not be shown the CMP UI again unless one of the following events has occurs:
- Vendor updates a purpose: A vendor you already selected updates their legal basis or declares new purposes. Fides automatically updates vendor changes once per week.
- You add a new vendor from Fides: Whenever you add a new vendor, you are required to resurface the CMP UI to consumers, even if they have an existing preference recorded. For this reason, we recommend adding new vendors in groups on a regular, but infrequent basis.
Testing the implementation
If your ad scripts expect window.__tcfapi to be available before fides.js loads, you can install the optional TCF CMP Stub to make the API available immediately.
After you have selected vendors, edited the default text, and made any applicable vendor overrides, you can test the implementation by calling the TCF API from the browser console when visiting your site. From the console, call the command below to return the TCData object:
__tcfapi('addEventListener', 2, (data) => {console.log({data})})This will demonstrate that the API is available and capable of communicating user consent preferences to downstream vendors in your advertising stack, thereby ensuring that user consent preferences are honored. You can read more about the TCF API on Github (opens in a new tab).
You can also use the CMP Validator Chrome extension provided by the IAB to test your implementation. The validator is available on the Chrome Web Store (opens in a new tab).