Configuring Email Domains
Prerequisites
For this guide you should already have a Fides Cloud hosted account.
Domains and Email in Fides Cloud
Fides requires a valid domain to send email notifications to both business users and end-users of your compliance platform. The most common need for email is for identity verification. Learn more about subject identity verification here.
Adding a Domain for Email to Fides Cloud
To add a domain for Email to Fides Cloud, notify your Customer representative or email support@ethyca.com with the subdomain you would like to use, such as privacy-email.yourdomain.com (opens in a new tab).
Your Customer representative will confirm receipt and provide additional information to complete the domain verification steps (see below).
Verifying your Domain
Fides uses Sendgrid to securely send emails on yoru behalf. In order to add your domain for email, you will need to verify that you have permission and ownership of your domain and its DNS records.
To verify ownership of your domain and ensure email delivery, your Customer representative will share a set of DNS verification records with you. These records must be added to your DNS server in order to verify that you have ownership of the domain and to correctly configure email sending.
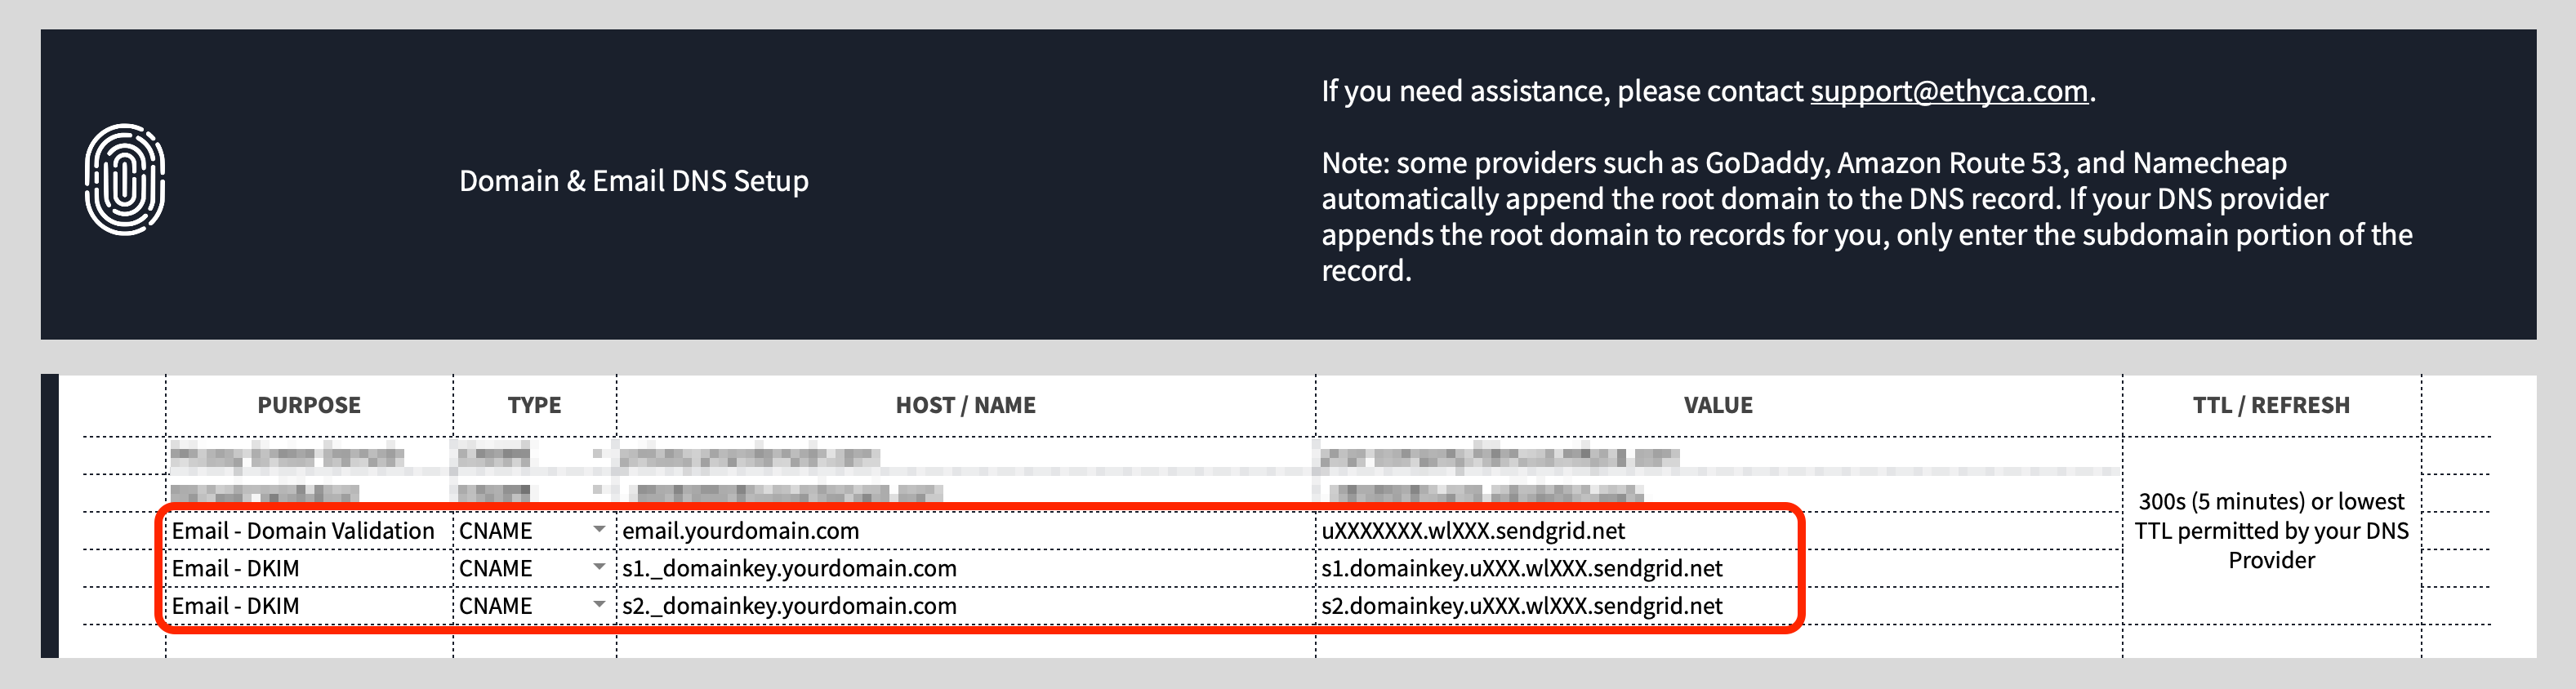
Adding CNAME verification records
Login to your DNS provider account and locate the controls for adding or managing records related to your domain. For more information on this step, please view your DNS provider documentation.
For each of the three new CNAME records complete the following steps:
- Add a record of type CNAME
- For the HOST or NAME set the value shown in the HOST / NAME of the record provided by your customer representative. This is typically in the form
XXXXXX.yourdomain.comwhereXXXXXXwill be the random string prepended to your domain - For the VALUE use the value showng in the VALUE of the record provided by your customer representative. This is typically in the form
XXXXXX.sendgrid.netand will containsendgrid.netin the domain - Set the TTL or REFRESH to as short as possible, typitcally this is set in milliseconds, we recommend 5 minutes.
- Save the record.
Repeat the above steps for each of the provided verification records.
Notify your Customer representative
Once you have successfully added all DNS verification records to your DNS, notify your Customer representative or email support@ethyca.com to get confirmation of the verification.
Verification complete
You will receive email notification as soon as domain verification for email has been completed.