Manual privacy request tasks
Overview
Manual tasks provide a way to process privacy requests against systems that do not provide programmatic access or lack the APIs to process requests programmatically. While Fides aims to automate as much of the privacy request process as possible, there are often legacy systems in which data must be exported or deleted manually. Manual tasks in Fides provide a basic task management interface that allows both internal and external users to respond to and manage the specific tasks related to access and erasure requests in systems they are responsible for.
This guide will walk through the process of setting up manual tasks and enabling an external portal where users from outside your organization or users who are not registered Fides users can view and respond to tasks.
Prerequisites
- To use this feature, you must have a configured email messaging provider. Clients that use Ethyca's Fides Cloud service have this configured automatically for them. Fides Enterprise Server clients will need to configure this themselves. More information about configuring email messaging providers can be found in the email messaging provider user guide.
- DSR 3.0 must be enabled in order to use manual tasks. Ensure that the
FIDES__EXECUTION__USE_DSR_3_0=trueenvironment variable is set in the Fides deployment. - To use tasks with external users you must enable the task portal feature in the privacy center to do this, set
FIDES_PRIVACY_CENTER__ENABLE_EXTERNAL_TASK_PORTALtotrue. You can read more about Privacy Center configuration in the Privacy Center documentation. - To use tasks with external users you must set
FIDES__PRIVACY_CENTER__URLenvironment variable to the URL where the Privacy Center is hosted. You can read more about Fides API configuration in the Fides API documentation.
This feature replaces the "Manual Requests" integration which will be deprecated at a later date.
Configuring the integration
To begin configuring manual tasks, navigate to the Integrations page and click Add integration in the top right of the page. In the modal that appears, select "Manual Tasks" from the list of integration types. You can search for "Manual tasks" or filter to show the "Manual" type to find the integration type more easily.
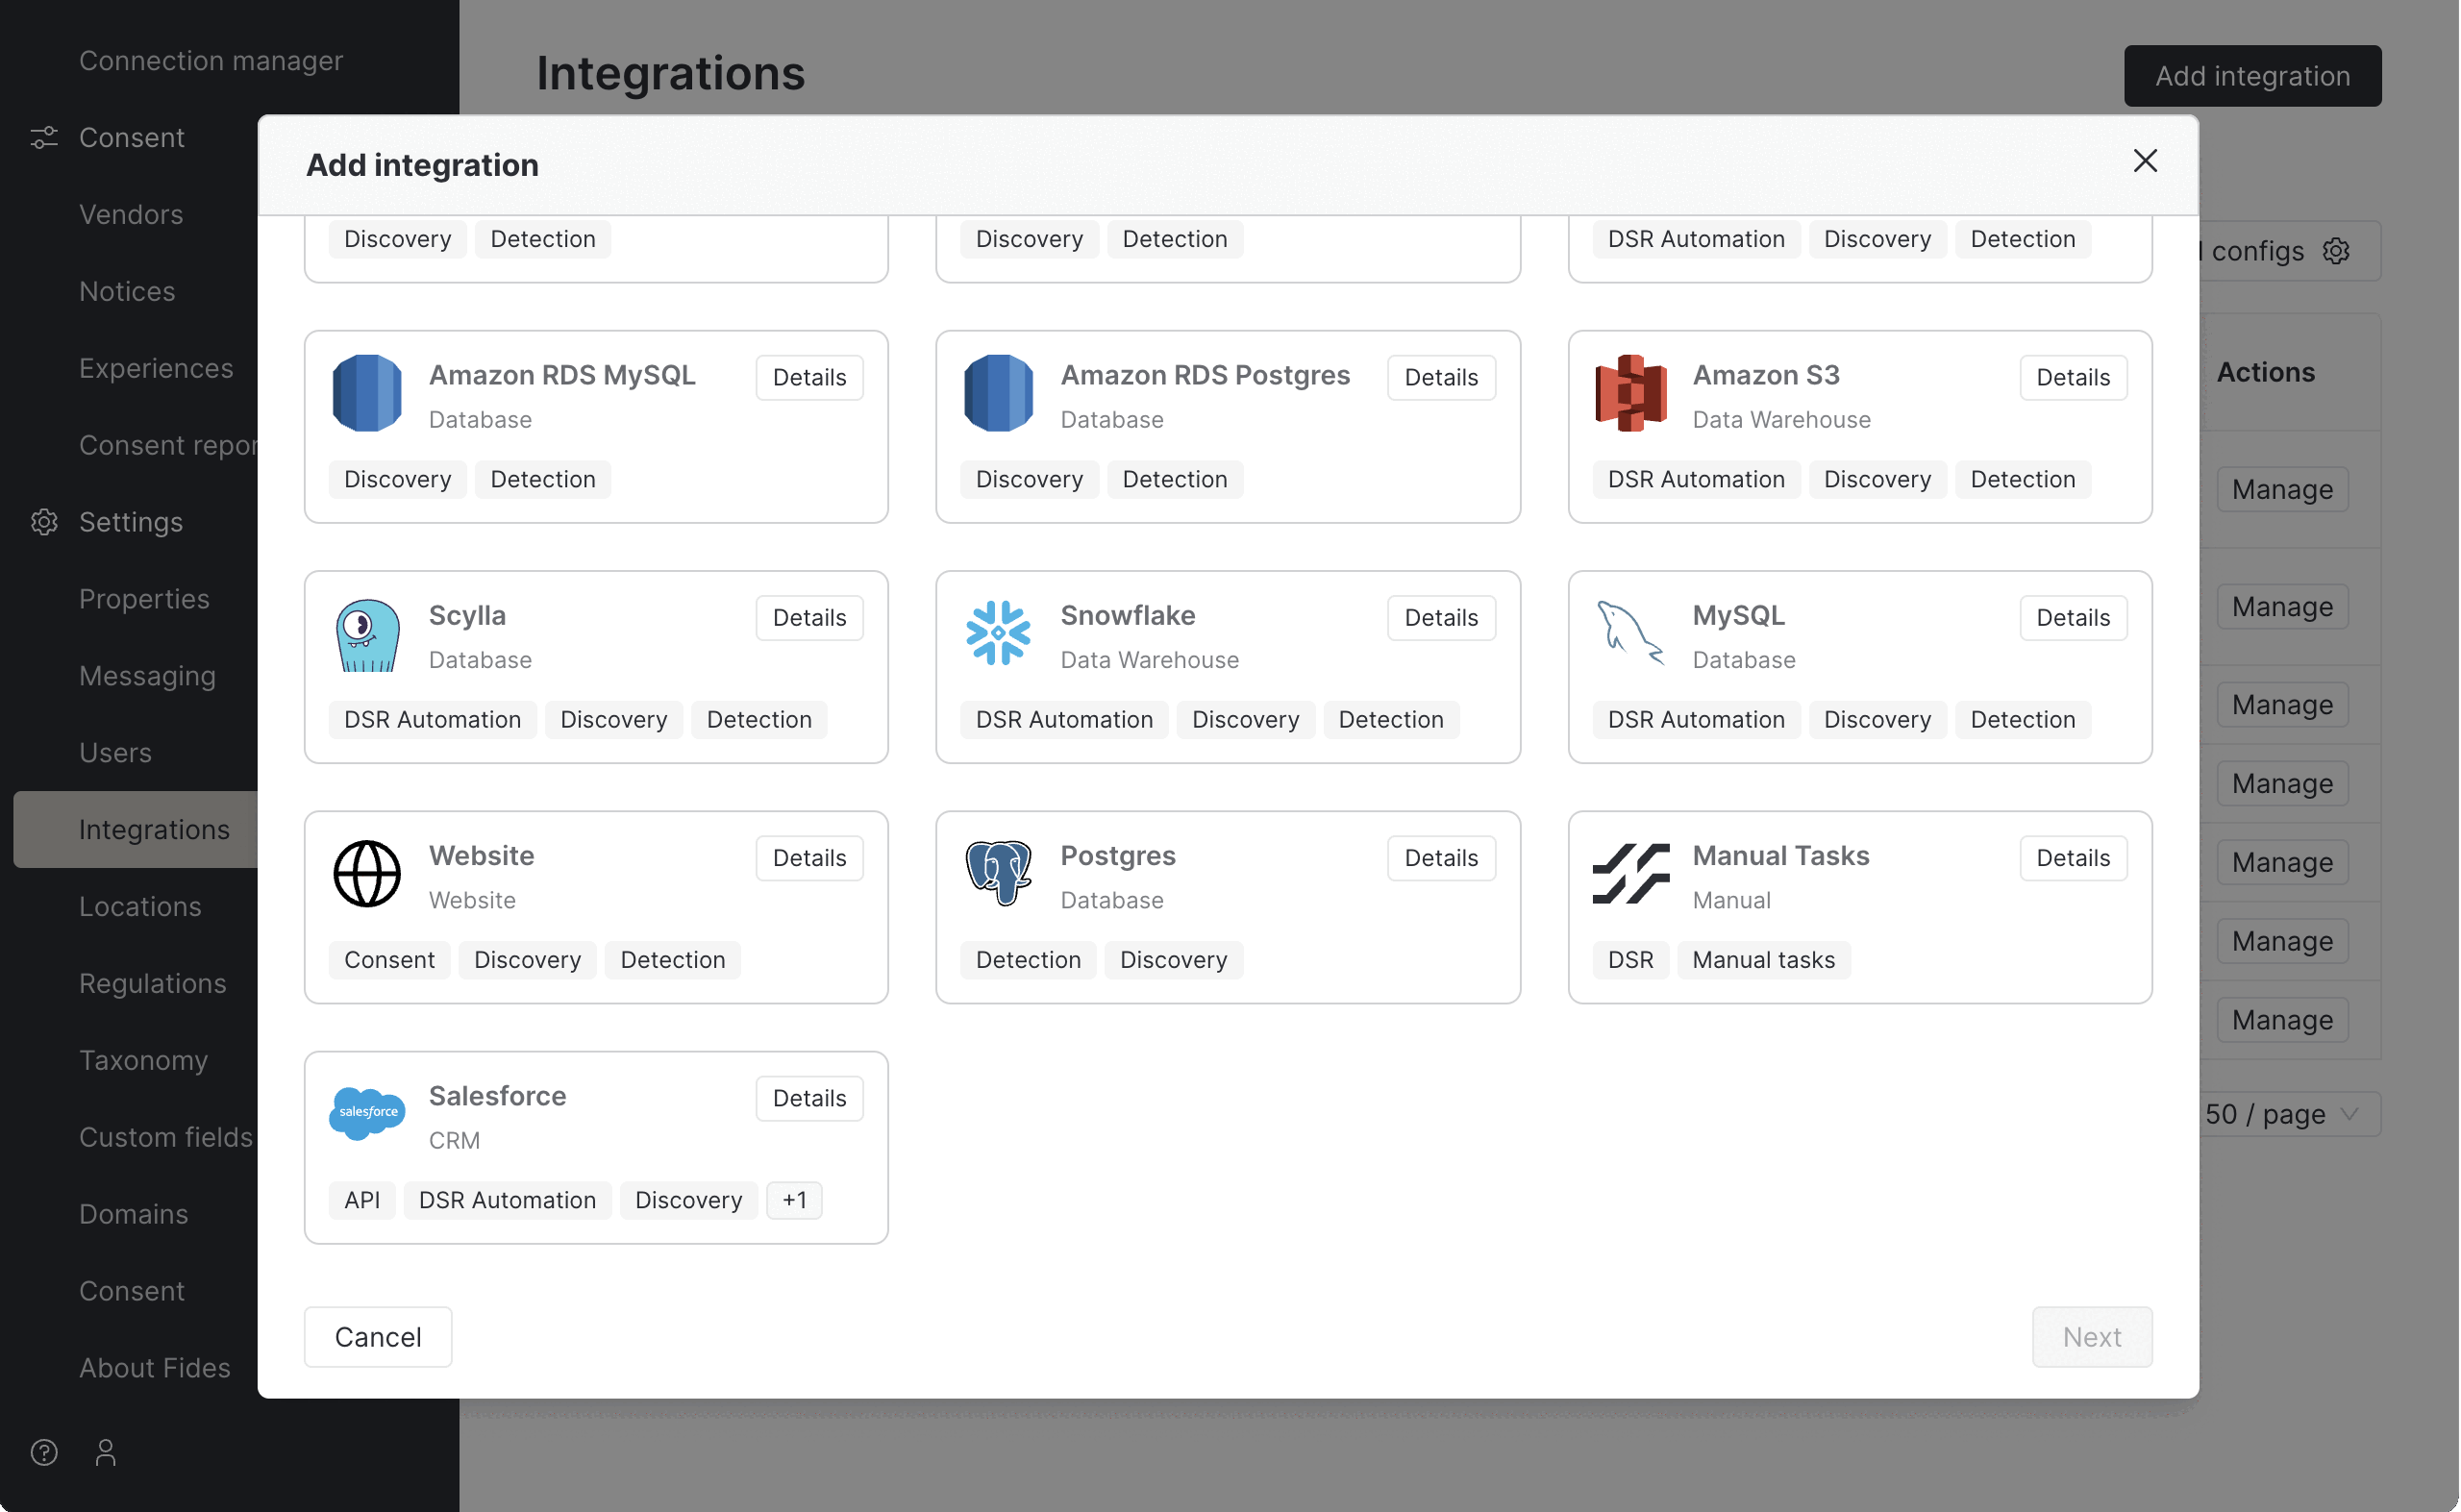
Select "Manual Tasks" and click "Next" to continue.
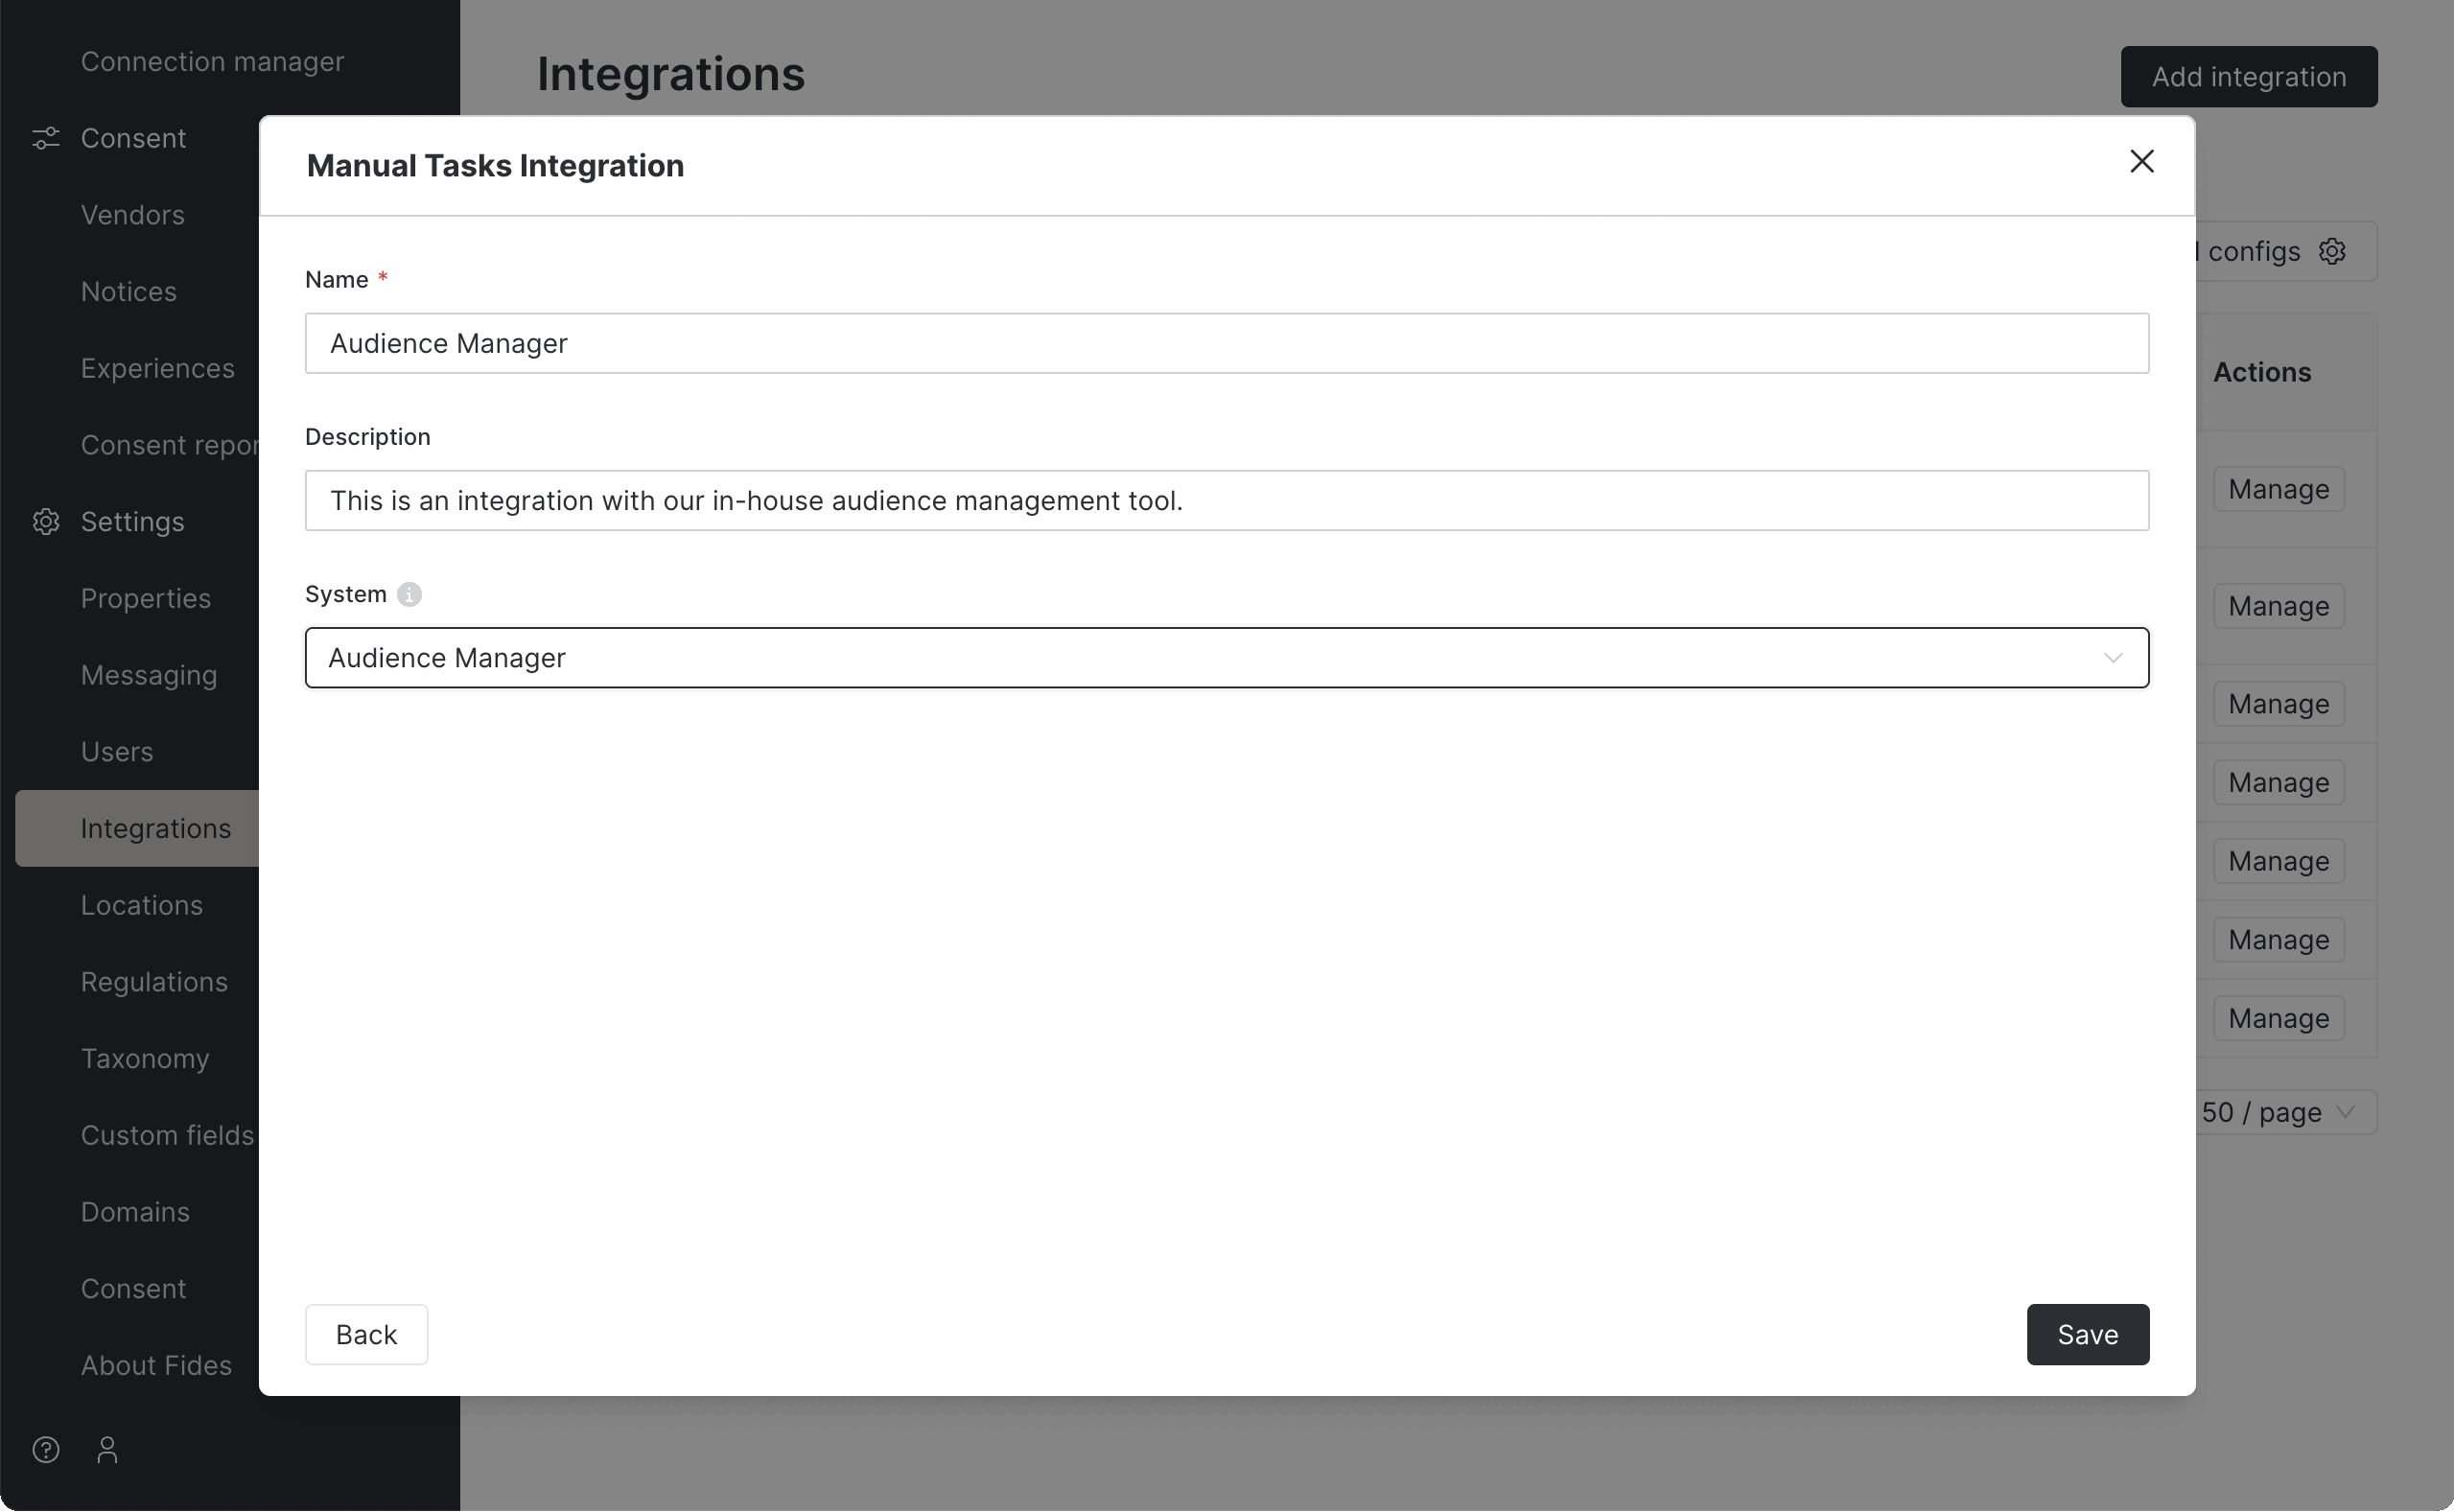
From this screen, provide a name and description for this manual integration. We recommend a short name that indicates which system the integration is for, and a longer description that explains the purpose for the integration and will make it clear to other users what the integration is for.
Finally, choose a system from your system inventory to associate with this manual integration. This will be useful in the future when you want to check for systems have integrations vs those that don't.
Configuring tasks
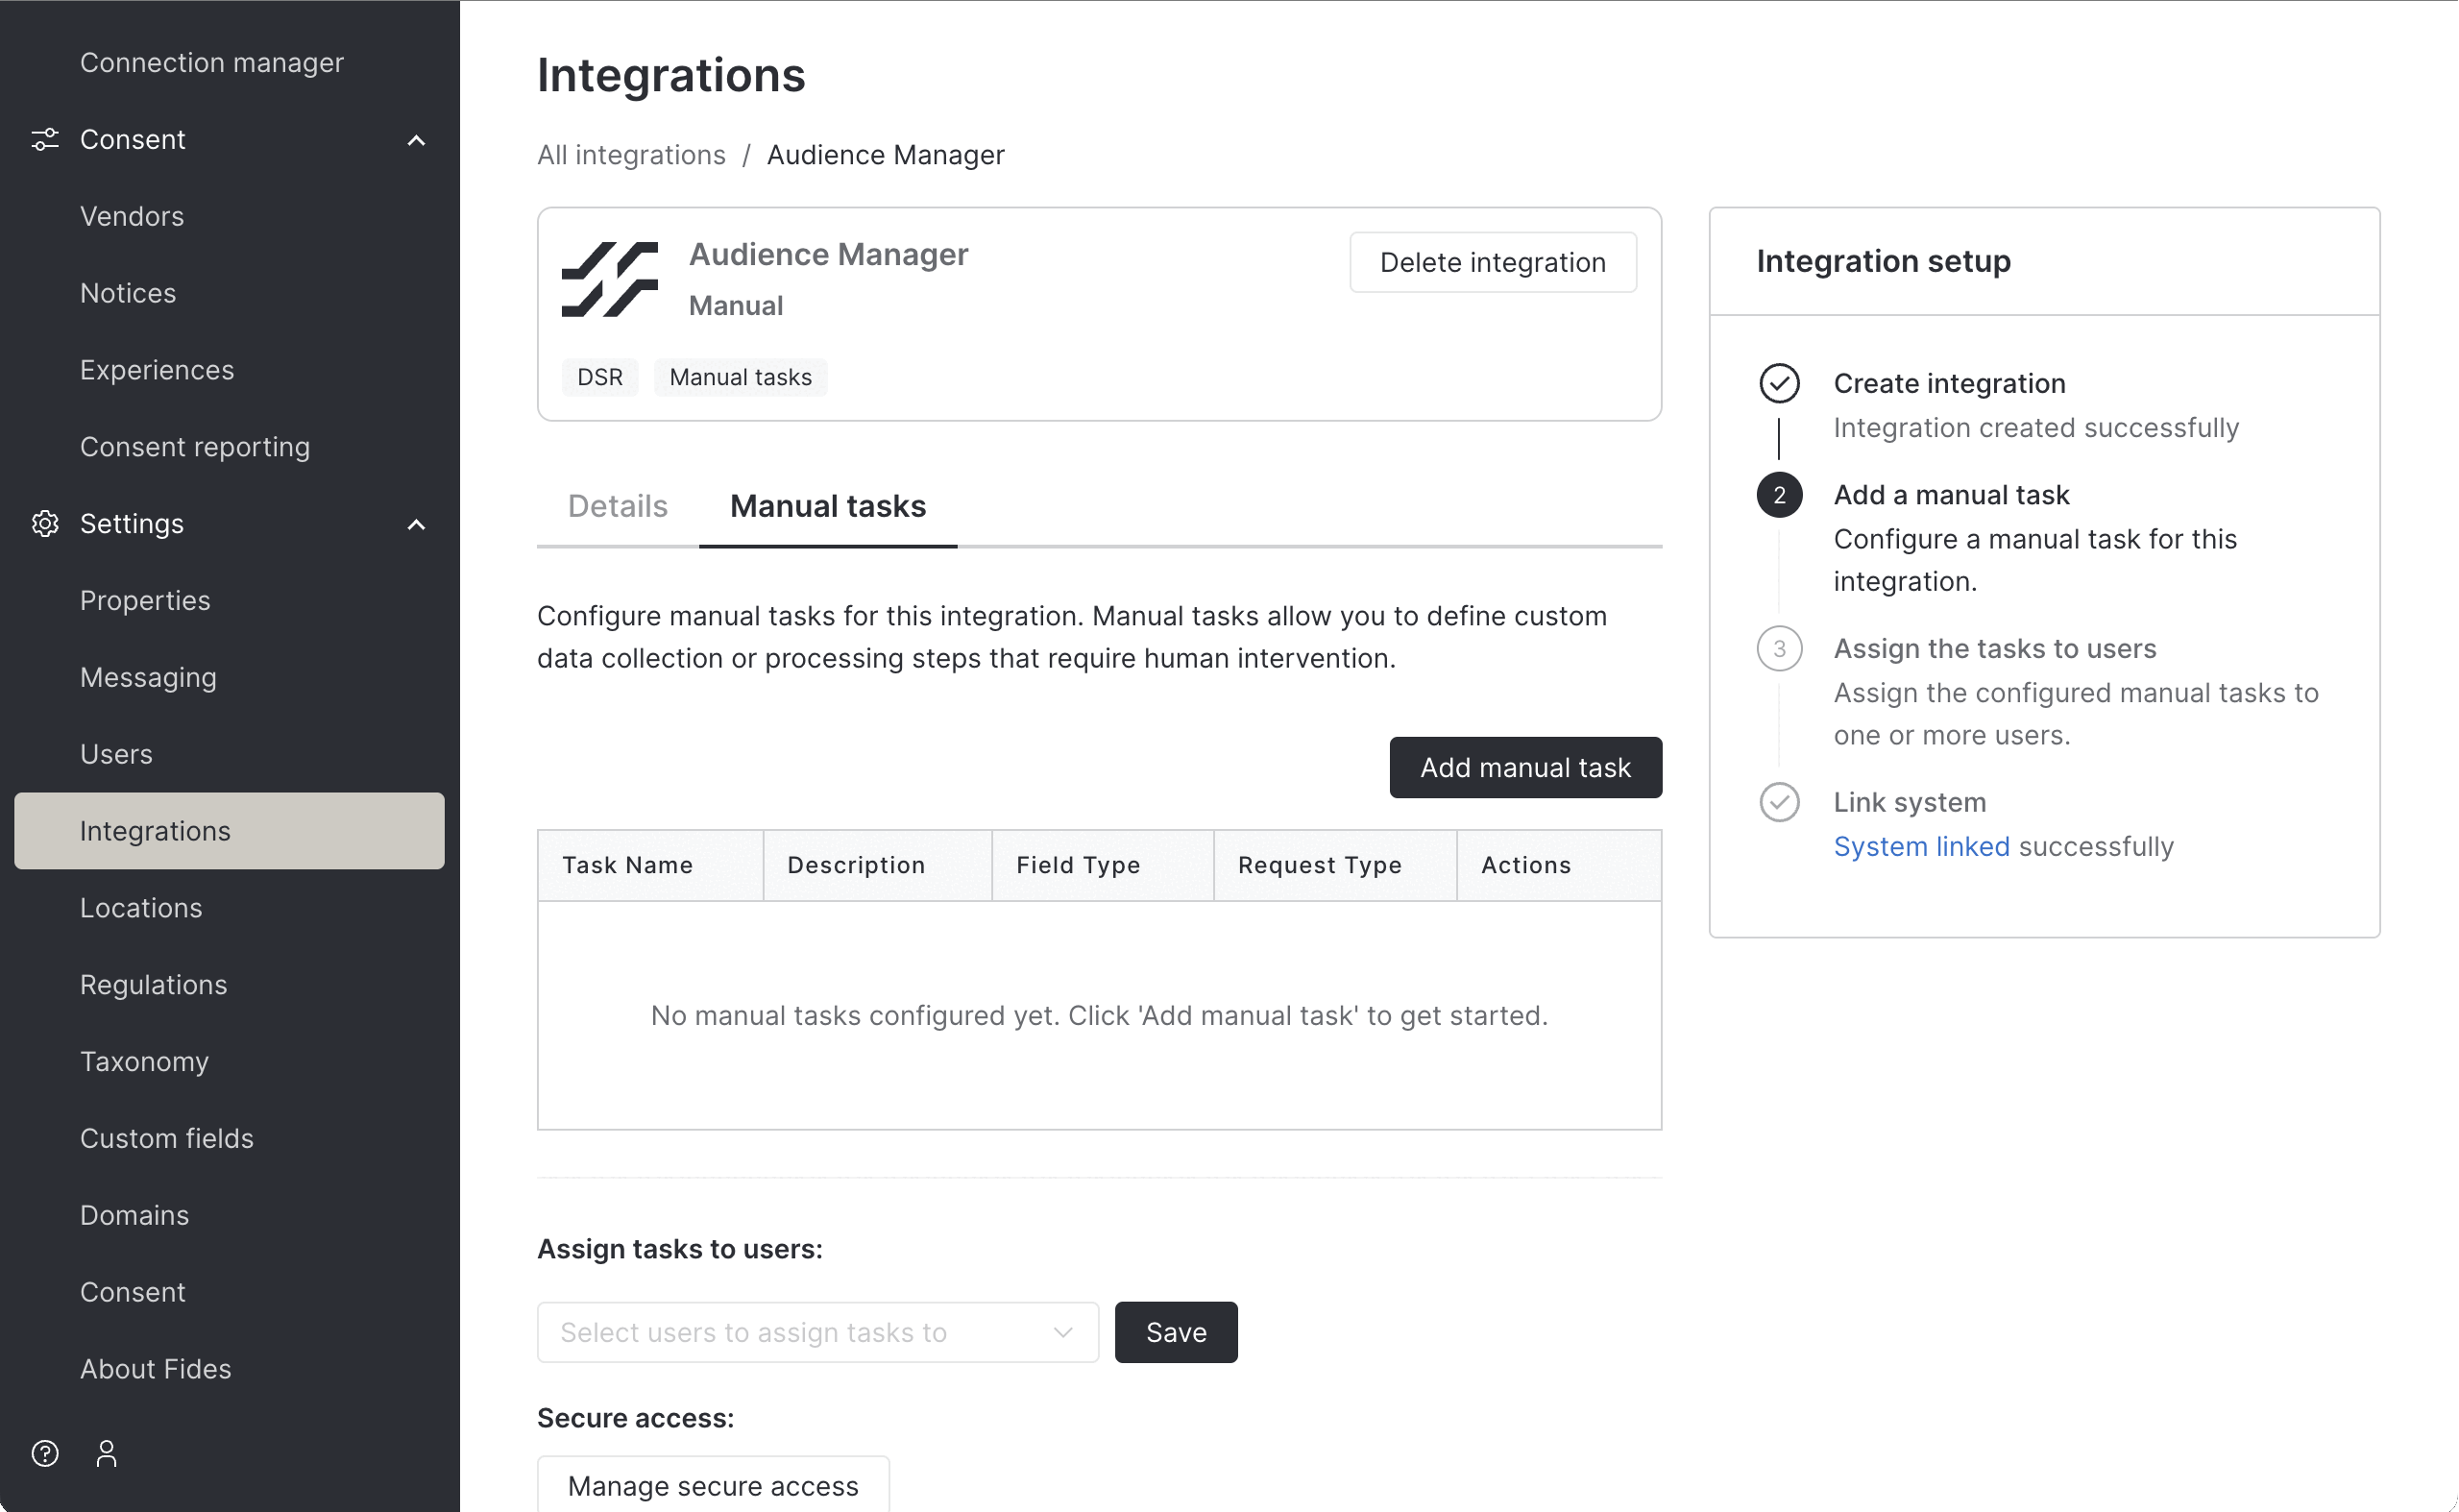
Once the integration is created, it will appear in the list of integrations on the Integrations page. Click "Manage" to continue the configuration process.
When you're viewing the details of the manual integration, click on the "Manual tasks" tab to begin configuring tasks. When the integration is new, you'll see an empty table where we can add new tasks. To get started, click "Add manual task".
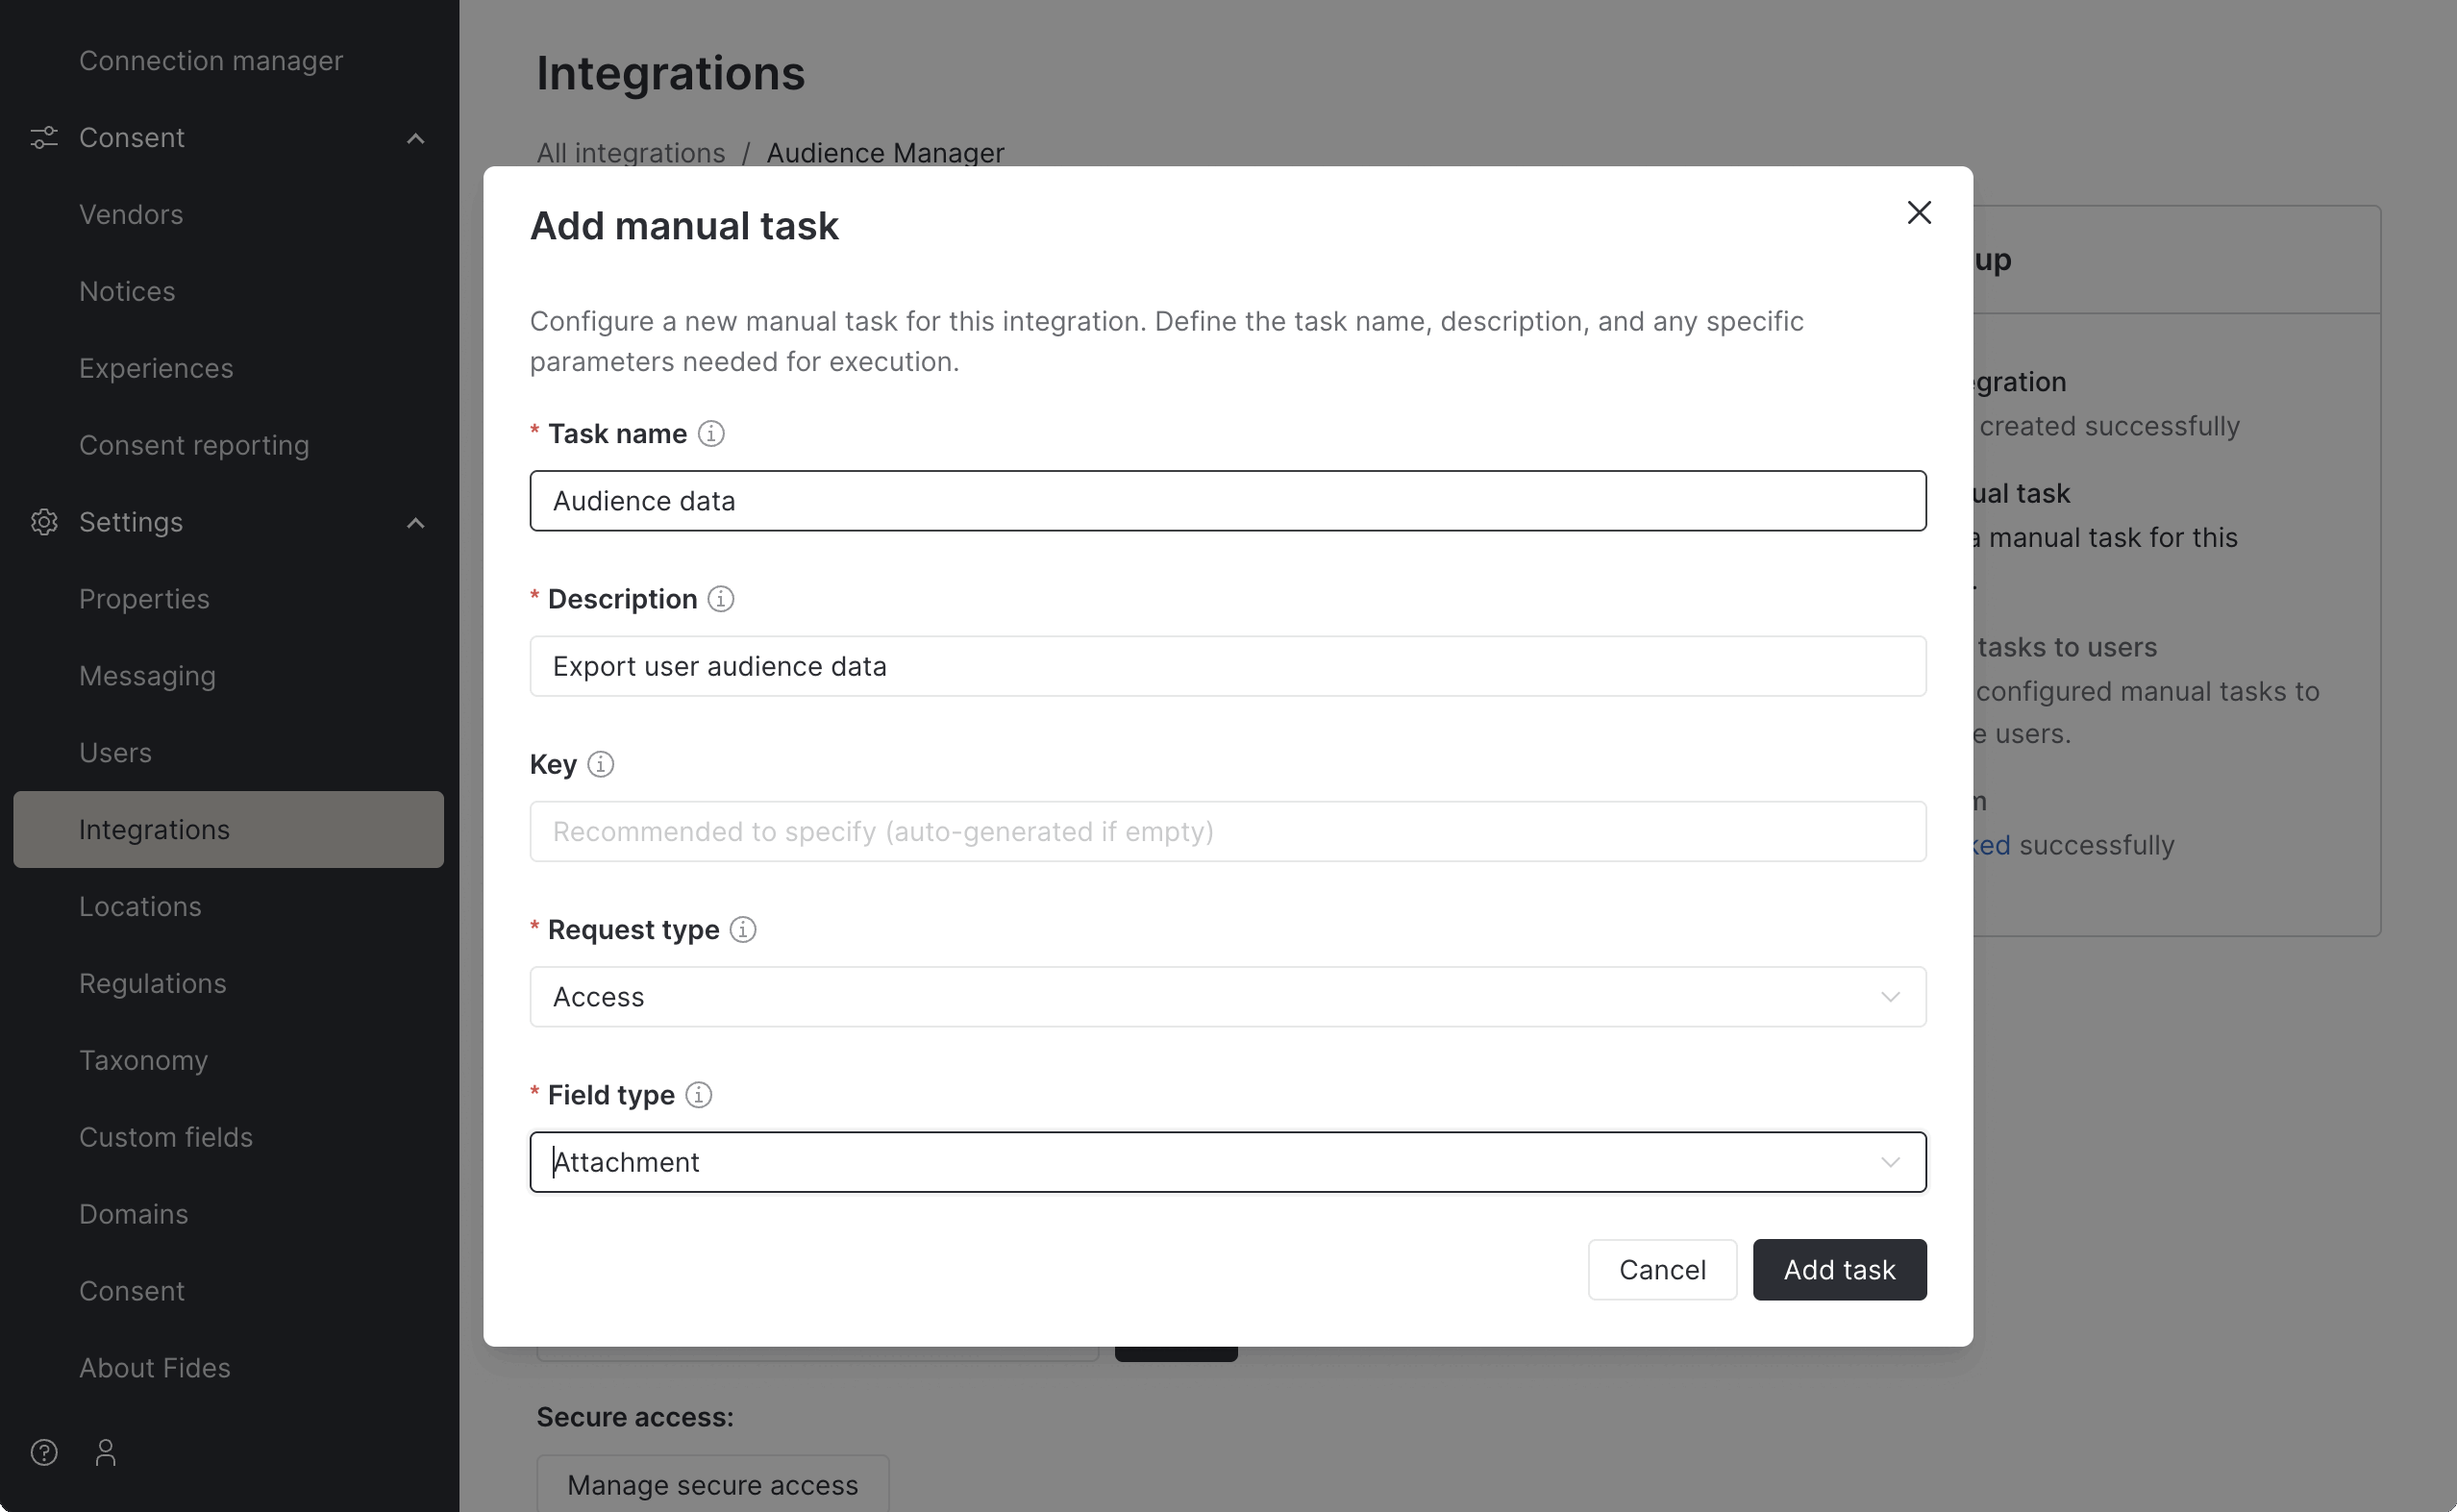
We can now configure our first task. Once again, provide a short name and a longer description that provides details about what a user must do to fulfill the task. When naming and describing each task, consider first whether the task is for access or erasure requests so that you can provide the appropriate instructions.
The key field can either be left blank, in which case it will be automatically generated based on the task name. If you'd like to provide a known key, you may also do that. The key is used in the access request file that is sent to users and also to reference the data from the task in downstream integrations. More information about this functionality will be provided in future documentation.
Select the request type, either "Access" or "Erasure" and lastly, based on the request type, select the field type that users will be interacting with when completing the task.
- Access requests support text fields, where users can provide data in free from text and attachment types, which allow responding users to provide files that have been exported or generated from the system to which the integration is assigned. These files or the text provided will be included in the data that is returned to the user when the privacy request is completed.
- Erasure requests support the "Checkbox" field type, which allows users to confirm that they have deleted the requesting users data from their system.
Save the configuration and you'll see the new task appear in the table. Each integration can support multiple tasks, so you can break down the tasks as needed. Add as many tasks as you need to make it easy for users to fulfill each request.
Assigning users to tasks
Once our tasks have been configured, we need to assign users to respond to the tasks so that we can delegate responsibility for responding to manual tasks.
Assigning internal users
If the users who will be responding to the tasks are already registered Fides users, you can assign them to the tasks by searching for them by username in the "Assign tasks to users" field, selecting the users and clicking "Save".
Assigning external users
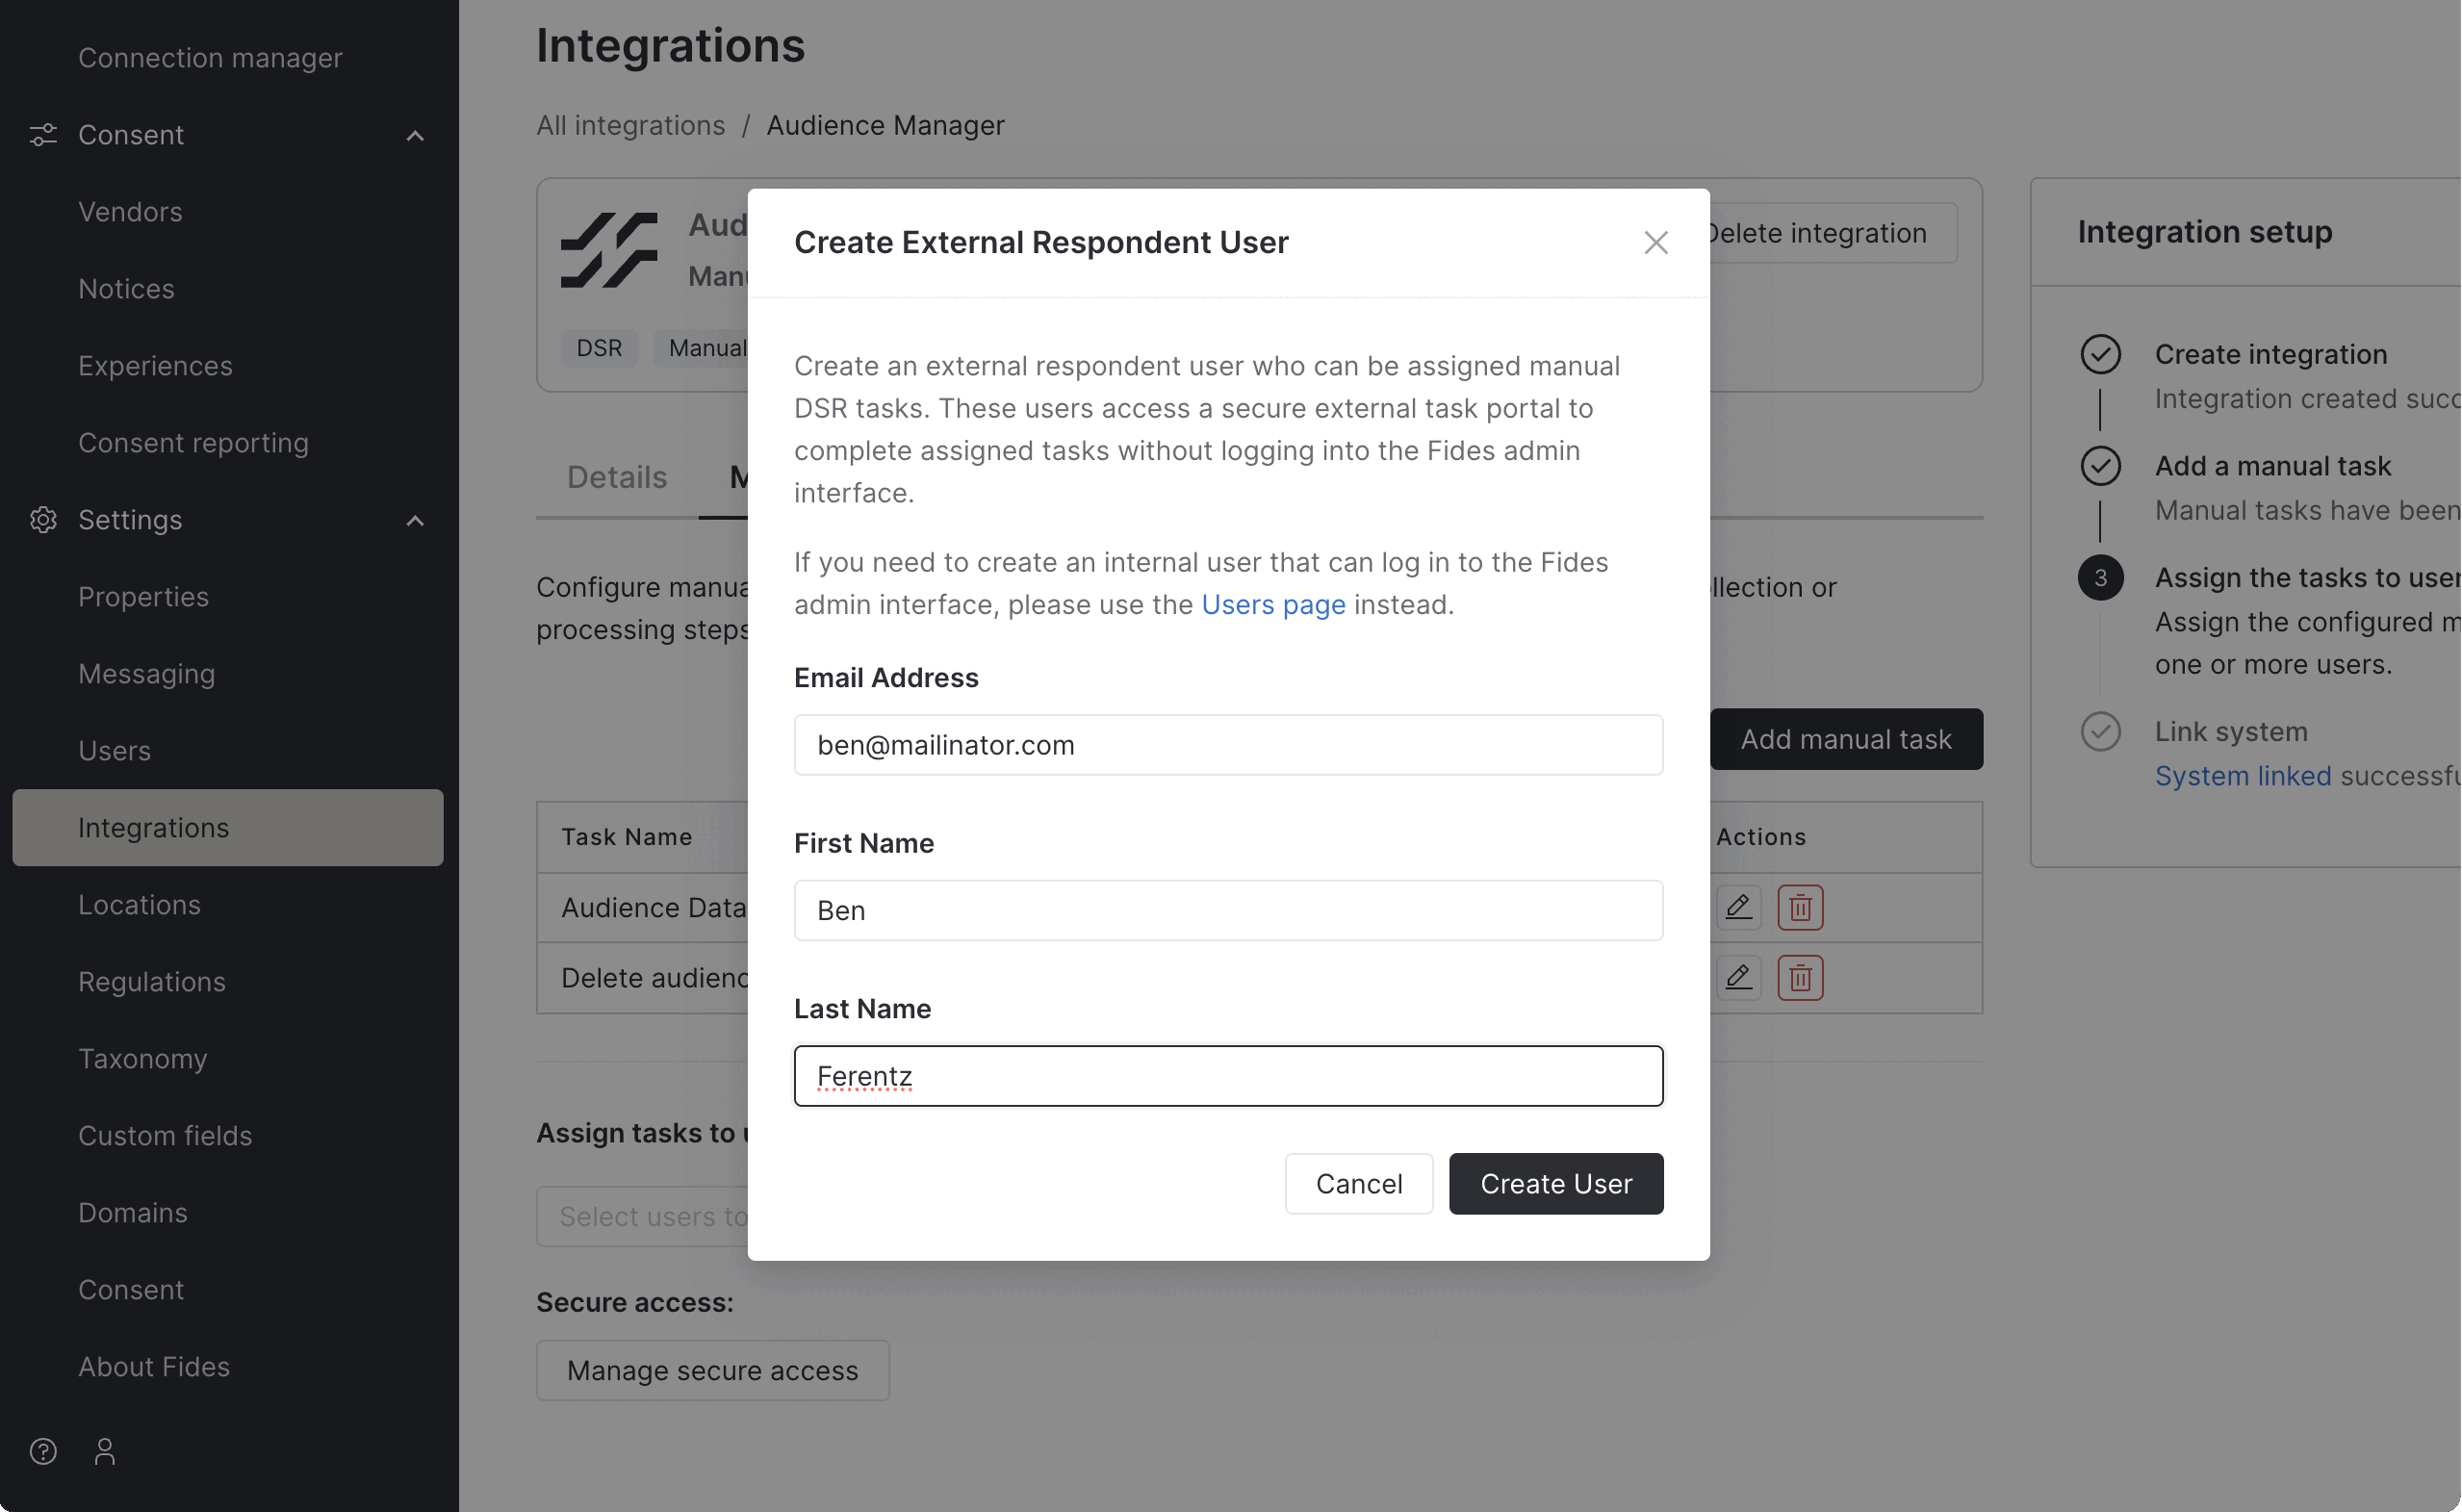
Manual tasks can also be assigned to users who are not registered in Fides, including users who are external to your organization. This can be useful to outsource the fulfillment of tasks to contacts at the vendors you work with, such as a vendor support team. When tasks are created for these users, they will access them via a secure, external portal that is hosted by the Fides privacy center.
To assign external users, start by clicking on the "Manage secure access" button on the bottom of the page. Provide the user's email address and name, then click "Create user". When you click create, the user will receive an email with a link to the external portal and a token that is good for 30 days. To read more about how external users can access and use the portal, review the "Processing requests" user guide.
Removing users
Users can be removed from tasks at any time. Find the integration and navigate to the Manual tasks tab. From the user input, you can remove the users who should no longer be assigned to tasks and assign the task to someone new.
Summary
That's it! You've now configured a manual task that supports access and erasure requests and internal and external users. To understand how to process requests that require manual tasks, review the processing requests user guide.