Consent Management: Configuring Google Tag Manager
In this tutorial, we'll configure Fides consent to ensure tags only fire with consent from a Tag Manager. In this example, we'll use Google Tag Manager, however, these steps are also applicable to similar tag managers such as Adobe Tag Manager and Tealium.
After reading this, you'll be familiar with how to configure tags to respect consent.
Prerequisites
For this tutorial you'll need:
- A Fides Cloud or Fides Enterprise account
- The role of
OwnerorContributorfor your Fides organization. - Update and publisher permissions on your Google Tag Manager account.
- At least one system with a data use on your Data Map. Read how to add systems to the Data Map now.
- At least one privacy notice configured. Read how to configure privacy notices now.
- At least one privacy experience configured. Read how to configure privacy experiences now.
- Installed
Fides.json your web site. Read how to install fides.js now.
Regulation information
When implementing Fides and Google Tag Manager for use in Europe and Germany specifically, seek the advice of your legal counsel on the proper implementation. In response to their advice, you may wish to load the GTM javascript only after consent is obtained from Fides. To accomplish this, ensure that Fides is loaded and initialized before Google Tag Manager. You can read more about this in the Fides.js documentation here.
Once Fides is initialized, you should defer any loading of GTM javascript until after consent is obtained. The specific consent you wish to use to load GTM is a choice you and your legal counsel will need to make. Once you have obtained the agreed upon consent, you can check for it using the Fides interface and load GTM based on the user's consent.
Create a GTM Variable
- Navigate to Variables → New to create a new GTM Variable.
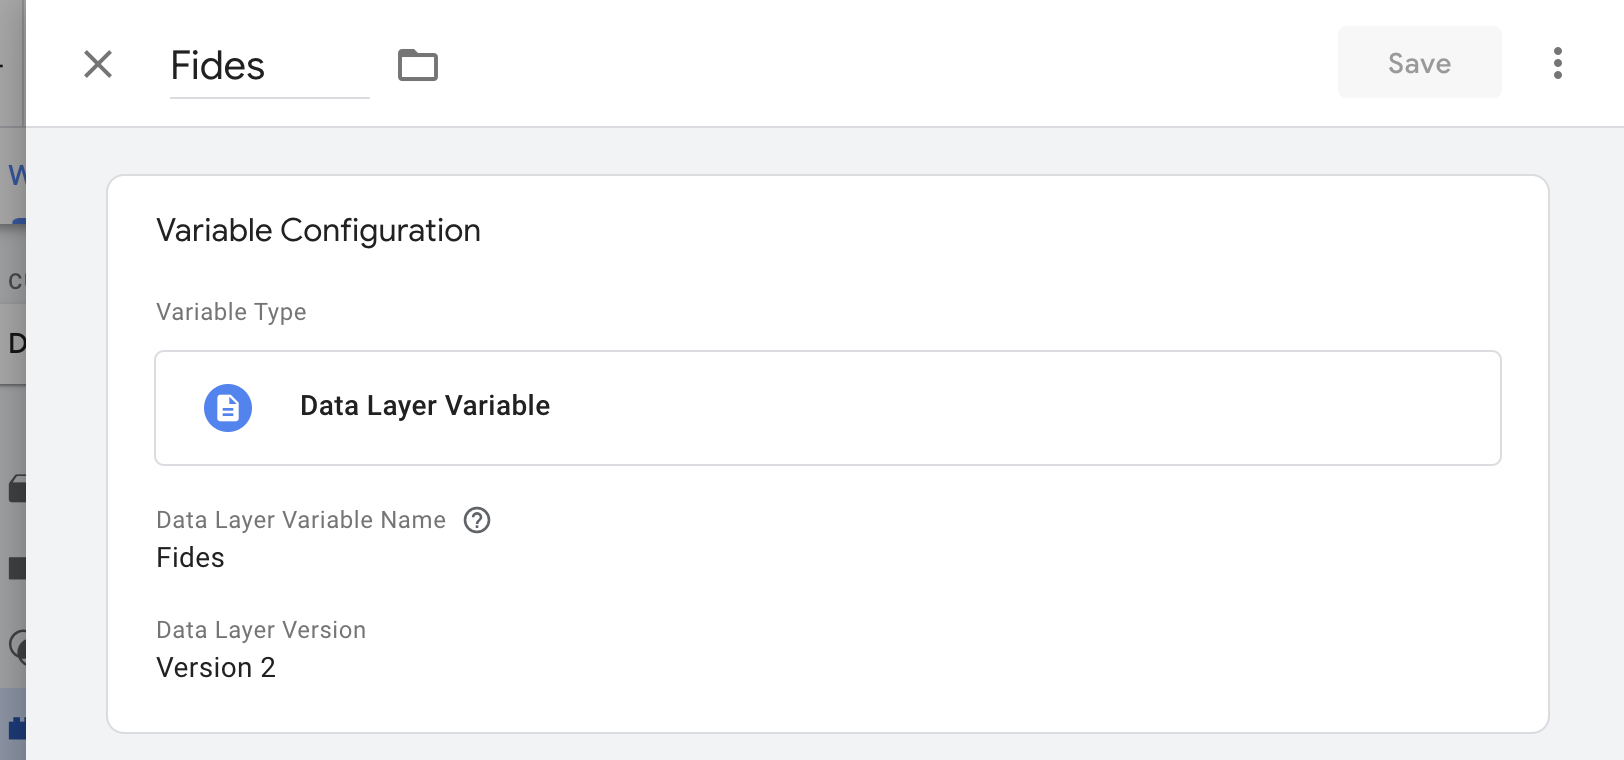
- From the Choose variable type menu, select Data Layer Variable as the type:

- Set the Data Layer Variable Name to the corresponding cookie key of the privacy notice you configured. In this example, we use
Fides.consent.data_sales_and_sharing. Read about creating cookie keys as part of privacy notices here. - Give the variable a suitable, identifiable name, such as
Fides.DataSalesAndSharing. In certain cases, you may want to set a default value. For example, in opt-out consent, you would set the default value totrue. See the example below:
Repeat this step to create a GTM variable for each of the cookie keys assigned to your privacy notices. You can define as many as you require but it's common to have variables for data_sales_and_sharing, analytics, marketing, functional and so on.
Configure a Trigger
Many third-party tools rely on you to correctly configure their tags to fire depending on user consent. A single consent trigger tag ensures that a third-party tag only fires when a user’s consent is appropriately set.
- Navigate to Triggers → New to create a new Trigger.
- From the Choose a trigger type menu, select the appropriate trigger, this can be anything you choose but is typically Page View or Custom Event:
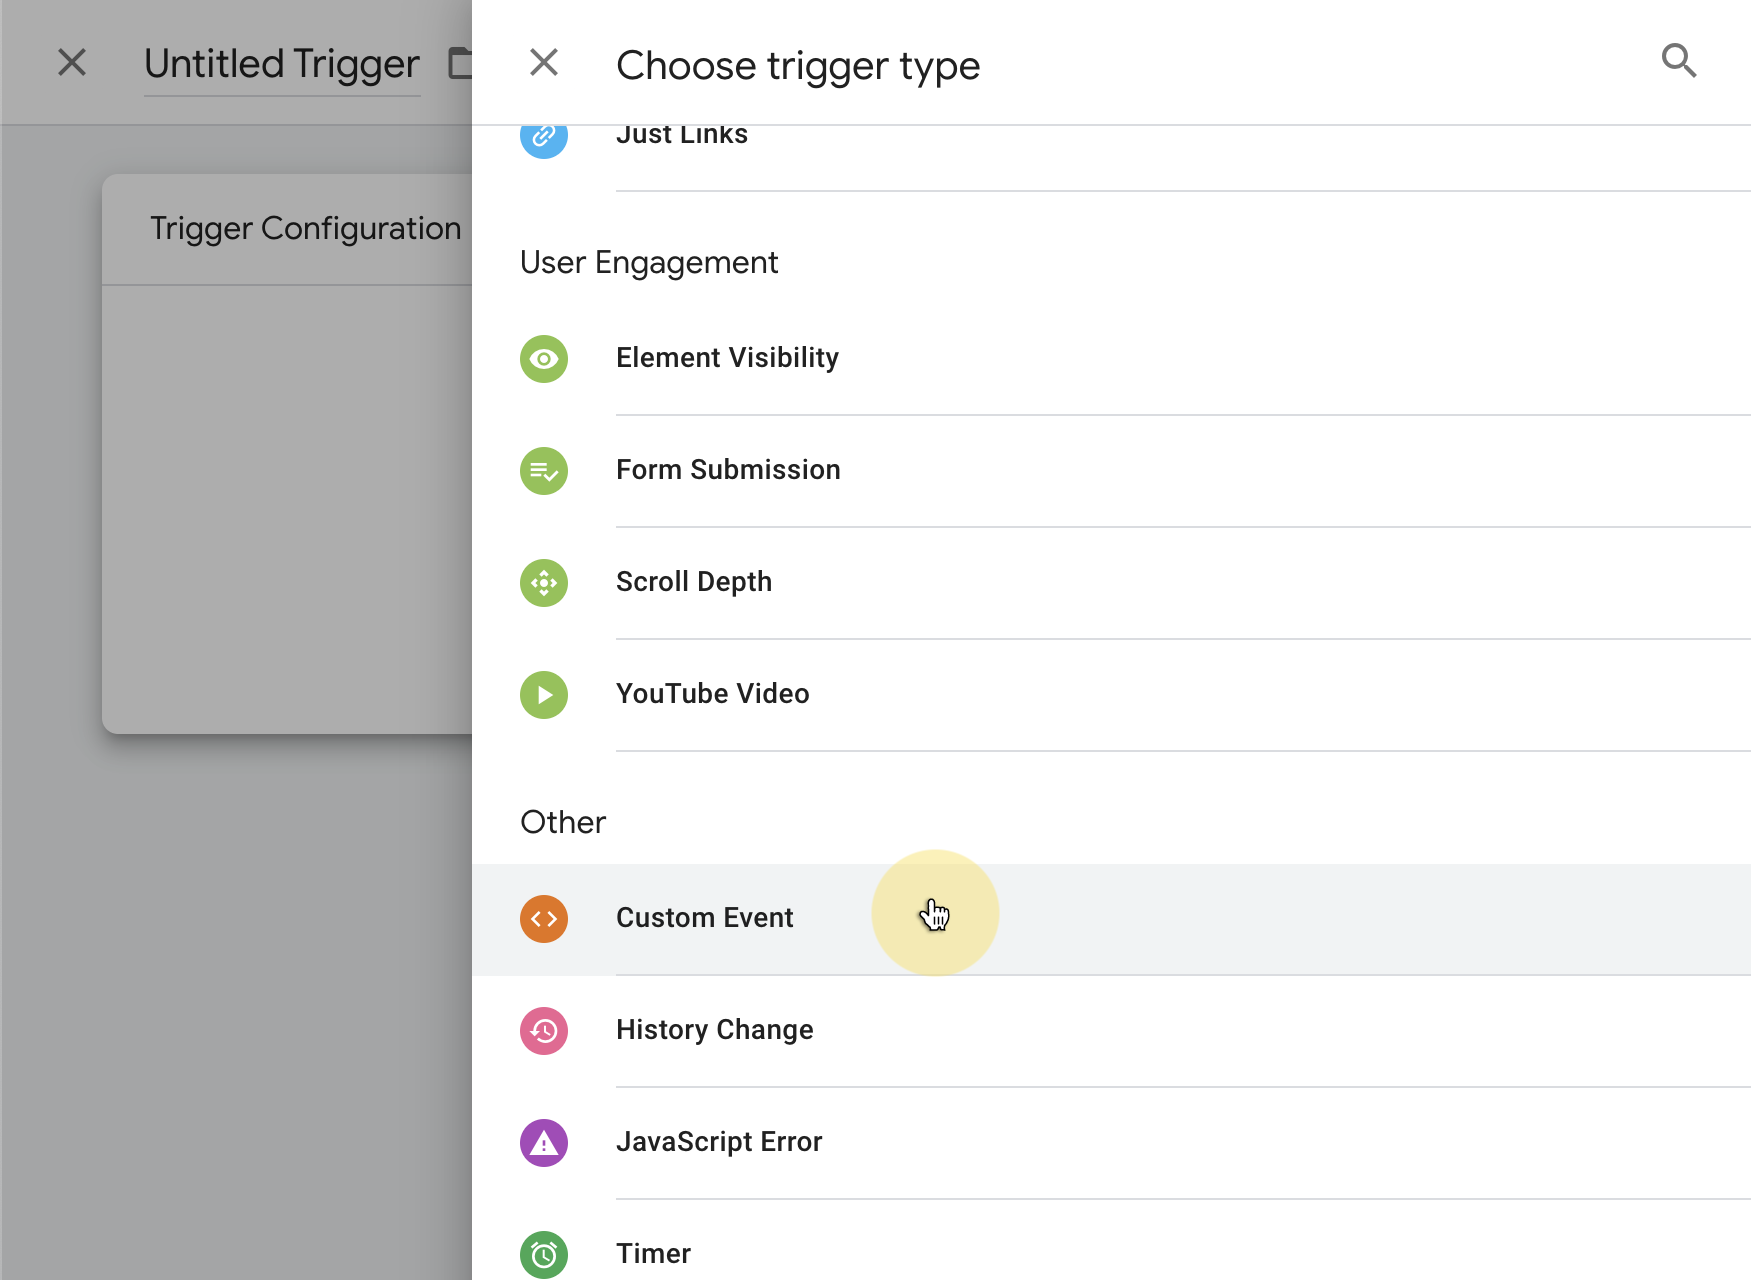
Ensure you use the appropriate trigger type for your tag. If your primary firing trigger is Page View based, use the Page View exception trigger. If your primary firing trigger is Custom Event based, use the Custom Event exception trigger.
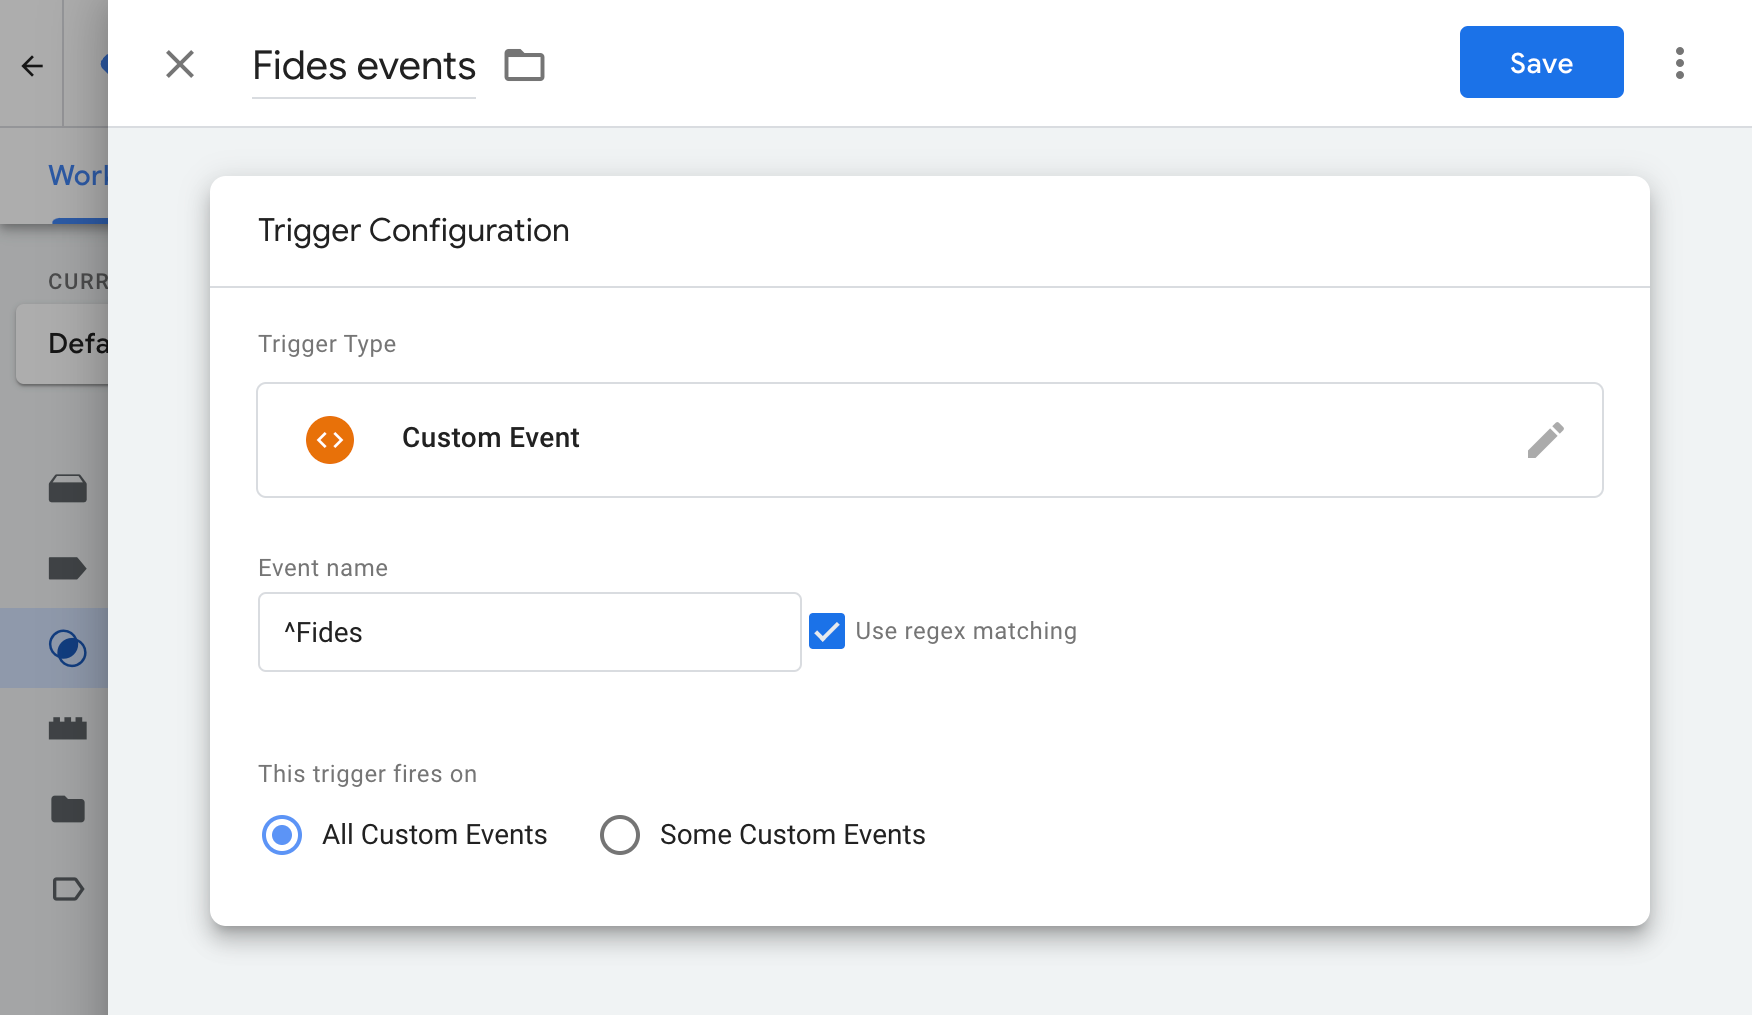
- Give the trigger a suitable, identifiable name, such as
Fides.DataSalesAndSharing.OptOut - Set “This trigger fires on” to Some Page Views.
- In the “Fire this trigger when…” option, set the following:
- The event field to match your user-defined variable earlier (e.g.
Fides.DataSalesAndSharing) - The evaluation to
equals - The value to
false
- The event field to match your user-defined variable earlier (e.g.

To suppress tags from firing where the user hasn't given consent, you can add your newly created trigger using the following steps:
- Navigate to Tags and select the Tag you would like to add a consent trigger to.
- Under Triggering you can add, remove or combine triggers. In this case, you are adding an exception that will suppress firing where you do not have consent. Select Add Exception to add your newly created trigger.
- Select the consent trigger created earlier (e.g.
Fides.DataSales.Consent), which will add it as an exception to your tag:
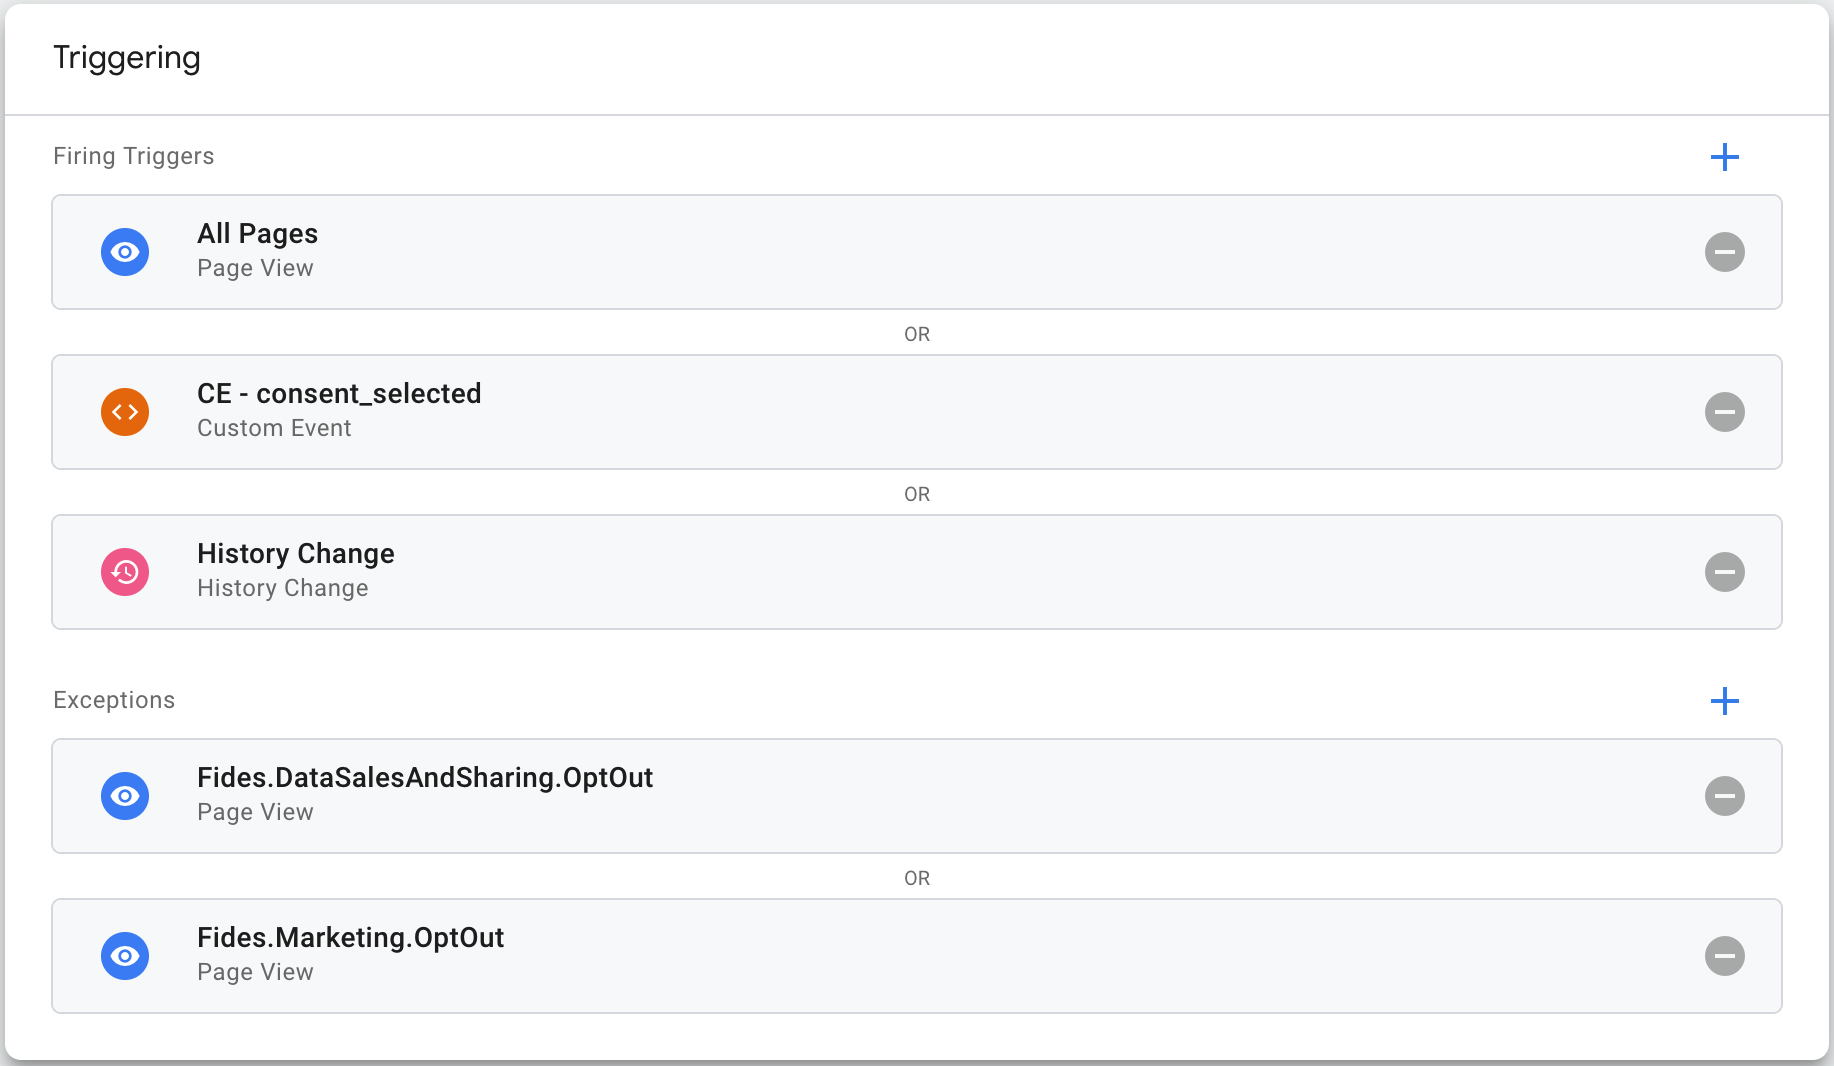
You should now see your trigger listed in your tag as an Exception. When configured as outlined in this tutorial, this tag will no longer fire if a user has opted out of Data Sales.
Repeat this step for any other tag you would like to apply consent to for any privacy notices you have configured for your organization in Fides.
Configure Limited Data Use for Meta (Facebook)
Meta's implementation of data sales is unique to their platform, and requires specific configuration in Google Tag Manager.
To implement the Limited Data Use flag, the following modifications to your pixel are required:
- Add the line below before the Facebook pixel is initialized
fbq('init', '{{YOUR_FACEBOOK_PIXEL_ID}}');
{{Fides.DataSalesAndSharing}} ? fbq('dataProcessingOptions', []) : fbq('dataProcessingOptions', ['LDU'], 0, 0);Save your changes. Your Limited Data Use is now configured!